

Disclaimer – If you are after some vintage caravan renovation inspo and just want to see some pretty images see here. But we’ve had a lot of interest from followers wanting to know about the nitty gritty of our renovation of Millie and keen to know details such as, materials used and costs etc. If this is you, read on.
For Michael and I, some of our fondest childhood memories are that of our beachside camping holidays. Naturally, we wanted to create the same memories for our own kids and whilst we’ve have been taking the kids camping since they were babies, life has continued to pick up speed and we needed to simplify our camping getaways. We needed a way to get up and go without the fanfare that comes with endless packing and unpacking required to set up a campsite. The idea of it alone makes me shudder. A caravan was the answer.
After some searching what we bought was a 1966 Millard Florida that had had one owner and had not been used in 20 years. We called her Millie.
At 50 years old Millie had great bones, no rust, and was without a dint on the exterior but she was tired, both inside and out and needed a thorough overhaul to be up to serving our holiday needs so we got to work creating a mobile holiday home that was inviting, comfortable and one that we could be proud of.
My original plan was to paint the van and add some decals for interest but some friends talked us into polishing up the aluminium for a finish closer to the van’s original state. After consulting with multiple panel painters and polishers, we learned that the job was a tedious one and no one was very keen to take it on. The ribbing in the aluminium would just made the work really laborious and it wasn’t something we could do ourselves and achieve a professional look. So that was that, I made the decision to paint and I’m so glad I did. The result demonstrates my original vision for the van and I know I would have been disappointed with the polished finish. Just to be clear, we love vintage caravans but we aren’t in the vintage caravan enthusiast category. Our goal was to create a van that worked for us. And that’s just what we did.
The Exterior
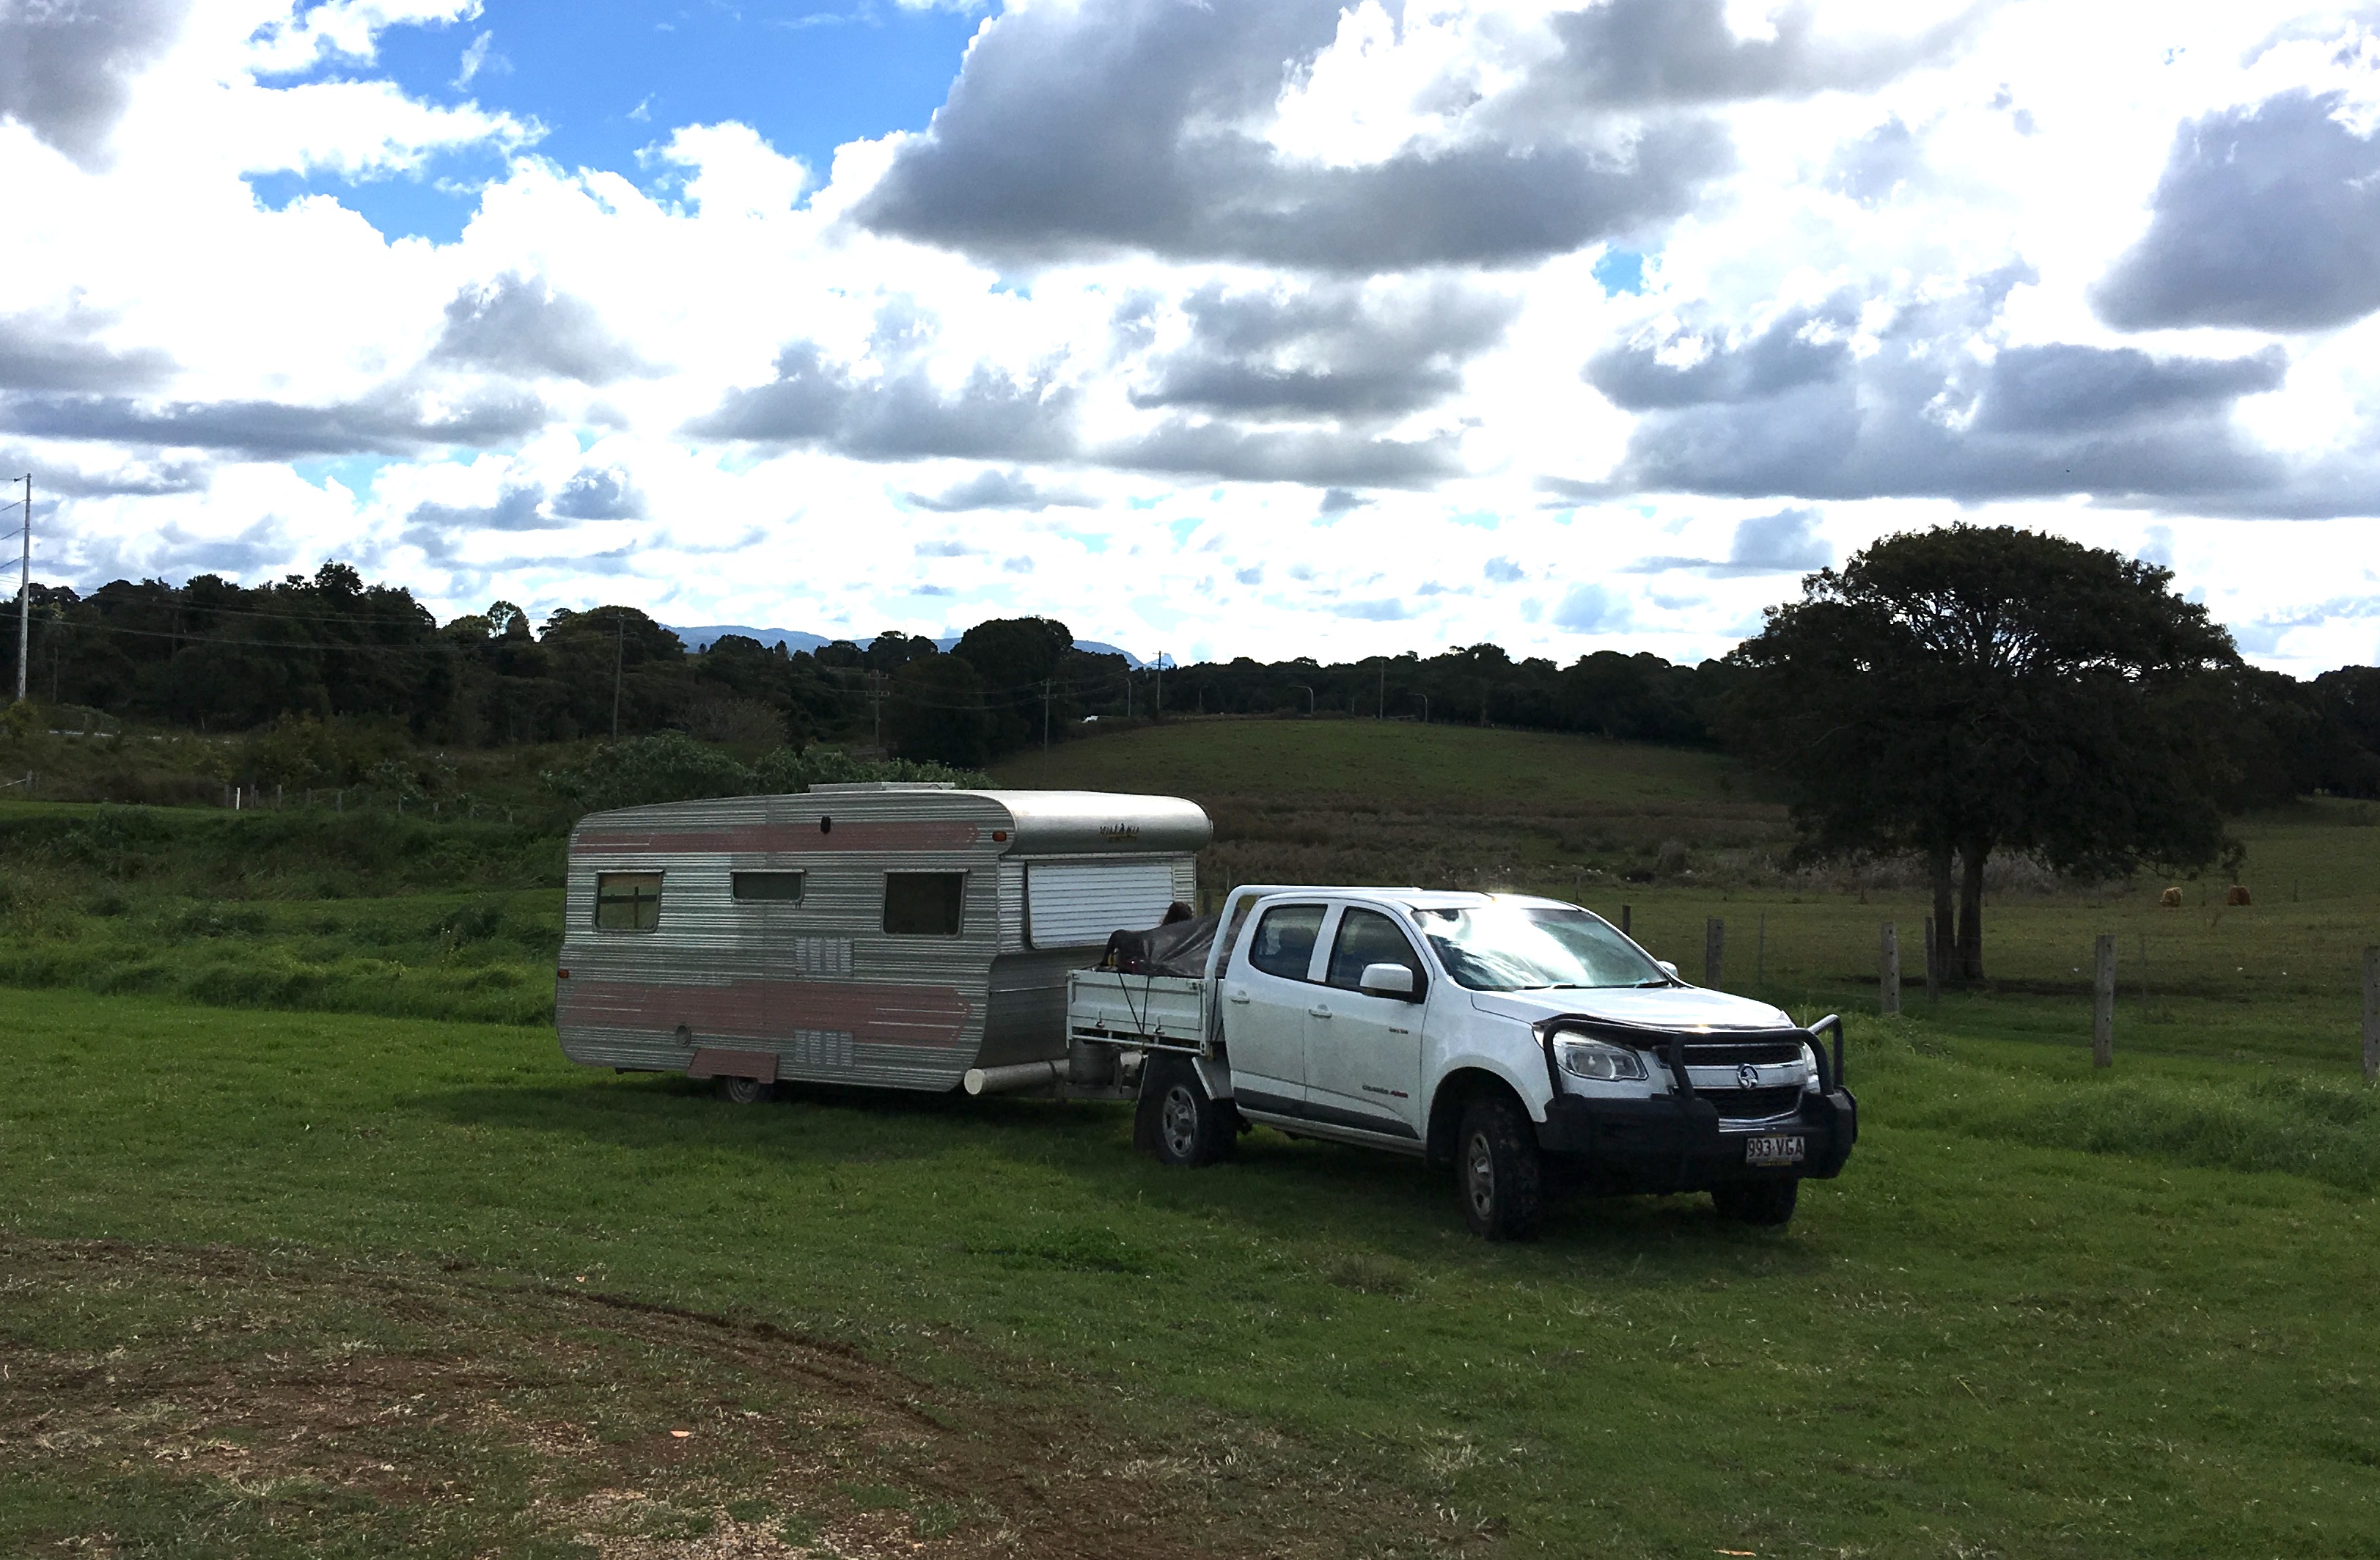
Exterior before
The darker markings on the van are our attempt at polishing. Not good and not what we wanted. Ps. I had a soft spot for the pink decal but it conflicted with my blue vision.
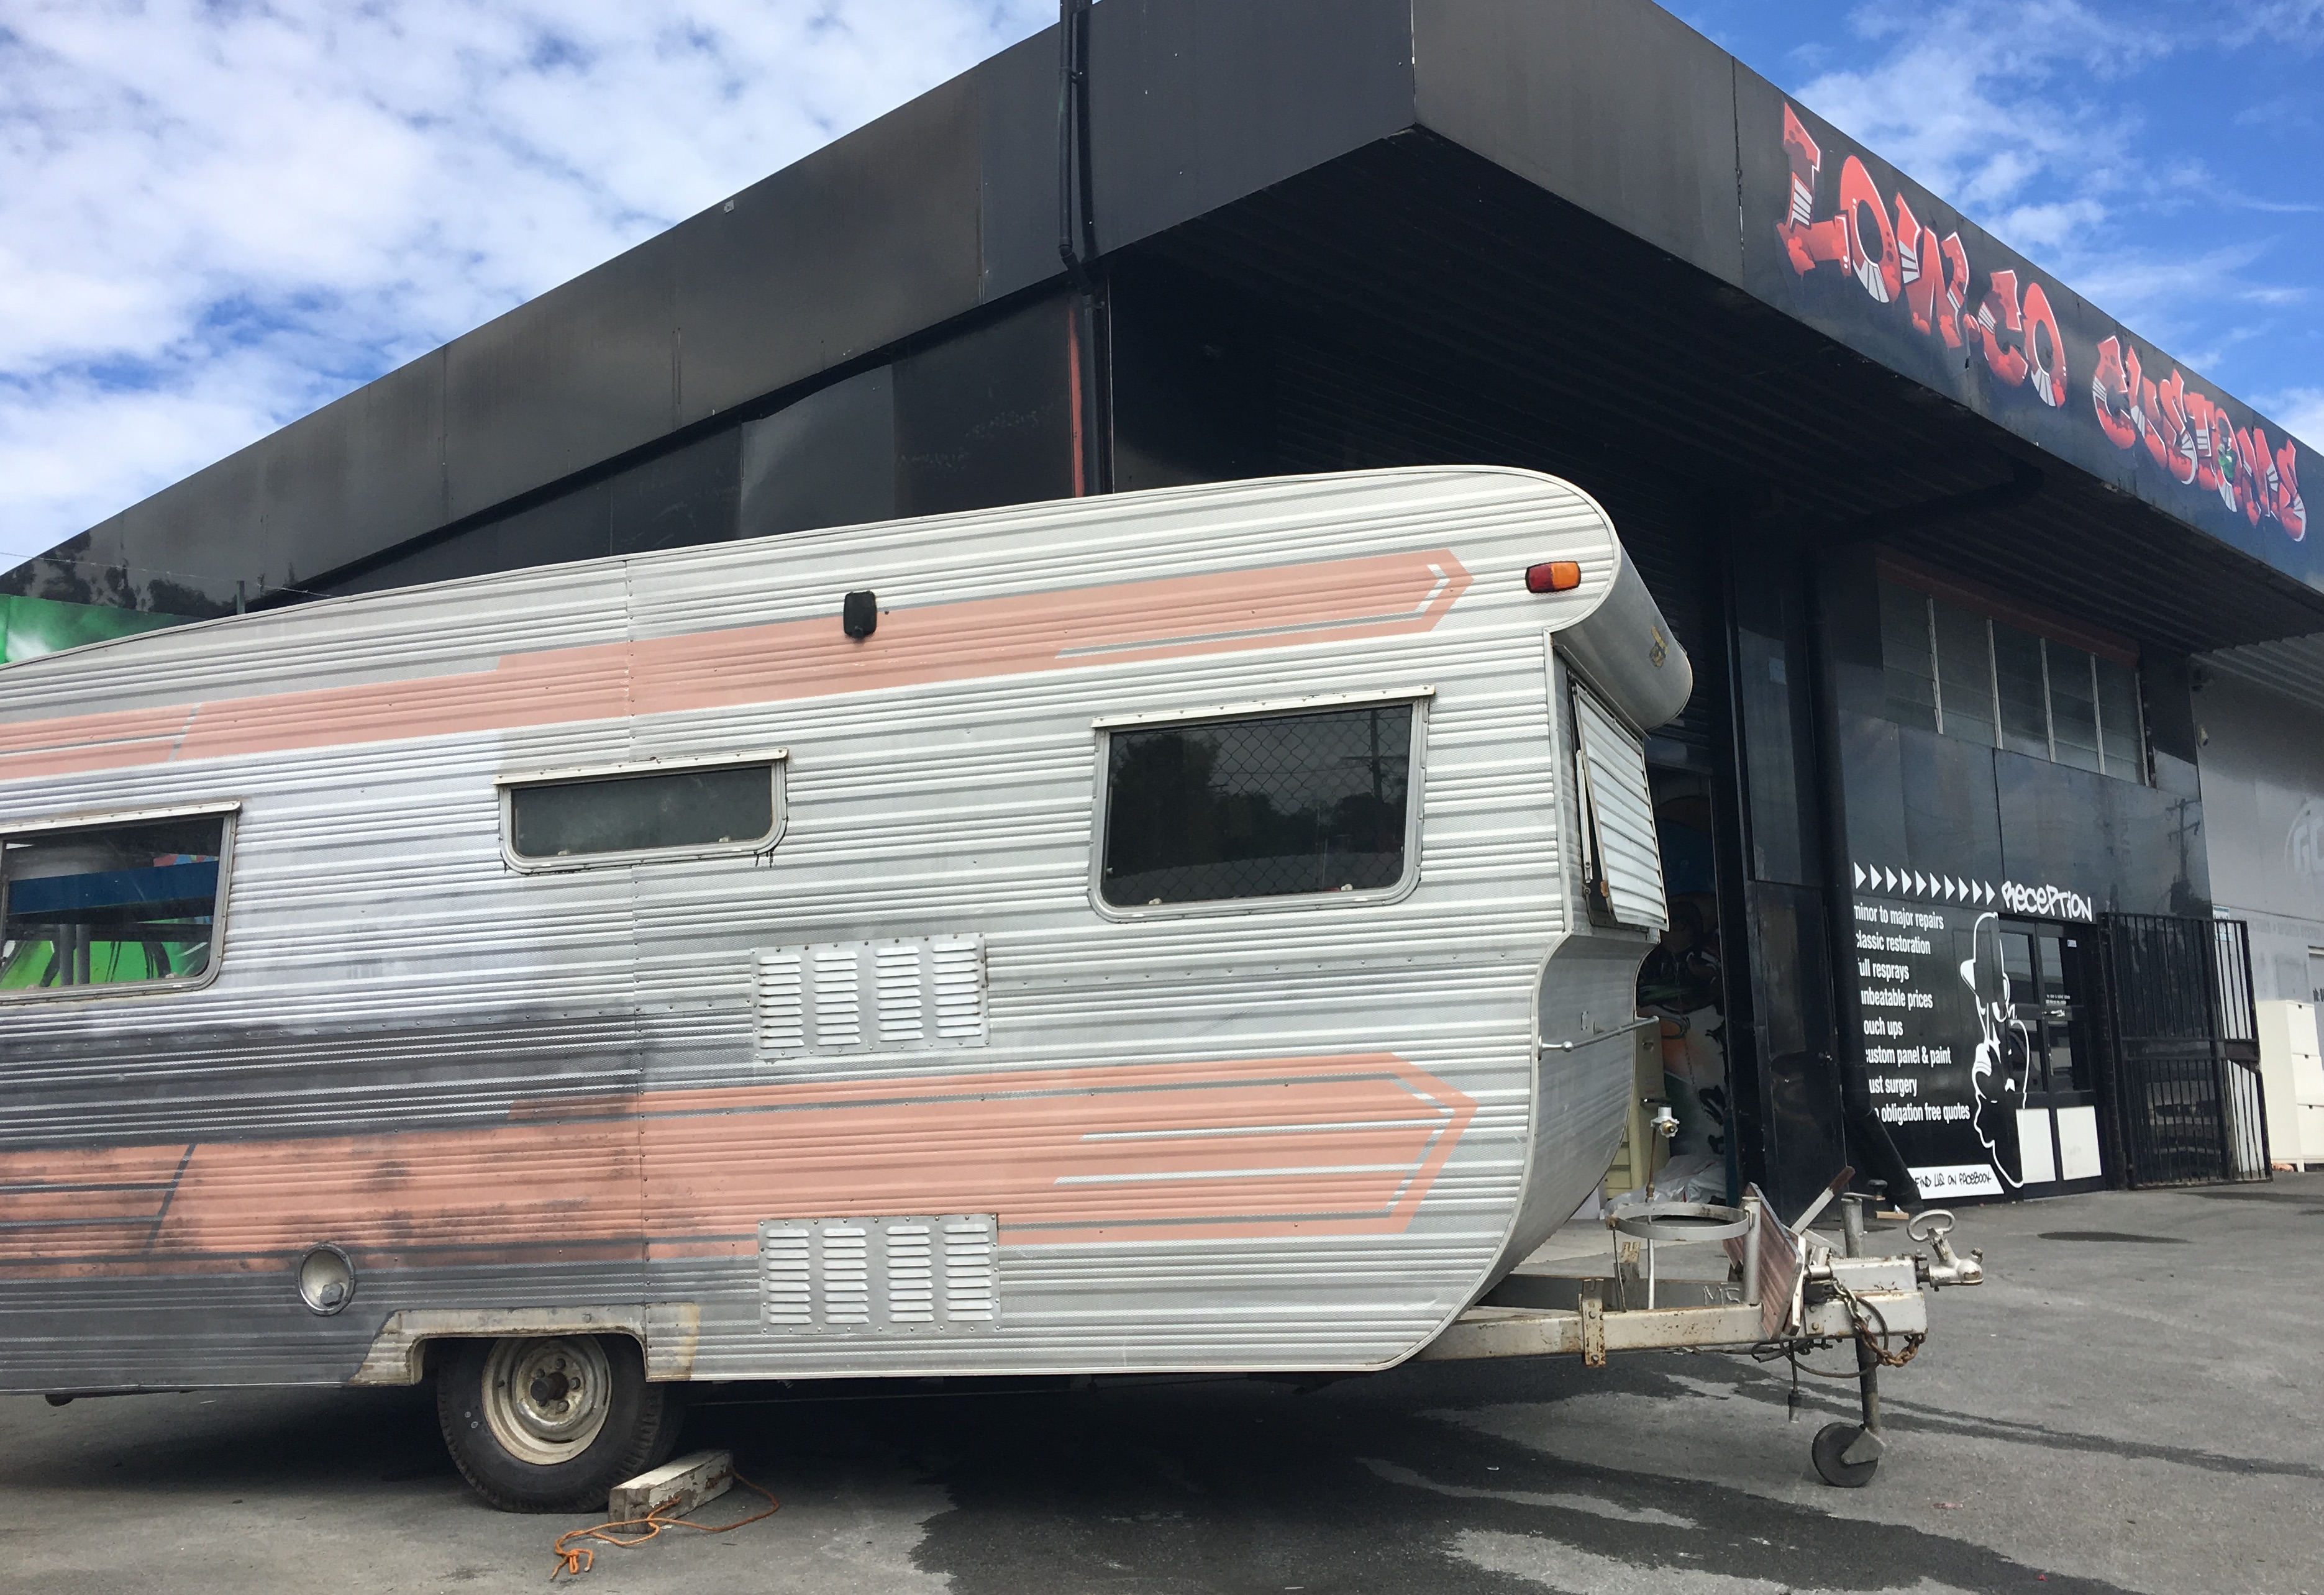
We had the van painted by Lowco Customs on the Gold Coast and they worked with us to get the job done in a much tighter time frame than they would normally work in because we had a holiday planned with said van. Eeeeek! We love a tight deadline! These guys actually specialise in car painting and this was their first caravan job.
Exterior in progress
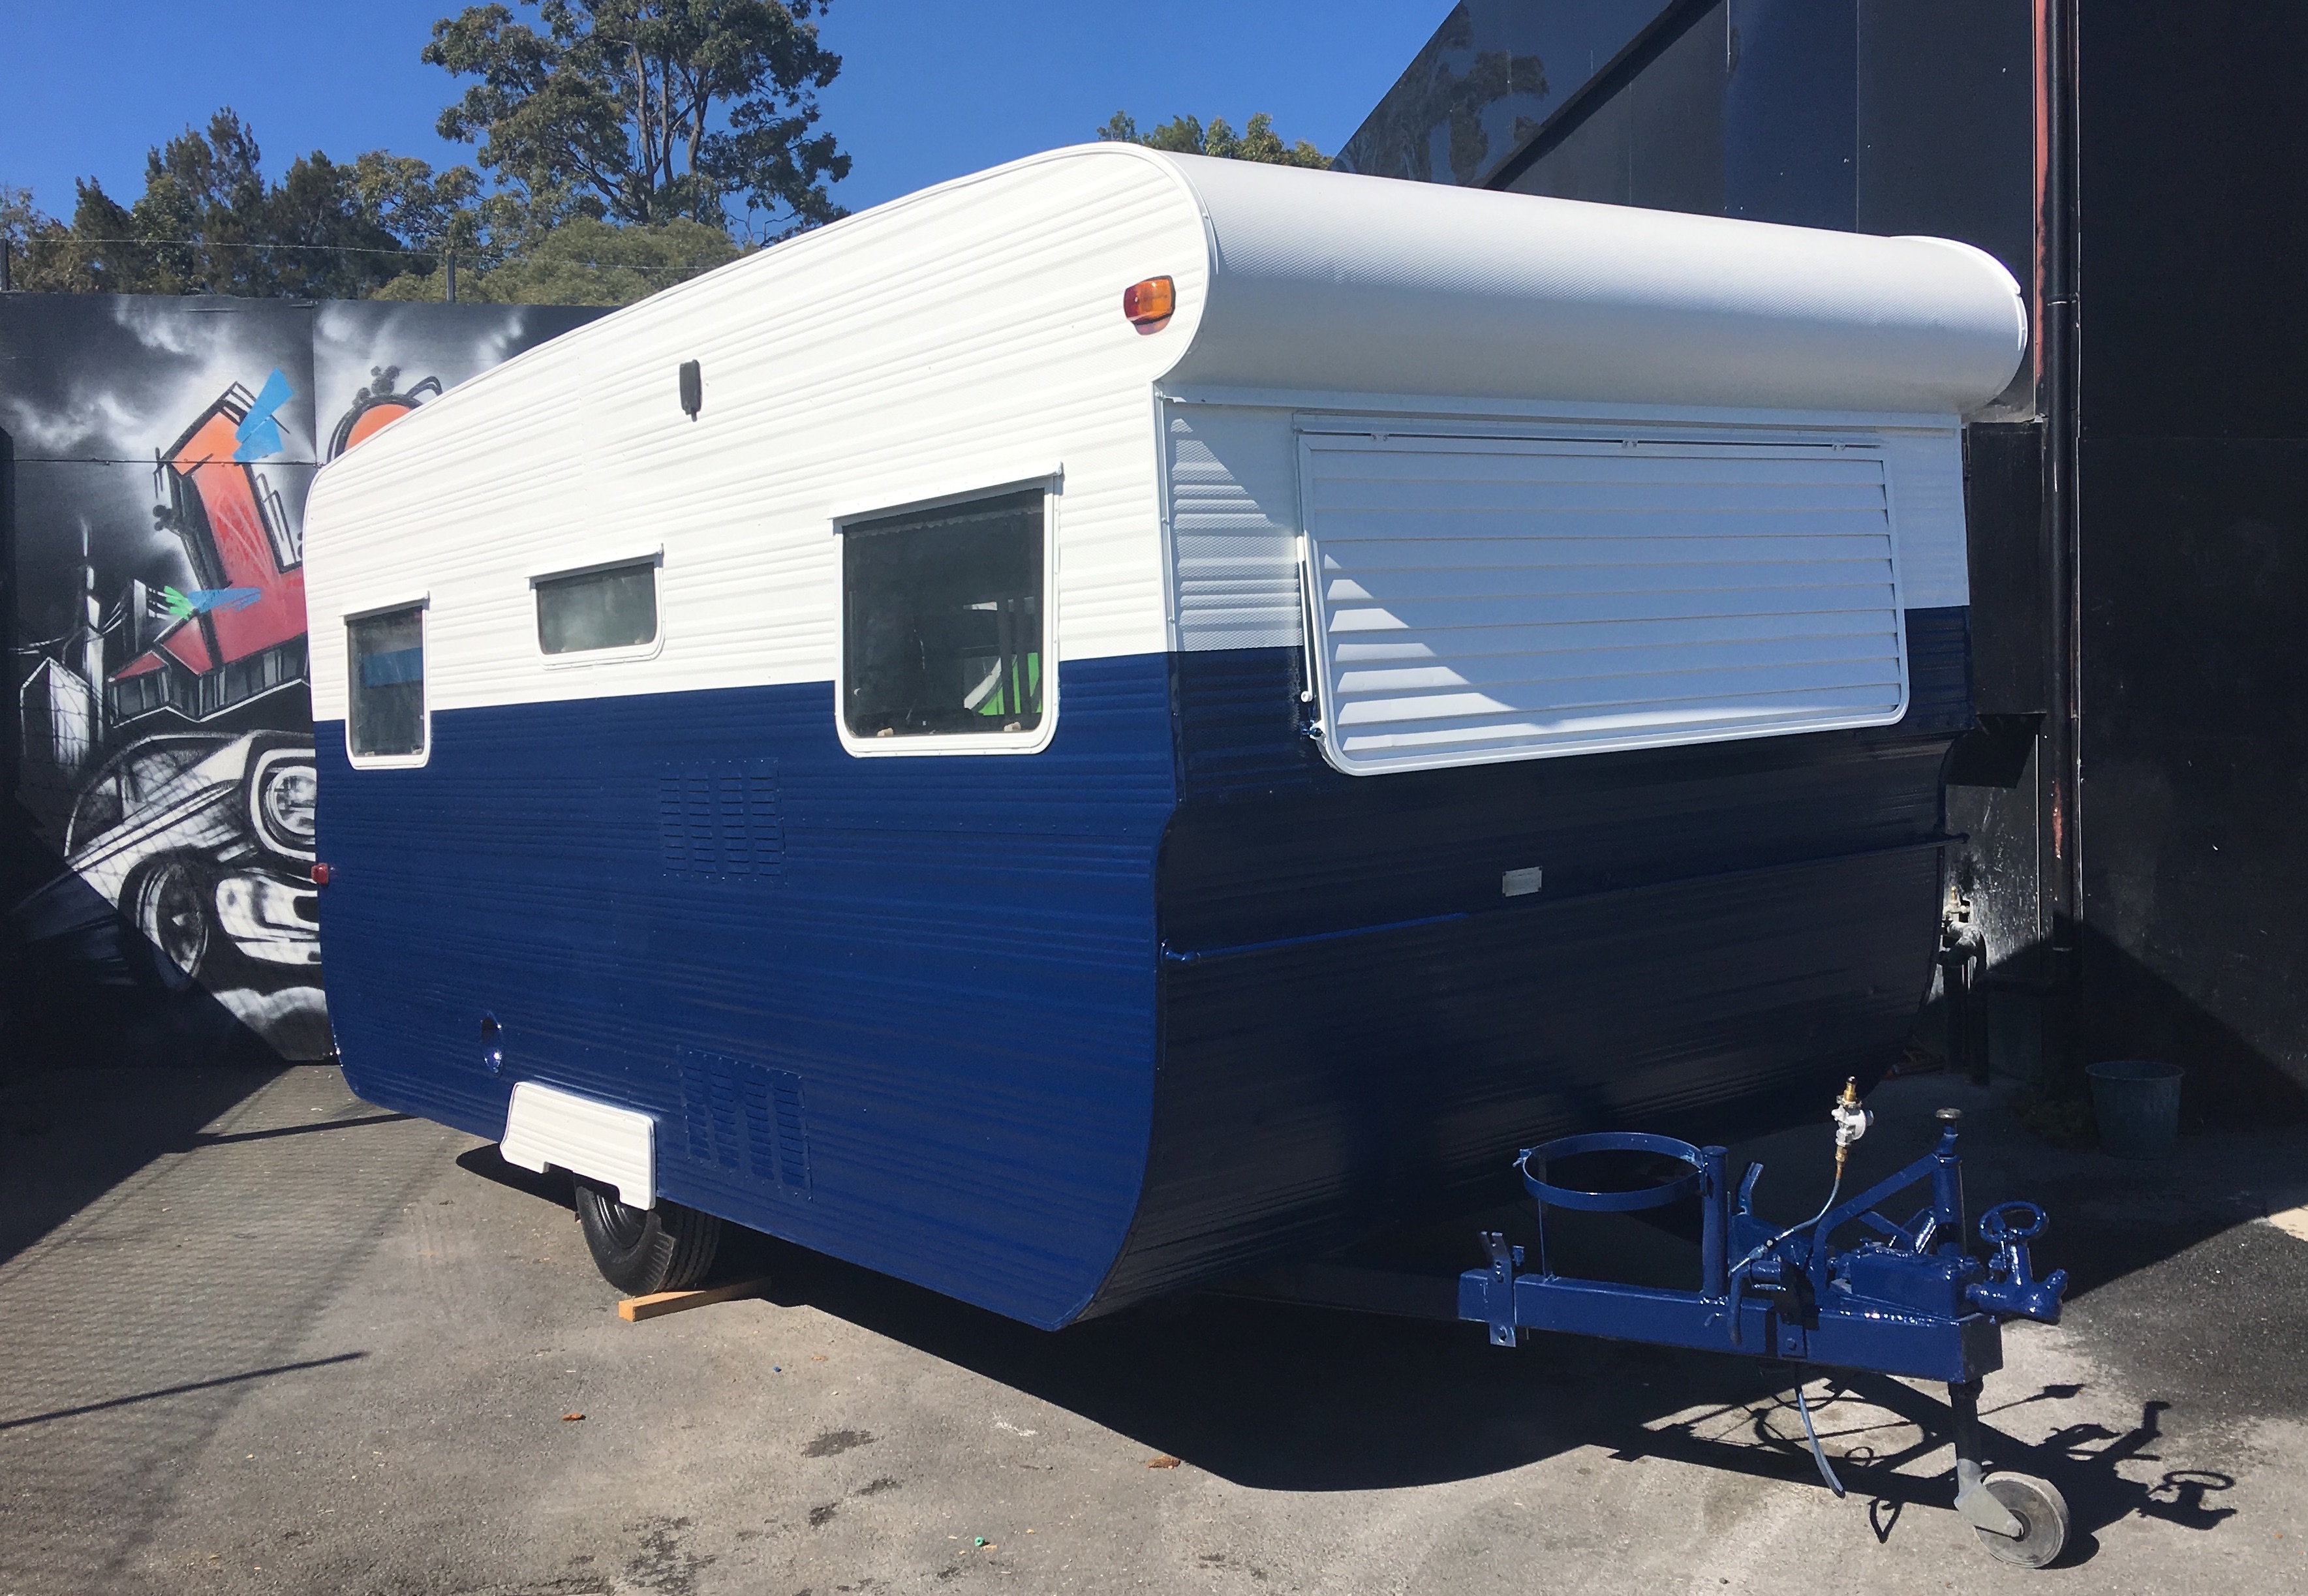
The two tone of the white and blue was bang on but it wasn’t finished. She needed stripes and a name decal.
I actually chose my Millie font from dafont.com and had Thrive Web, the same guys who designed our website, work it together with Cedar + Suede. From there, I contacted a local signwriter, Advanced Signworks who were sooooooooooooo easy to deal with. They made the process incredibly streamline and did exactly what they said they would do (this is not a sponsored post, I’m just a happy customer). They used my measurements and drew up the graphic to scale so that I could see what the the stripes and name would look like on the van before committing. This meant I could tweak the size etc to my liking.
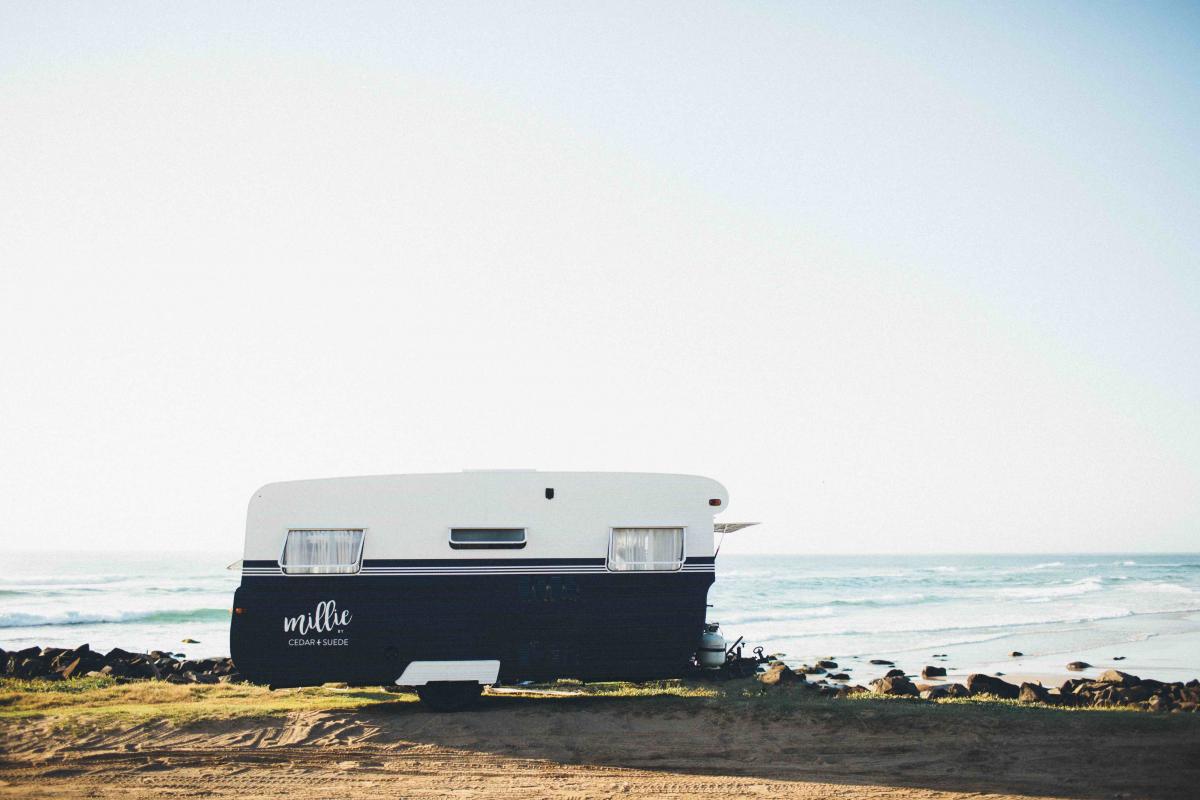
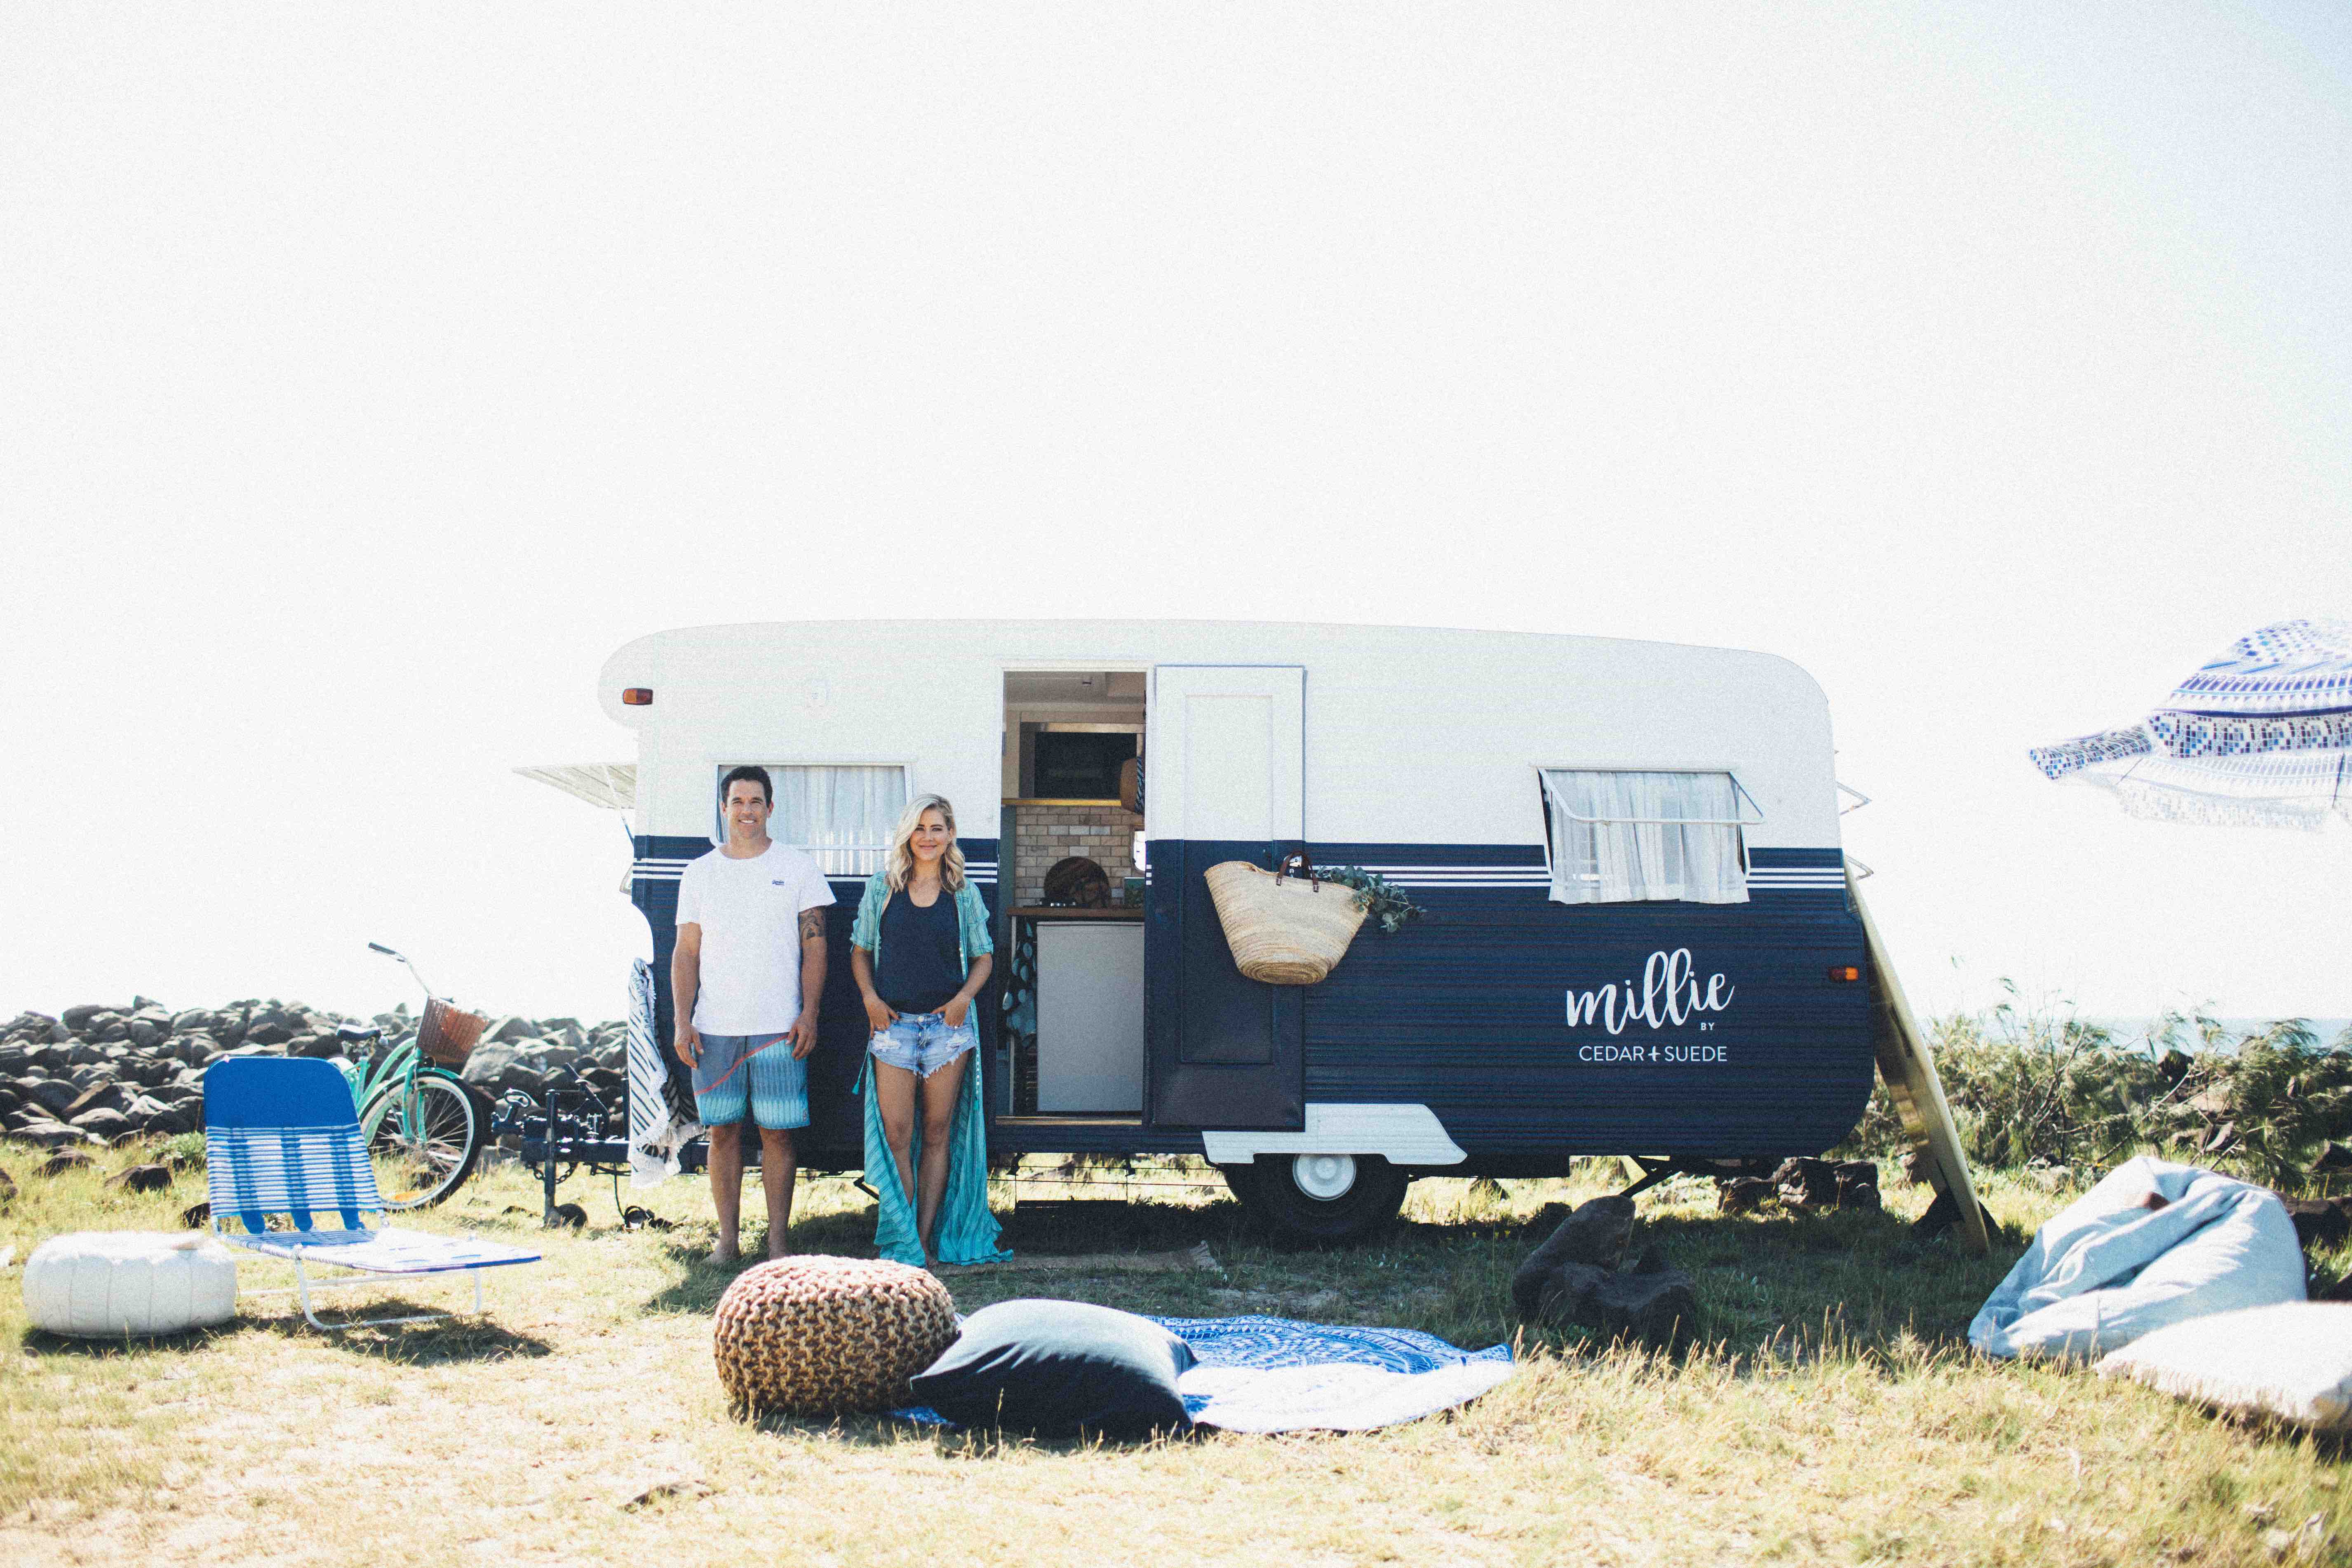
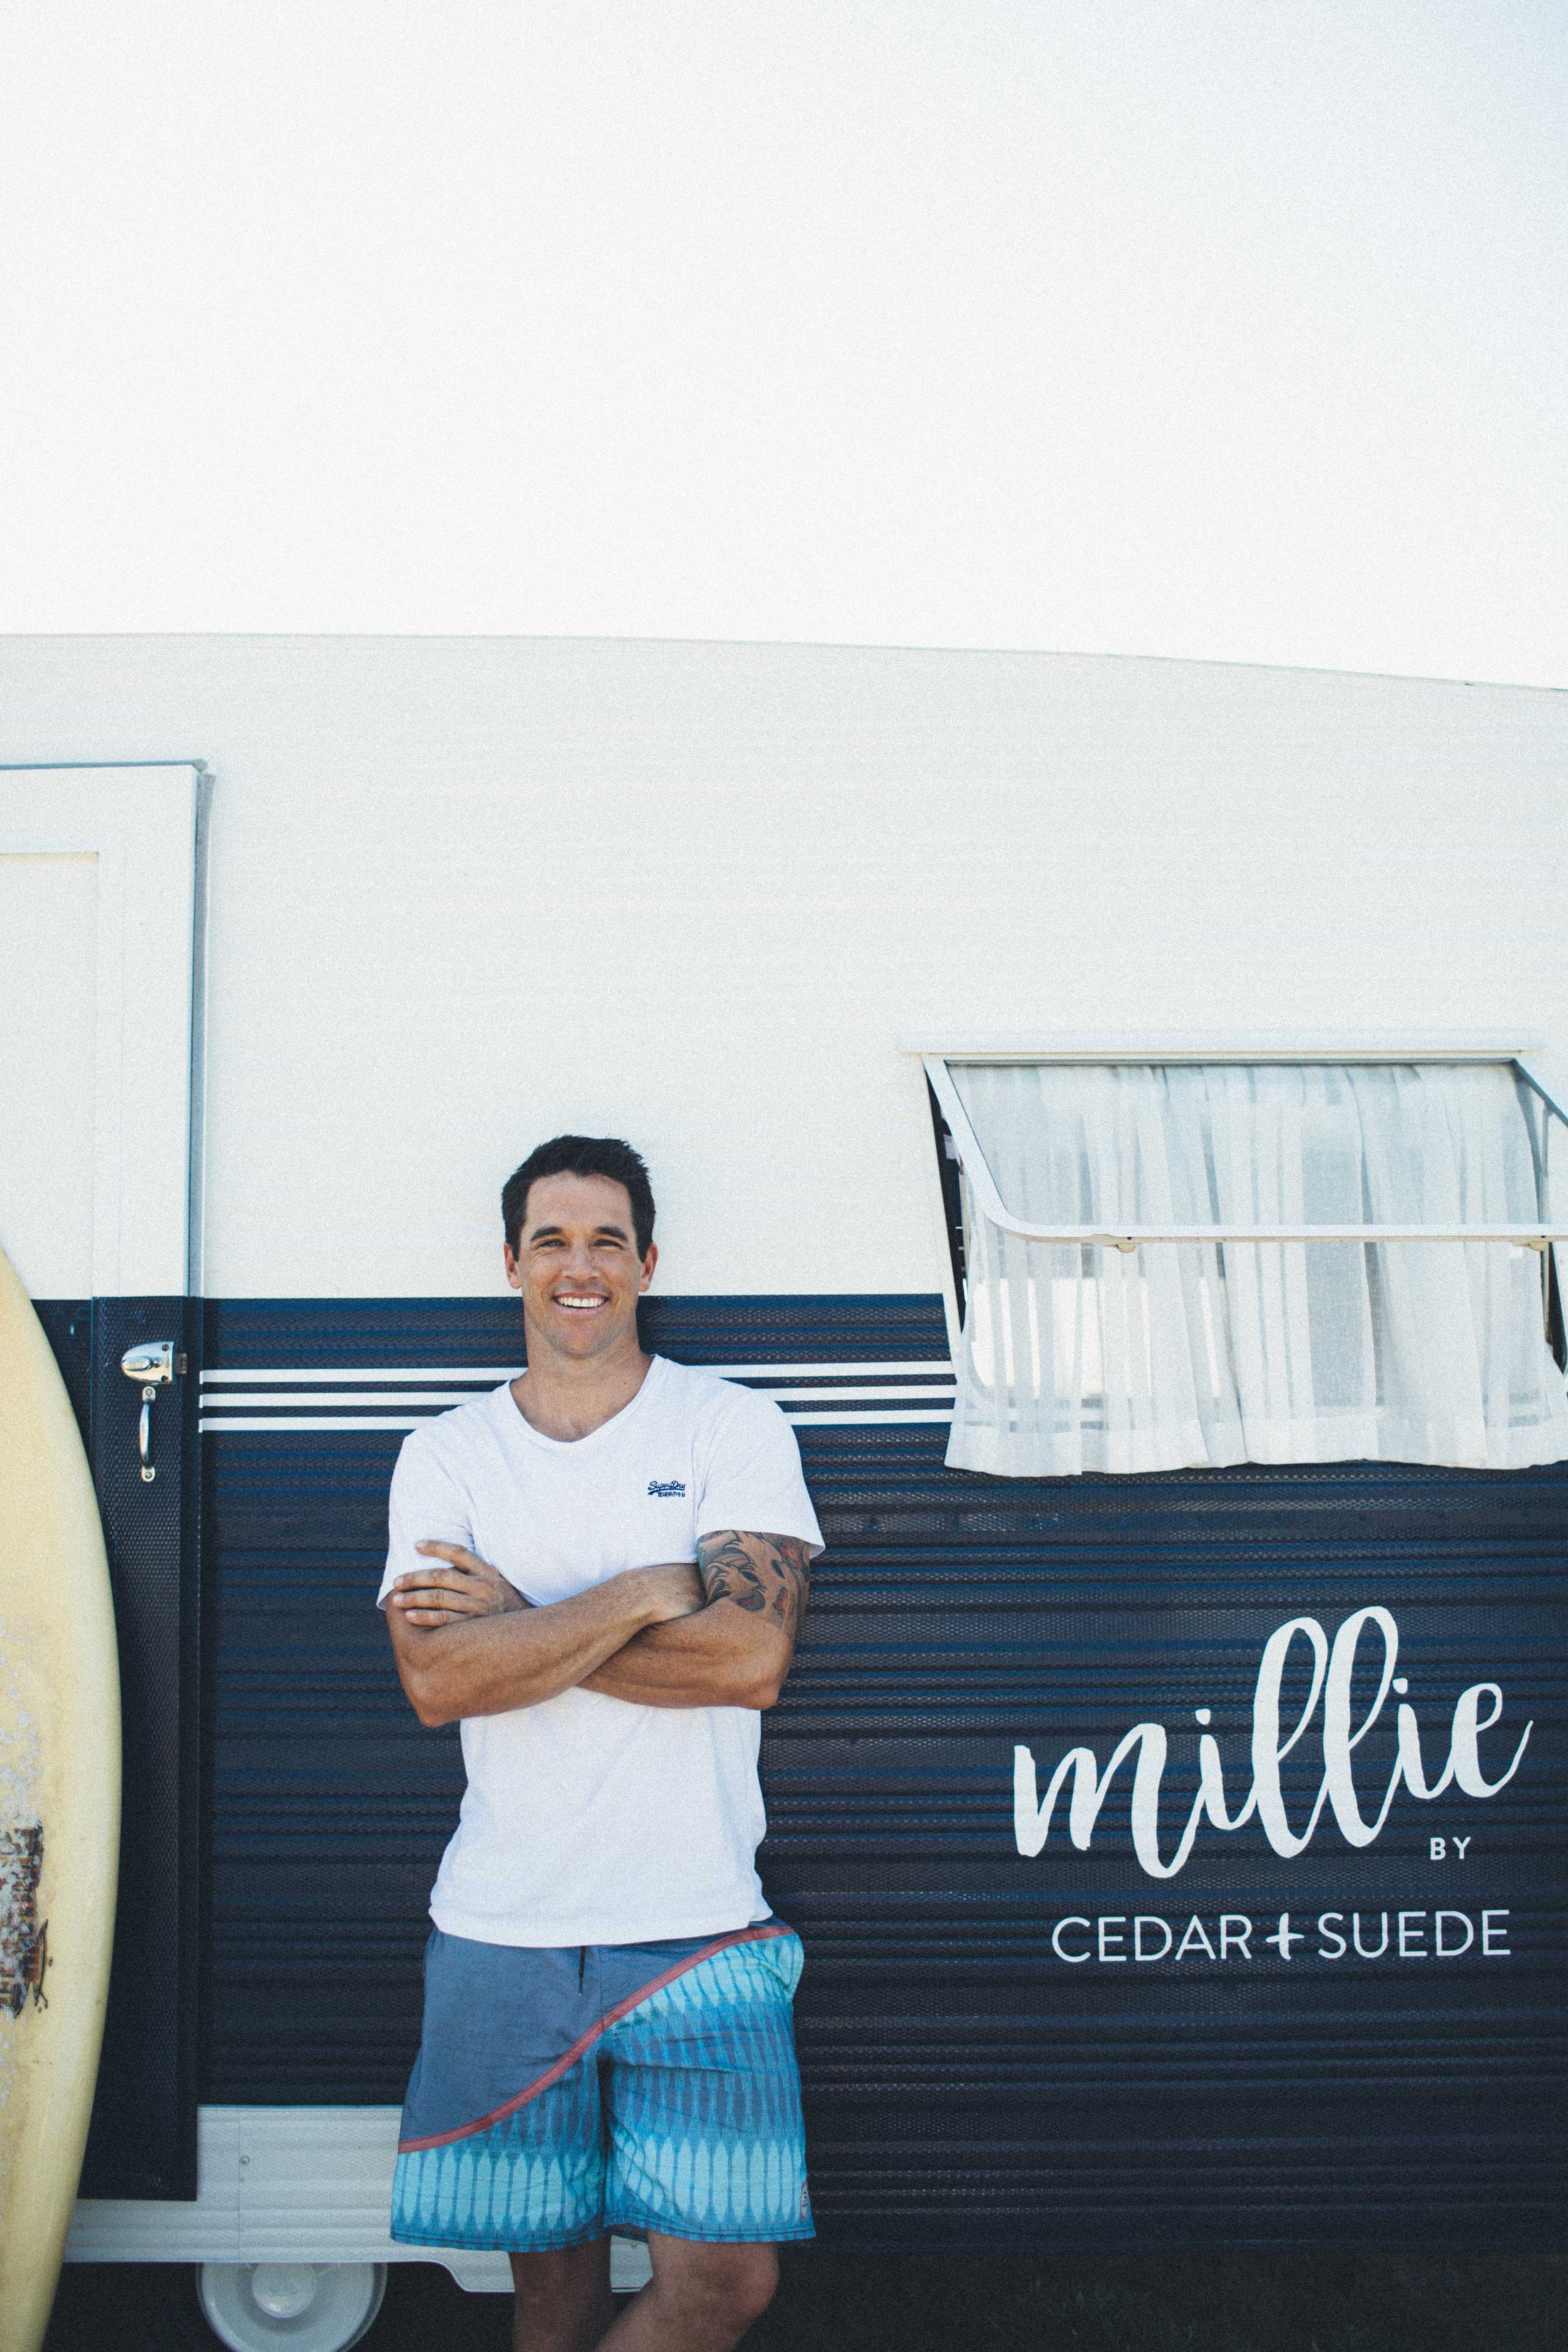
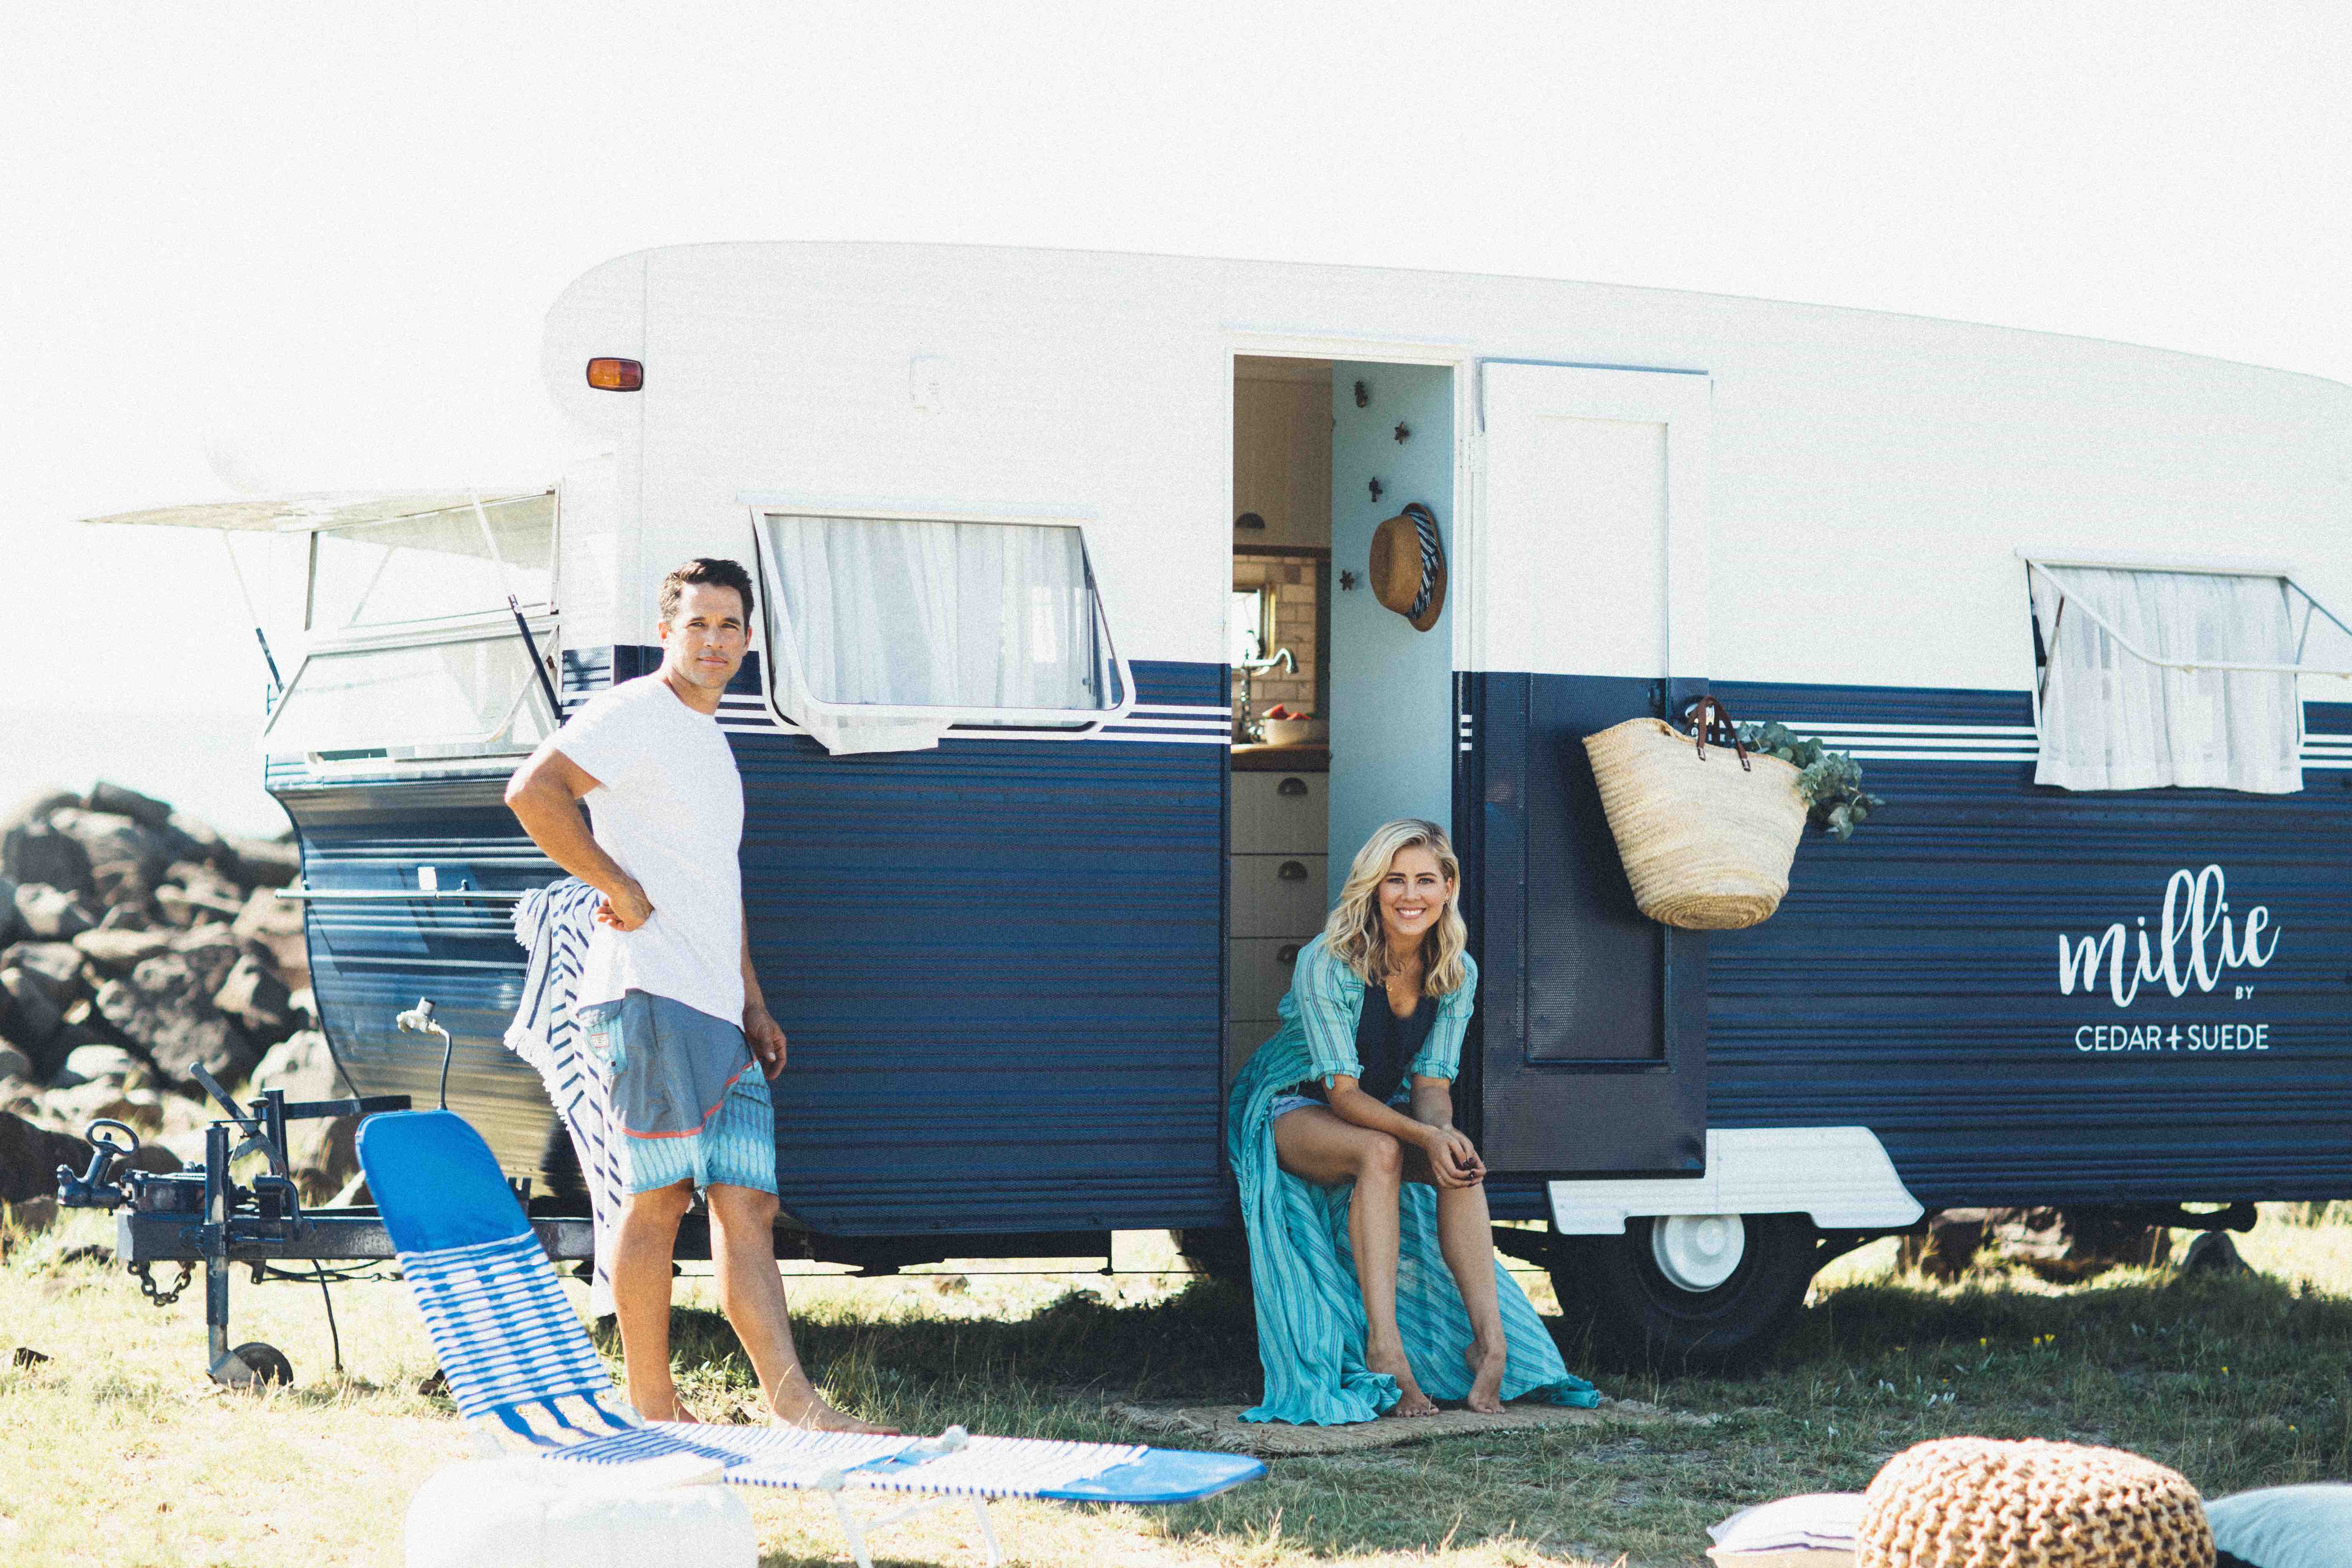
Exterior after
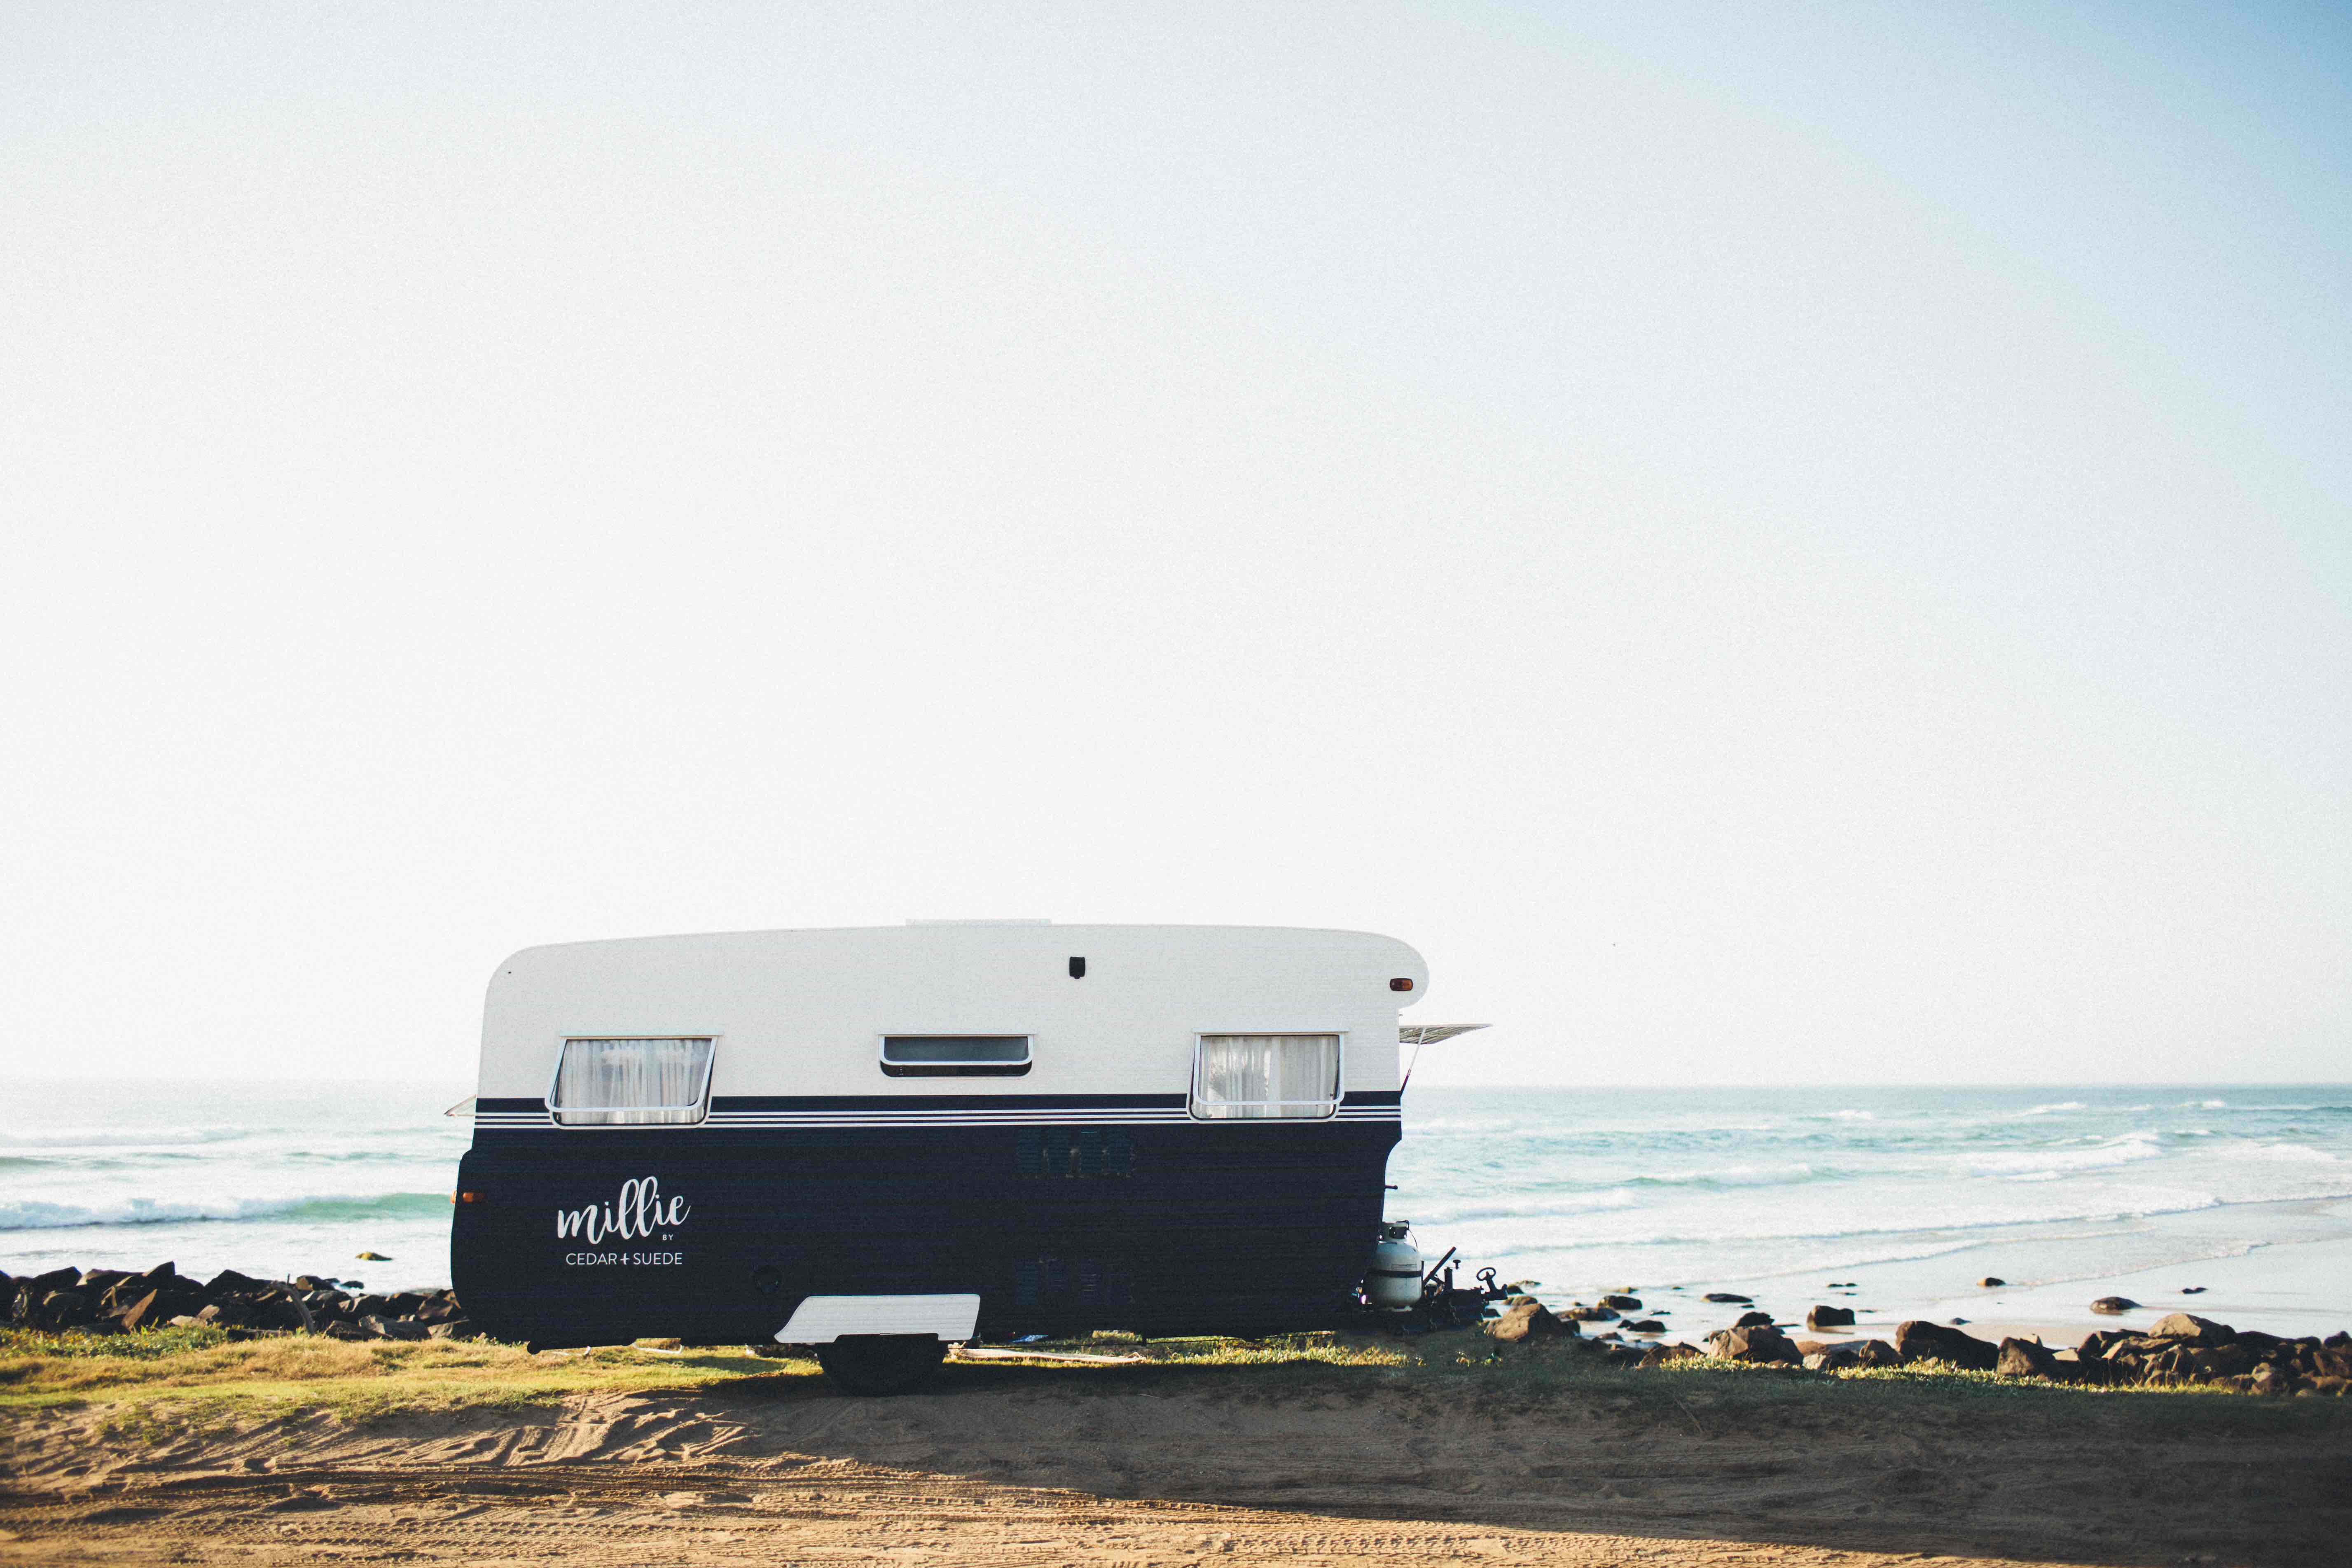
Ta da………. she’s so quaint, ain’t she?! I love the simplicity of this shot. Life appears so calm in this image. Goals!

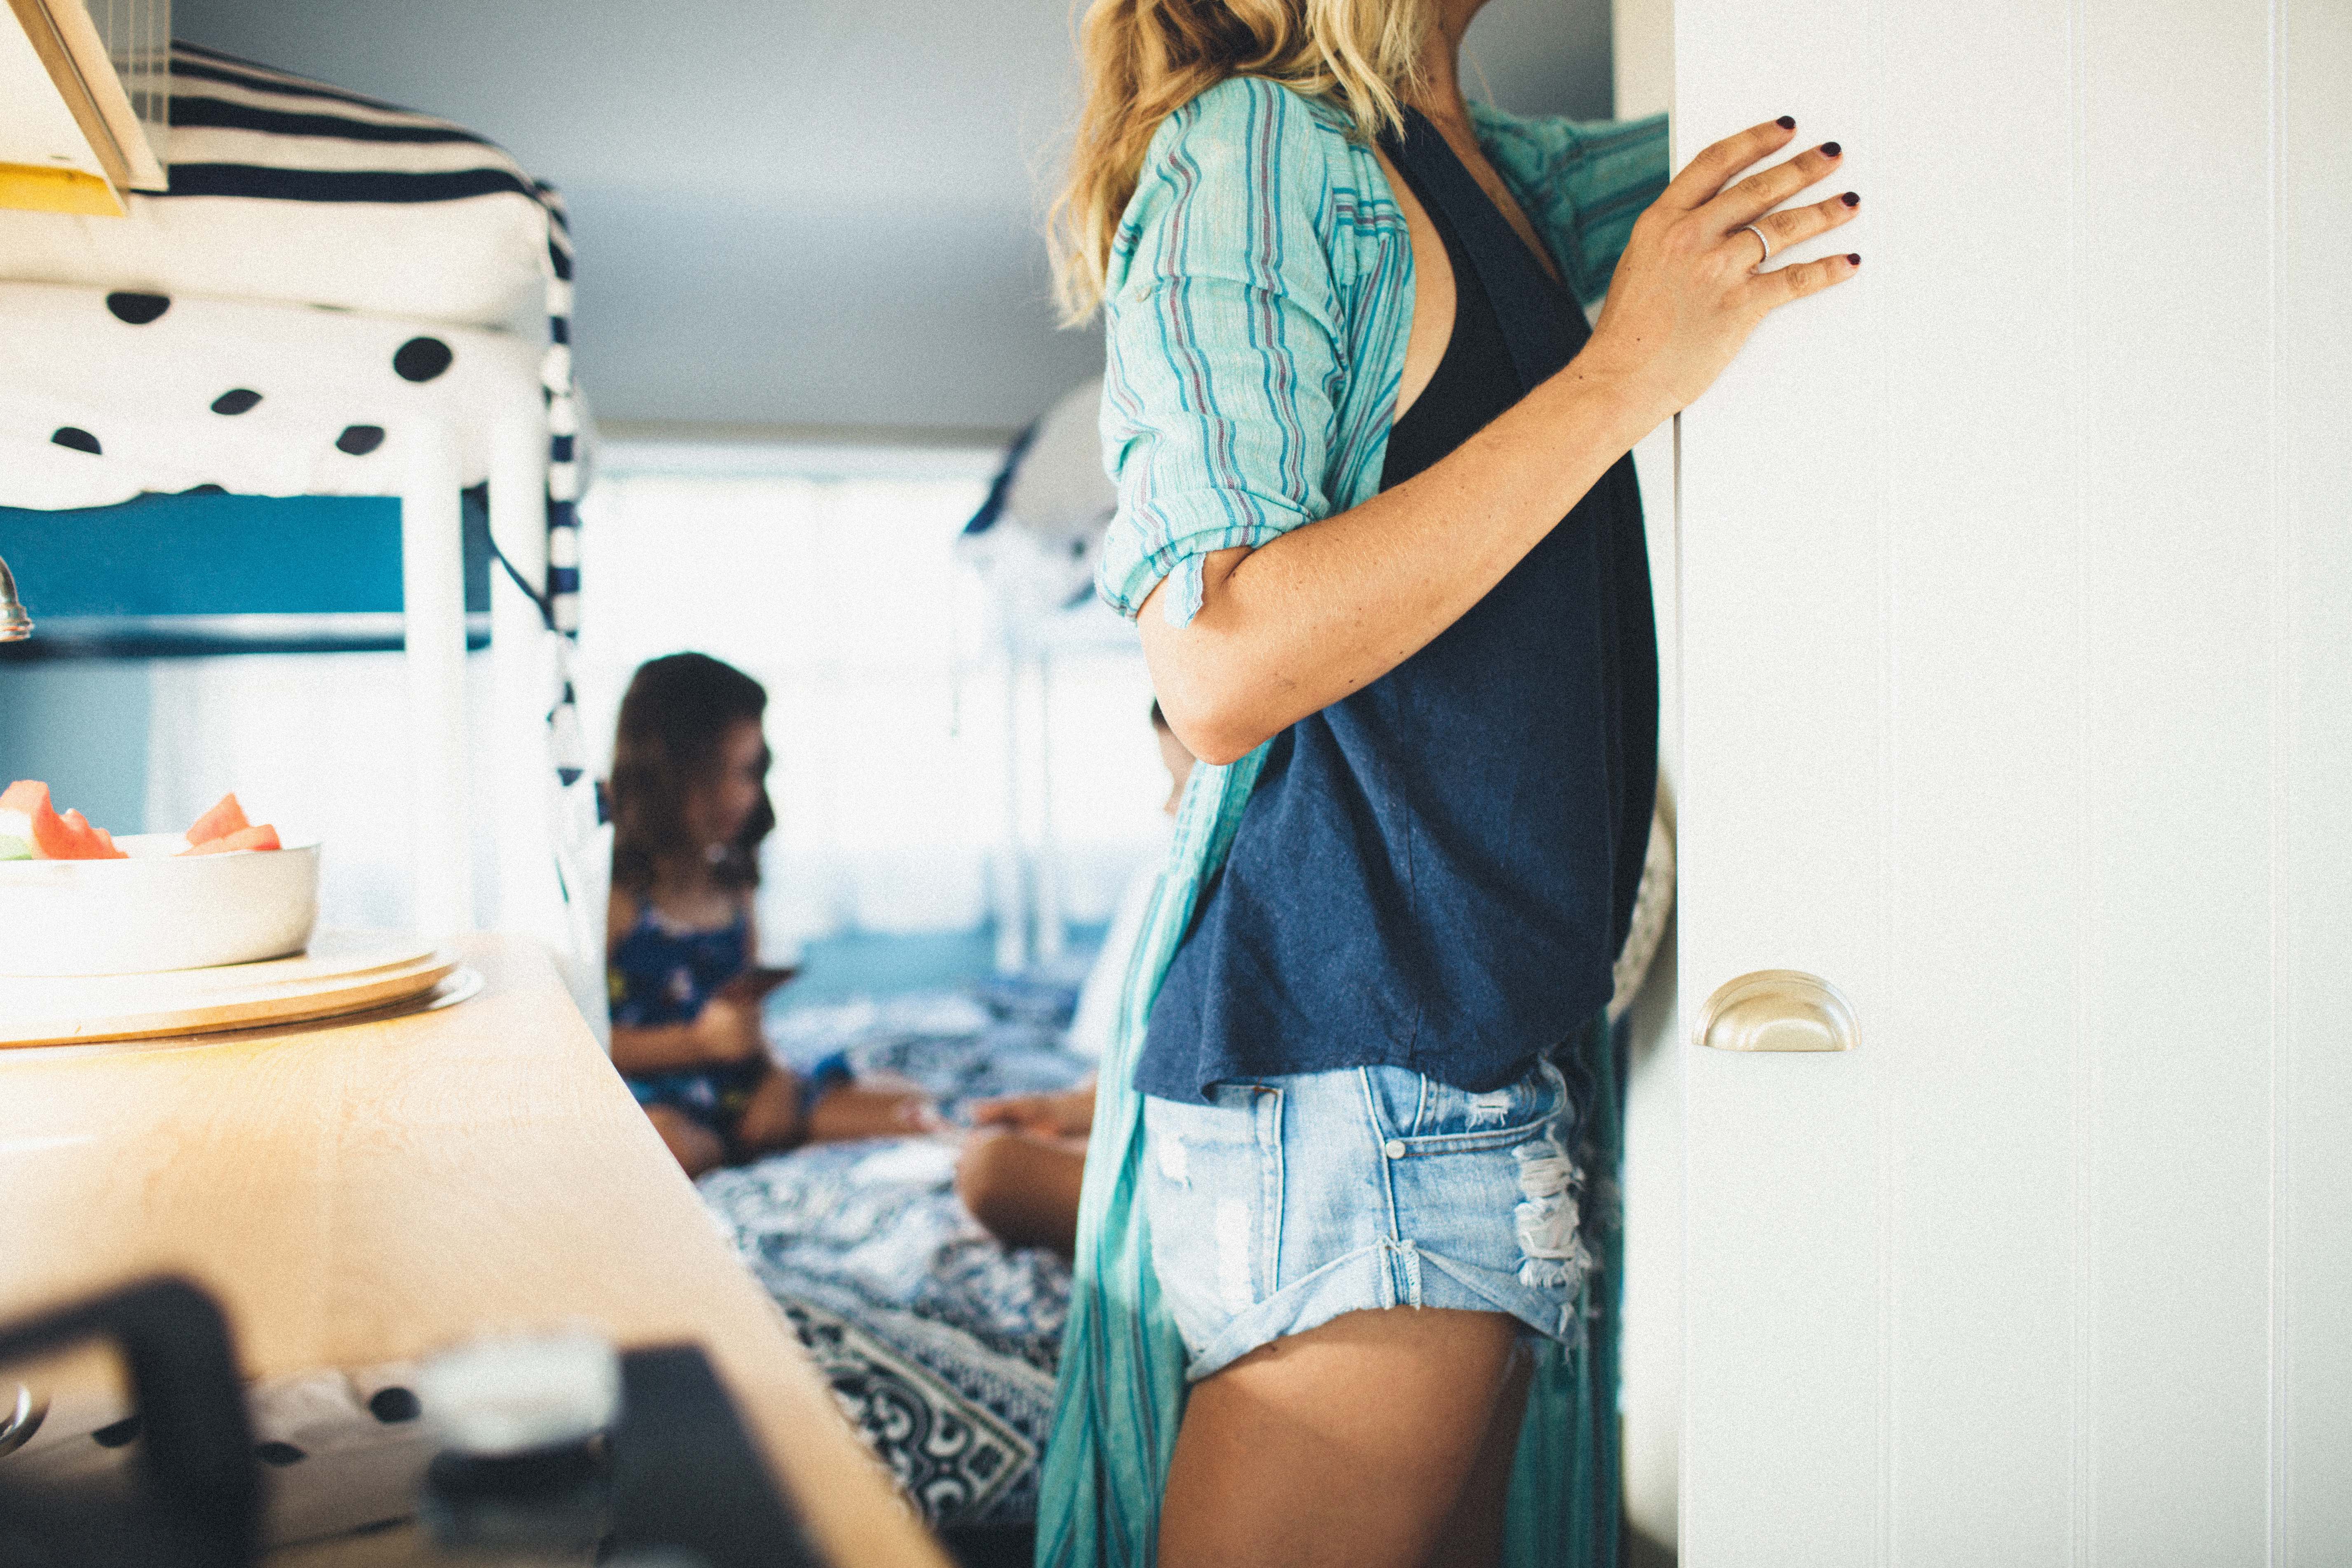
On to the interior. I think the interior is even lovelier than the exterior. There’s something so calming and peaceful about walking into this van and I don’t think it’s just the colour scheme. It has just a really serene, quiet energy which I’m going to put down to the energy of the previous owners because peaceful is not how I’d describe us or our lives.
Kitchen and beds
Kitchen/sleeping area before

We ripped out most of the interior and replaced the cabinetry with cheap and cheerful Ikea cabinetry.
Kitchen/sleeping area after
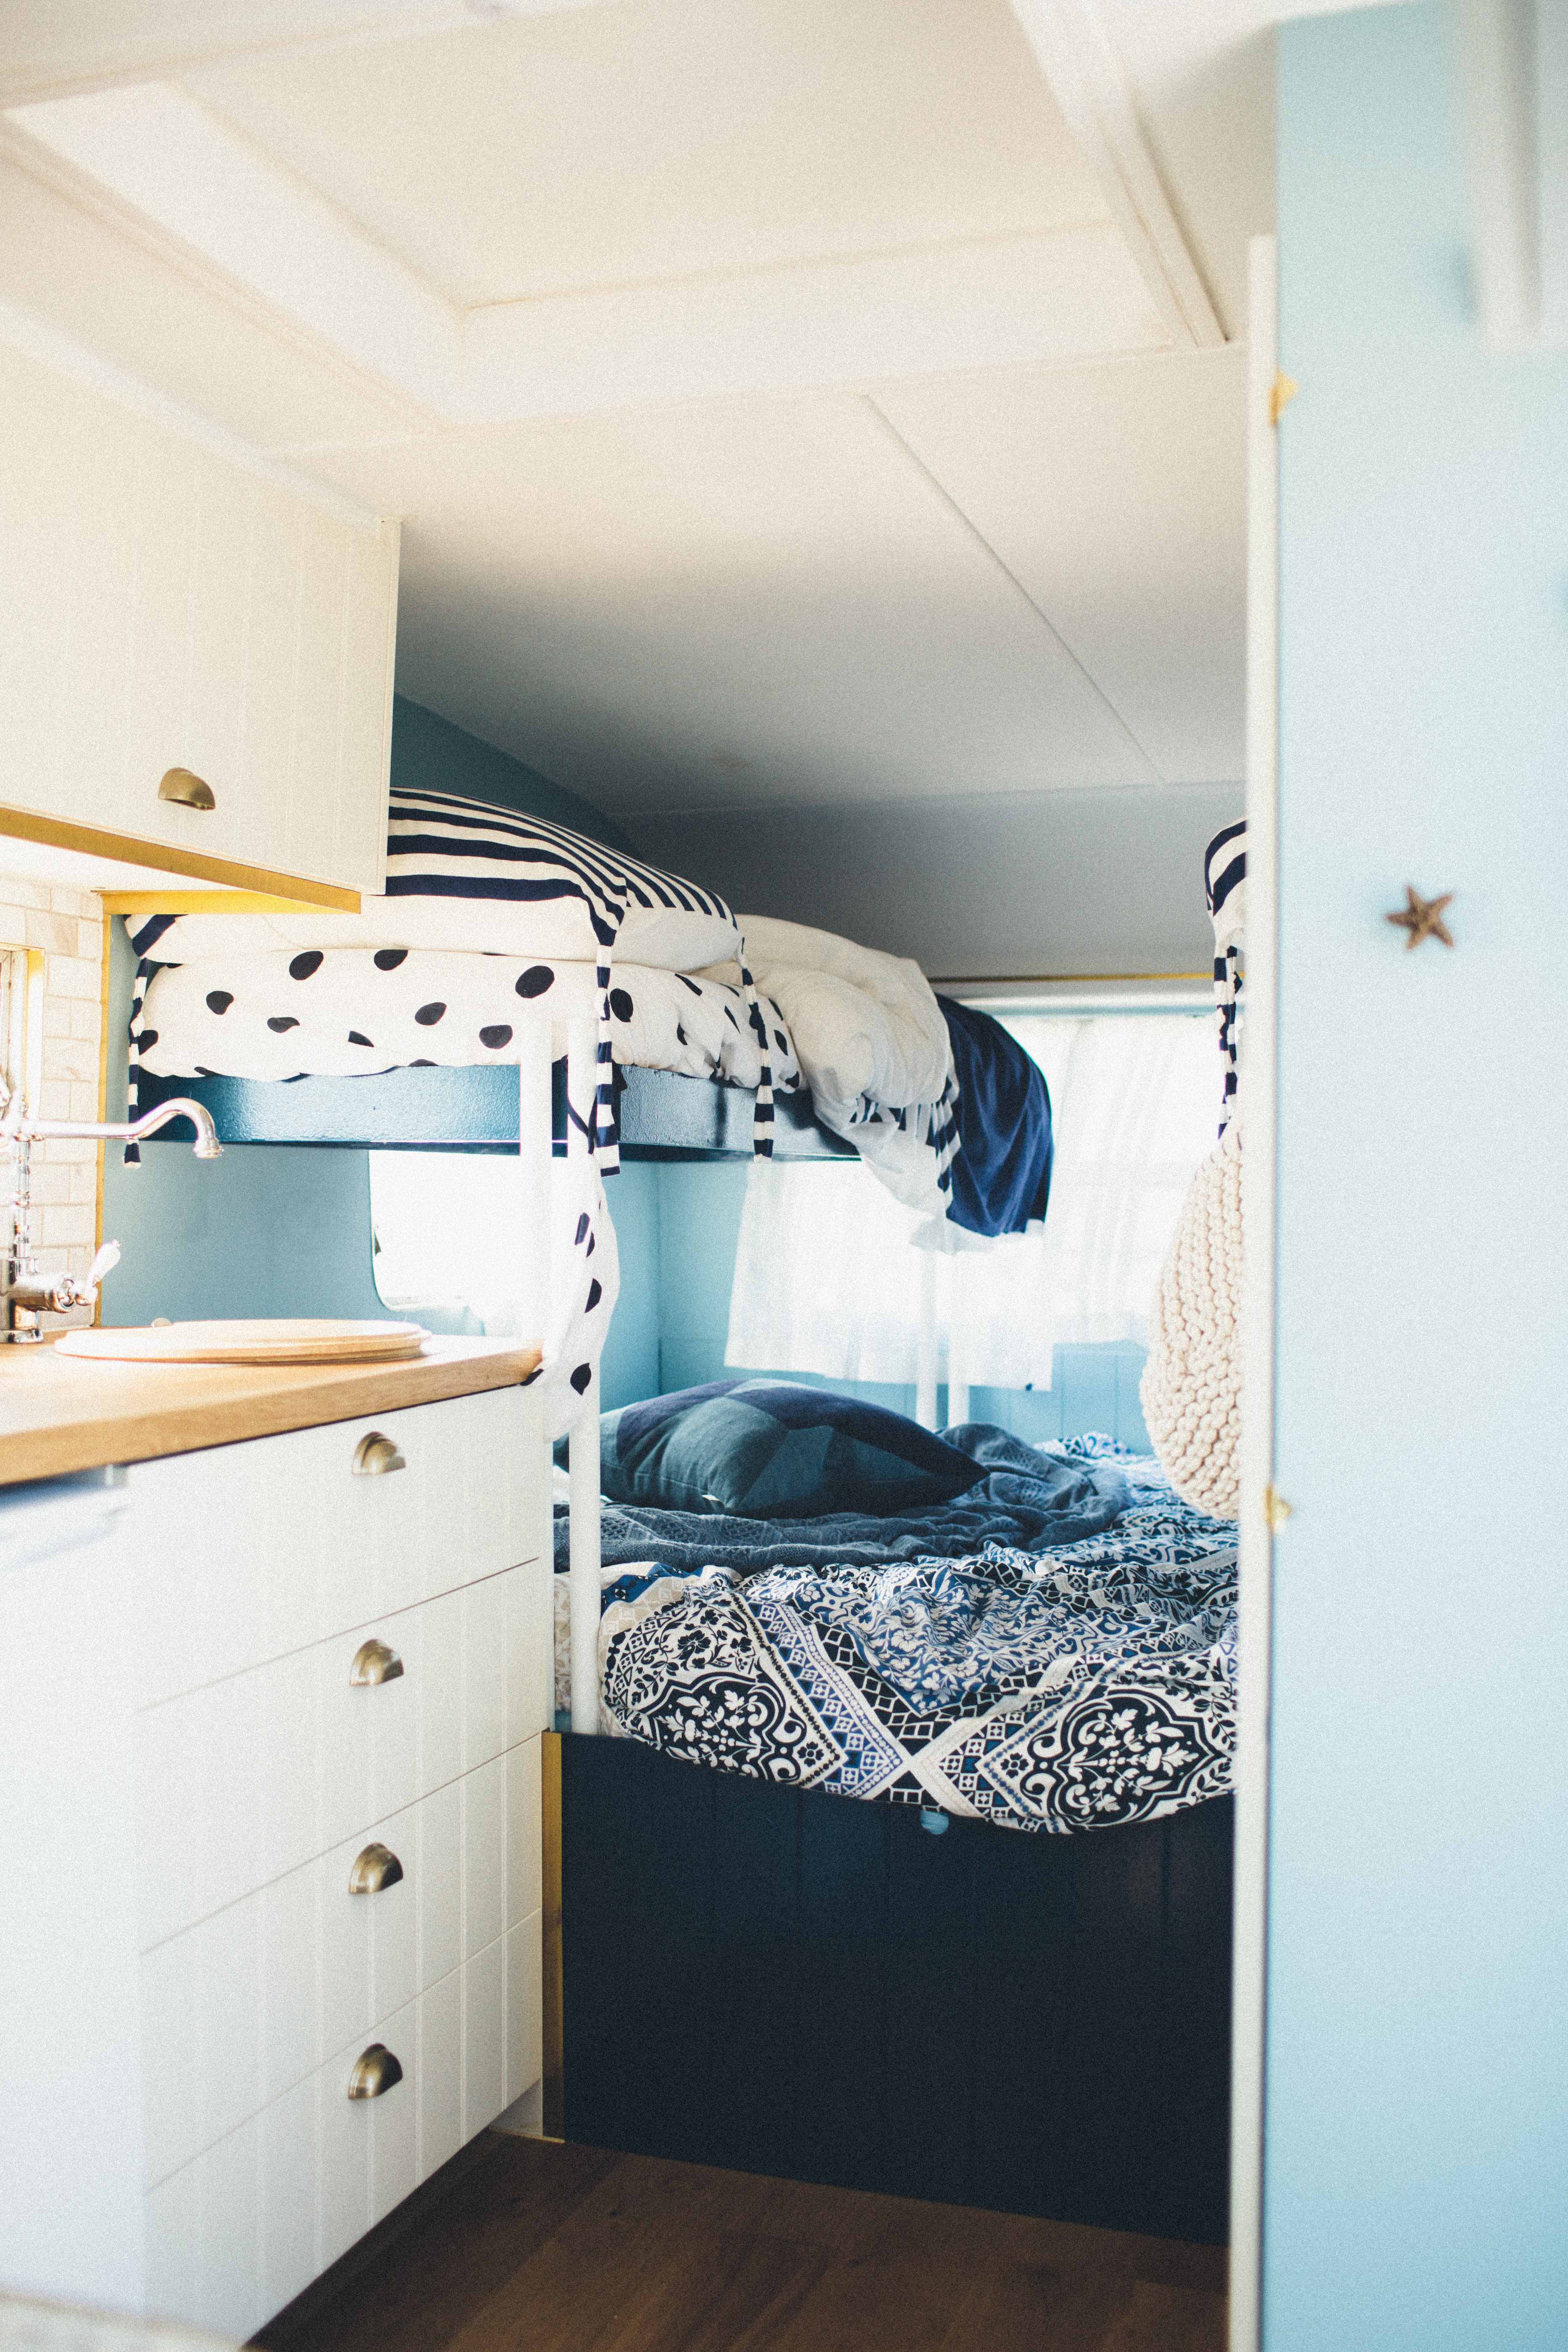
That navy blue panel in front of the bed slides up so that we can store items that we don’t need to access frequently.
My colour scheme was always going to be shades of blue for a cool, coastal vibe. For the walls I went with Resene Botticelli, which is just a really perfect shade of light blue. It’s light but not insipid, which I love. The beds, we painted in Resene Prussion Blue, which has very subtle green undertones that you can’t see in the photos but which is bold, rich and delicious.
Hot tip: Make sure you use a hard-wearing semi gloss paint for painting furniture such as beds because a low sheen finish will end up grubby and banged up.

Kitchen detail
I wanted to include some classical pieces in the van, which, we achieved with the decorative tapware, the brass-look shell handles, the VJ panelled cabinetry, all from Ikea. And of course, the marble brick pattern subway tiles, which are actually a mosaic that come in sheets and have a classical-inspired bevelled edge which you can’t really see in the photos. They’re from National Tiles.
Beds in progress
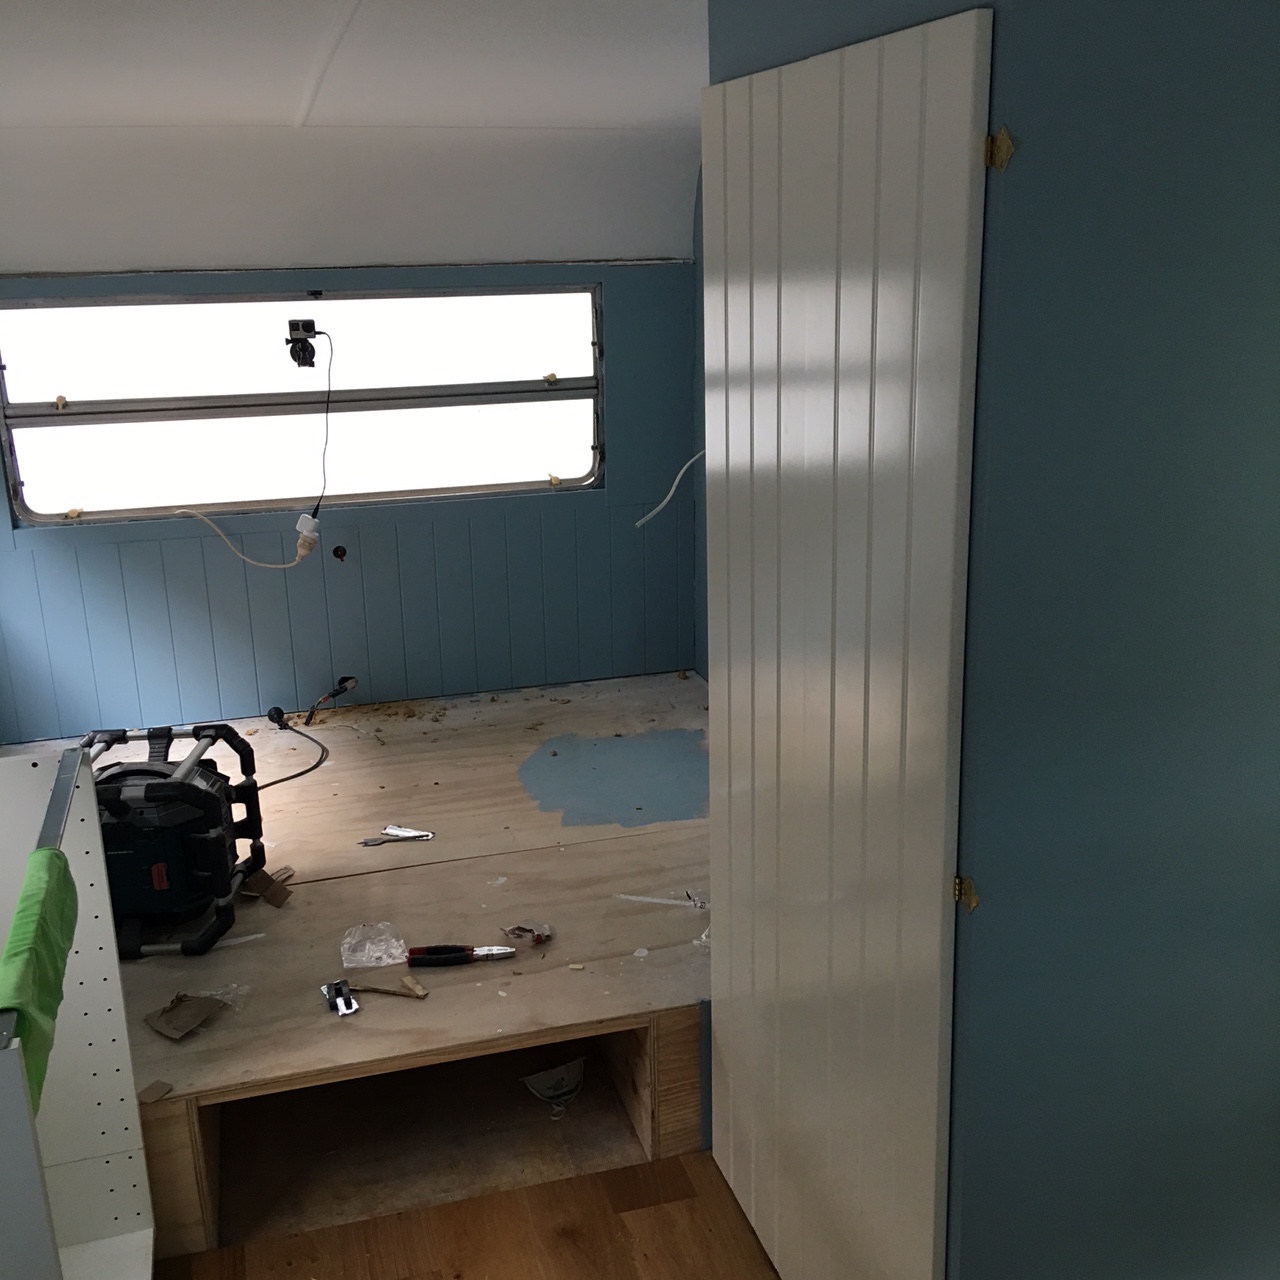
Where there were originally overheads cabinets over the single beds, we installed bunks. These work for the kids given that they’re still young but as they get older I can see us banishing them to the annex so that we all have more room.
We included internal drawers (Ikea) in the internal of the lower half of the wardrobe, as well as a new door, but otherwise, the wardrobe remained intact.
Beds after
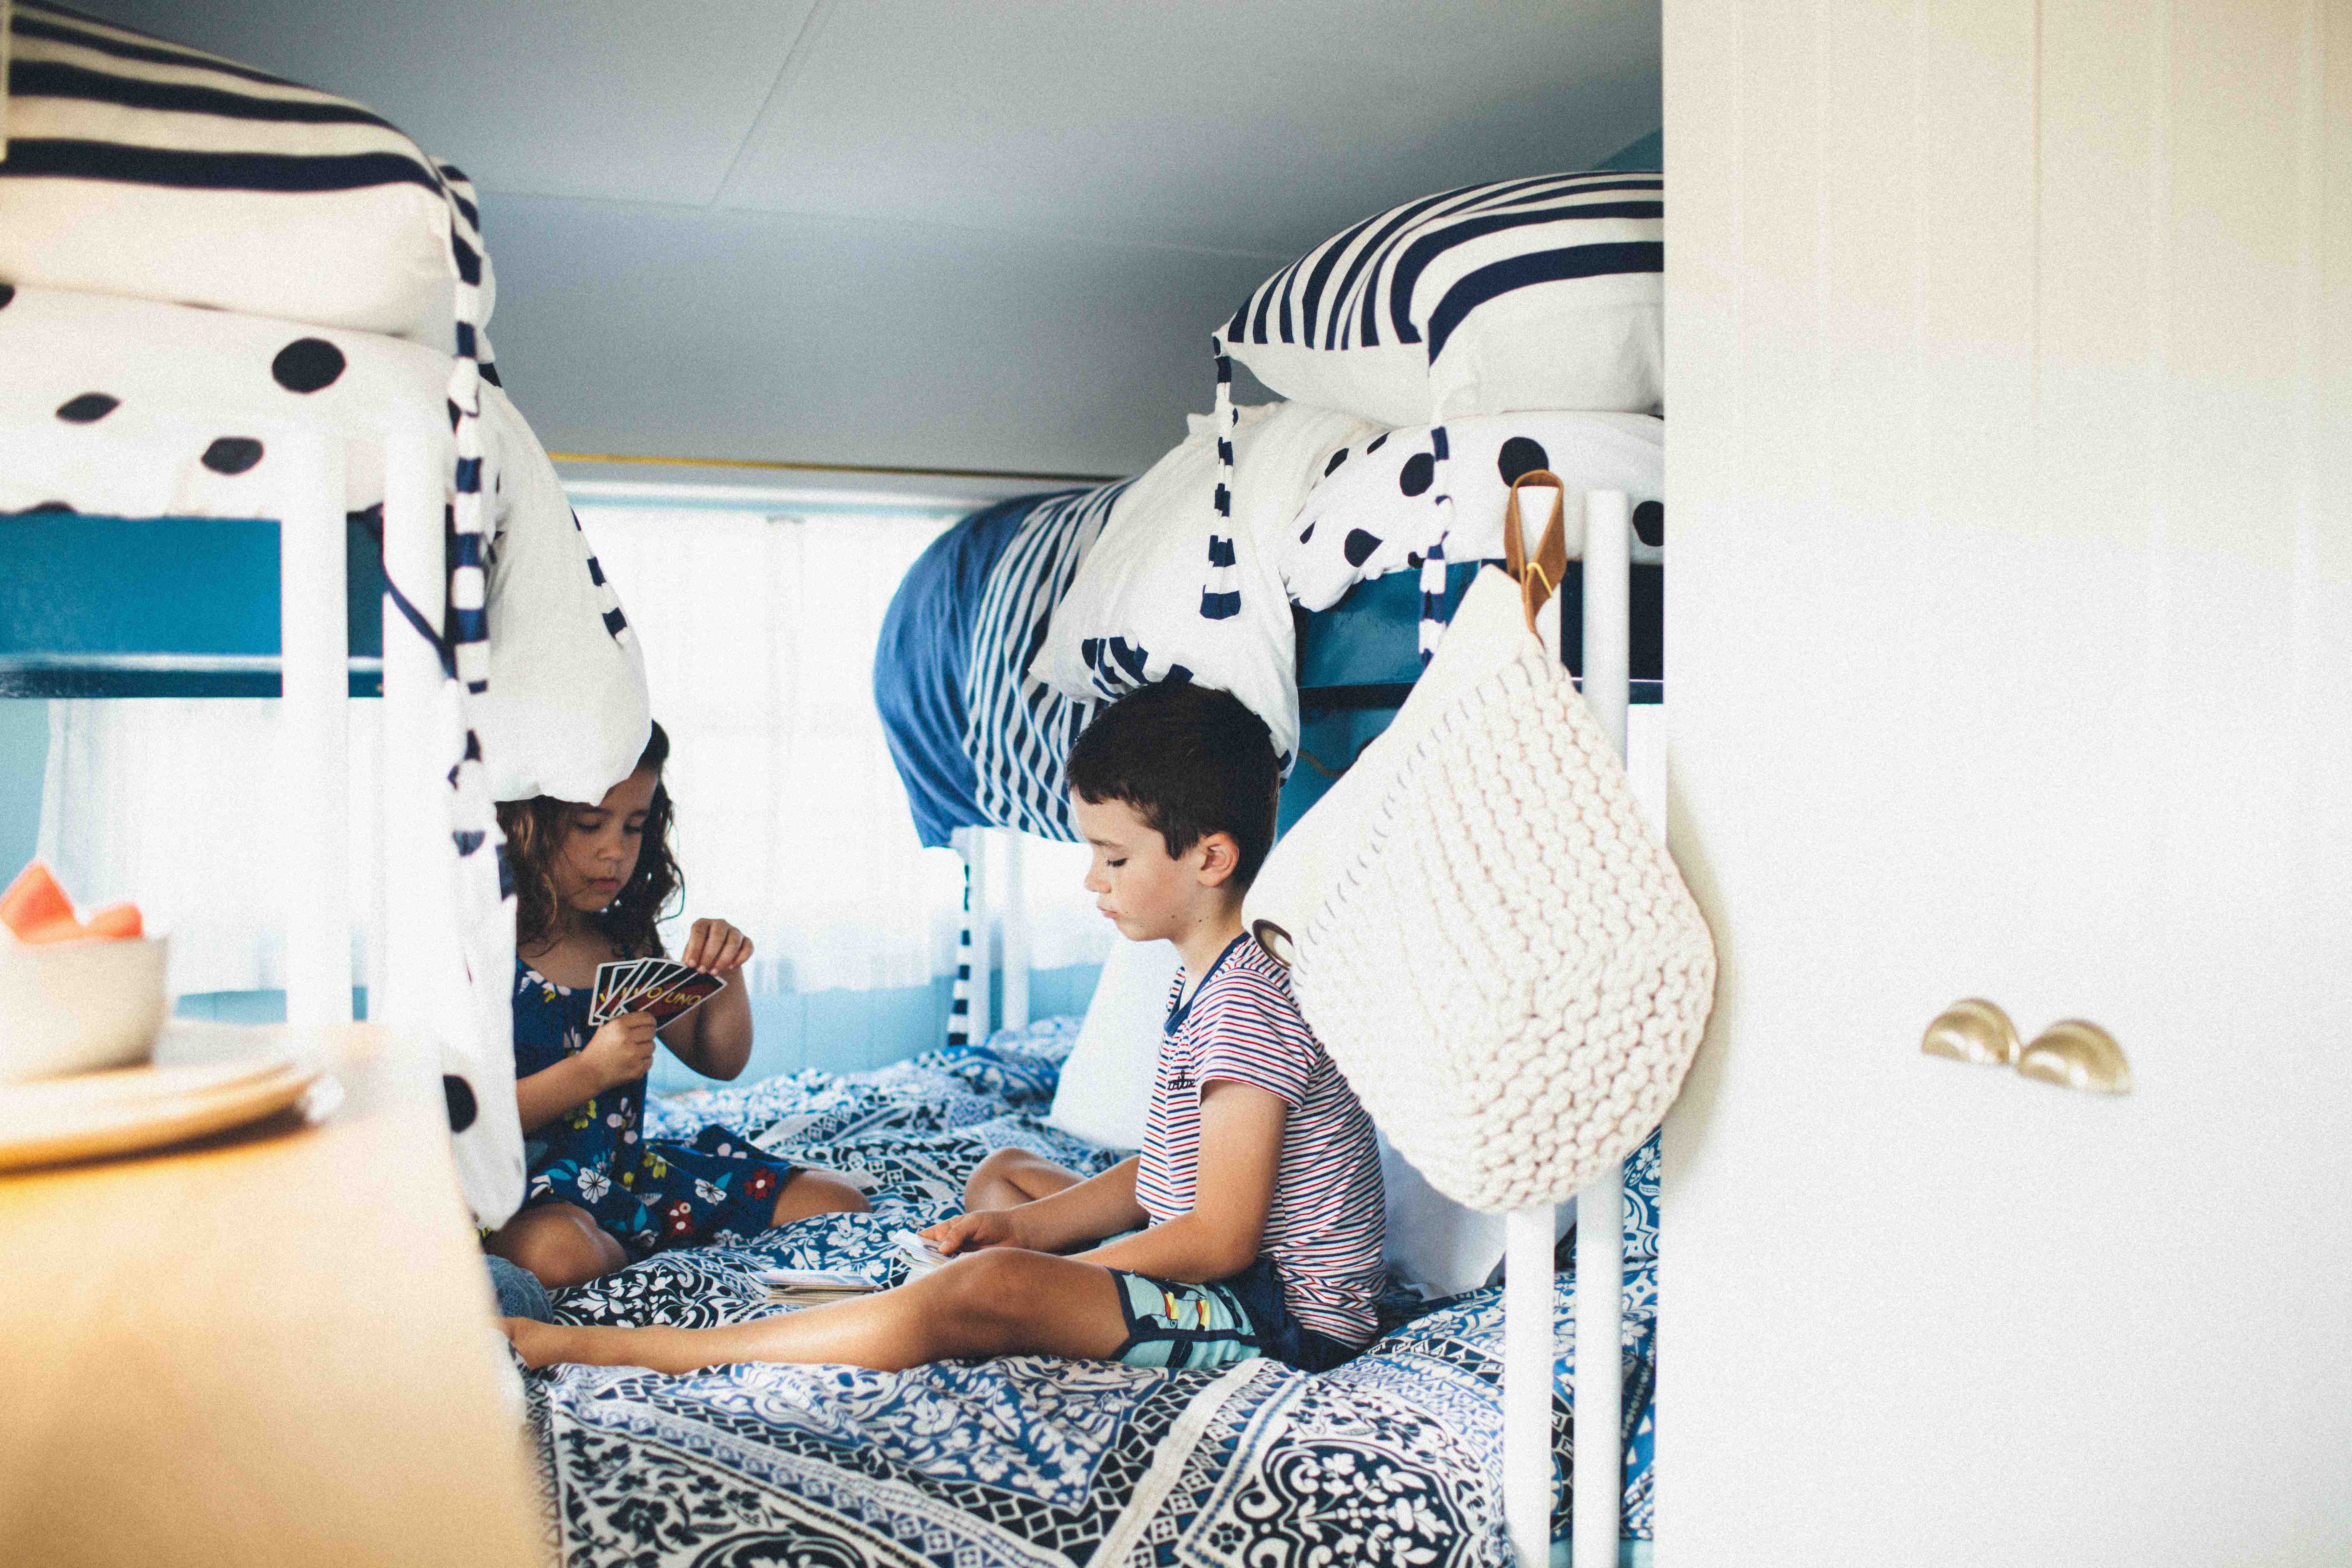
I got a little crazy with the patterns on the bedding, which I could do because the colour palette was so tonal. The kids polka dot fitted bed sheets are from Cotton On Kids and the striped quilt covers and pillow cases were from Linen House. Our bed is made up of a combination of Lorraine Lea quilt cover, a throw blanket from Kira & Kira and Citta Design cushion.
Dining area
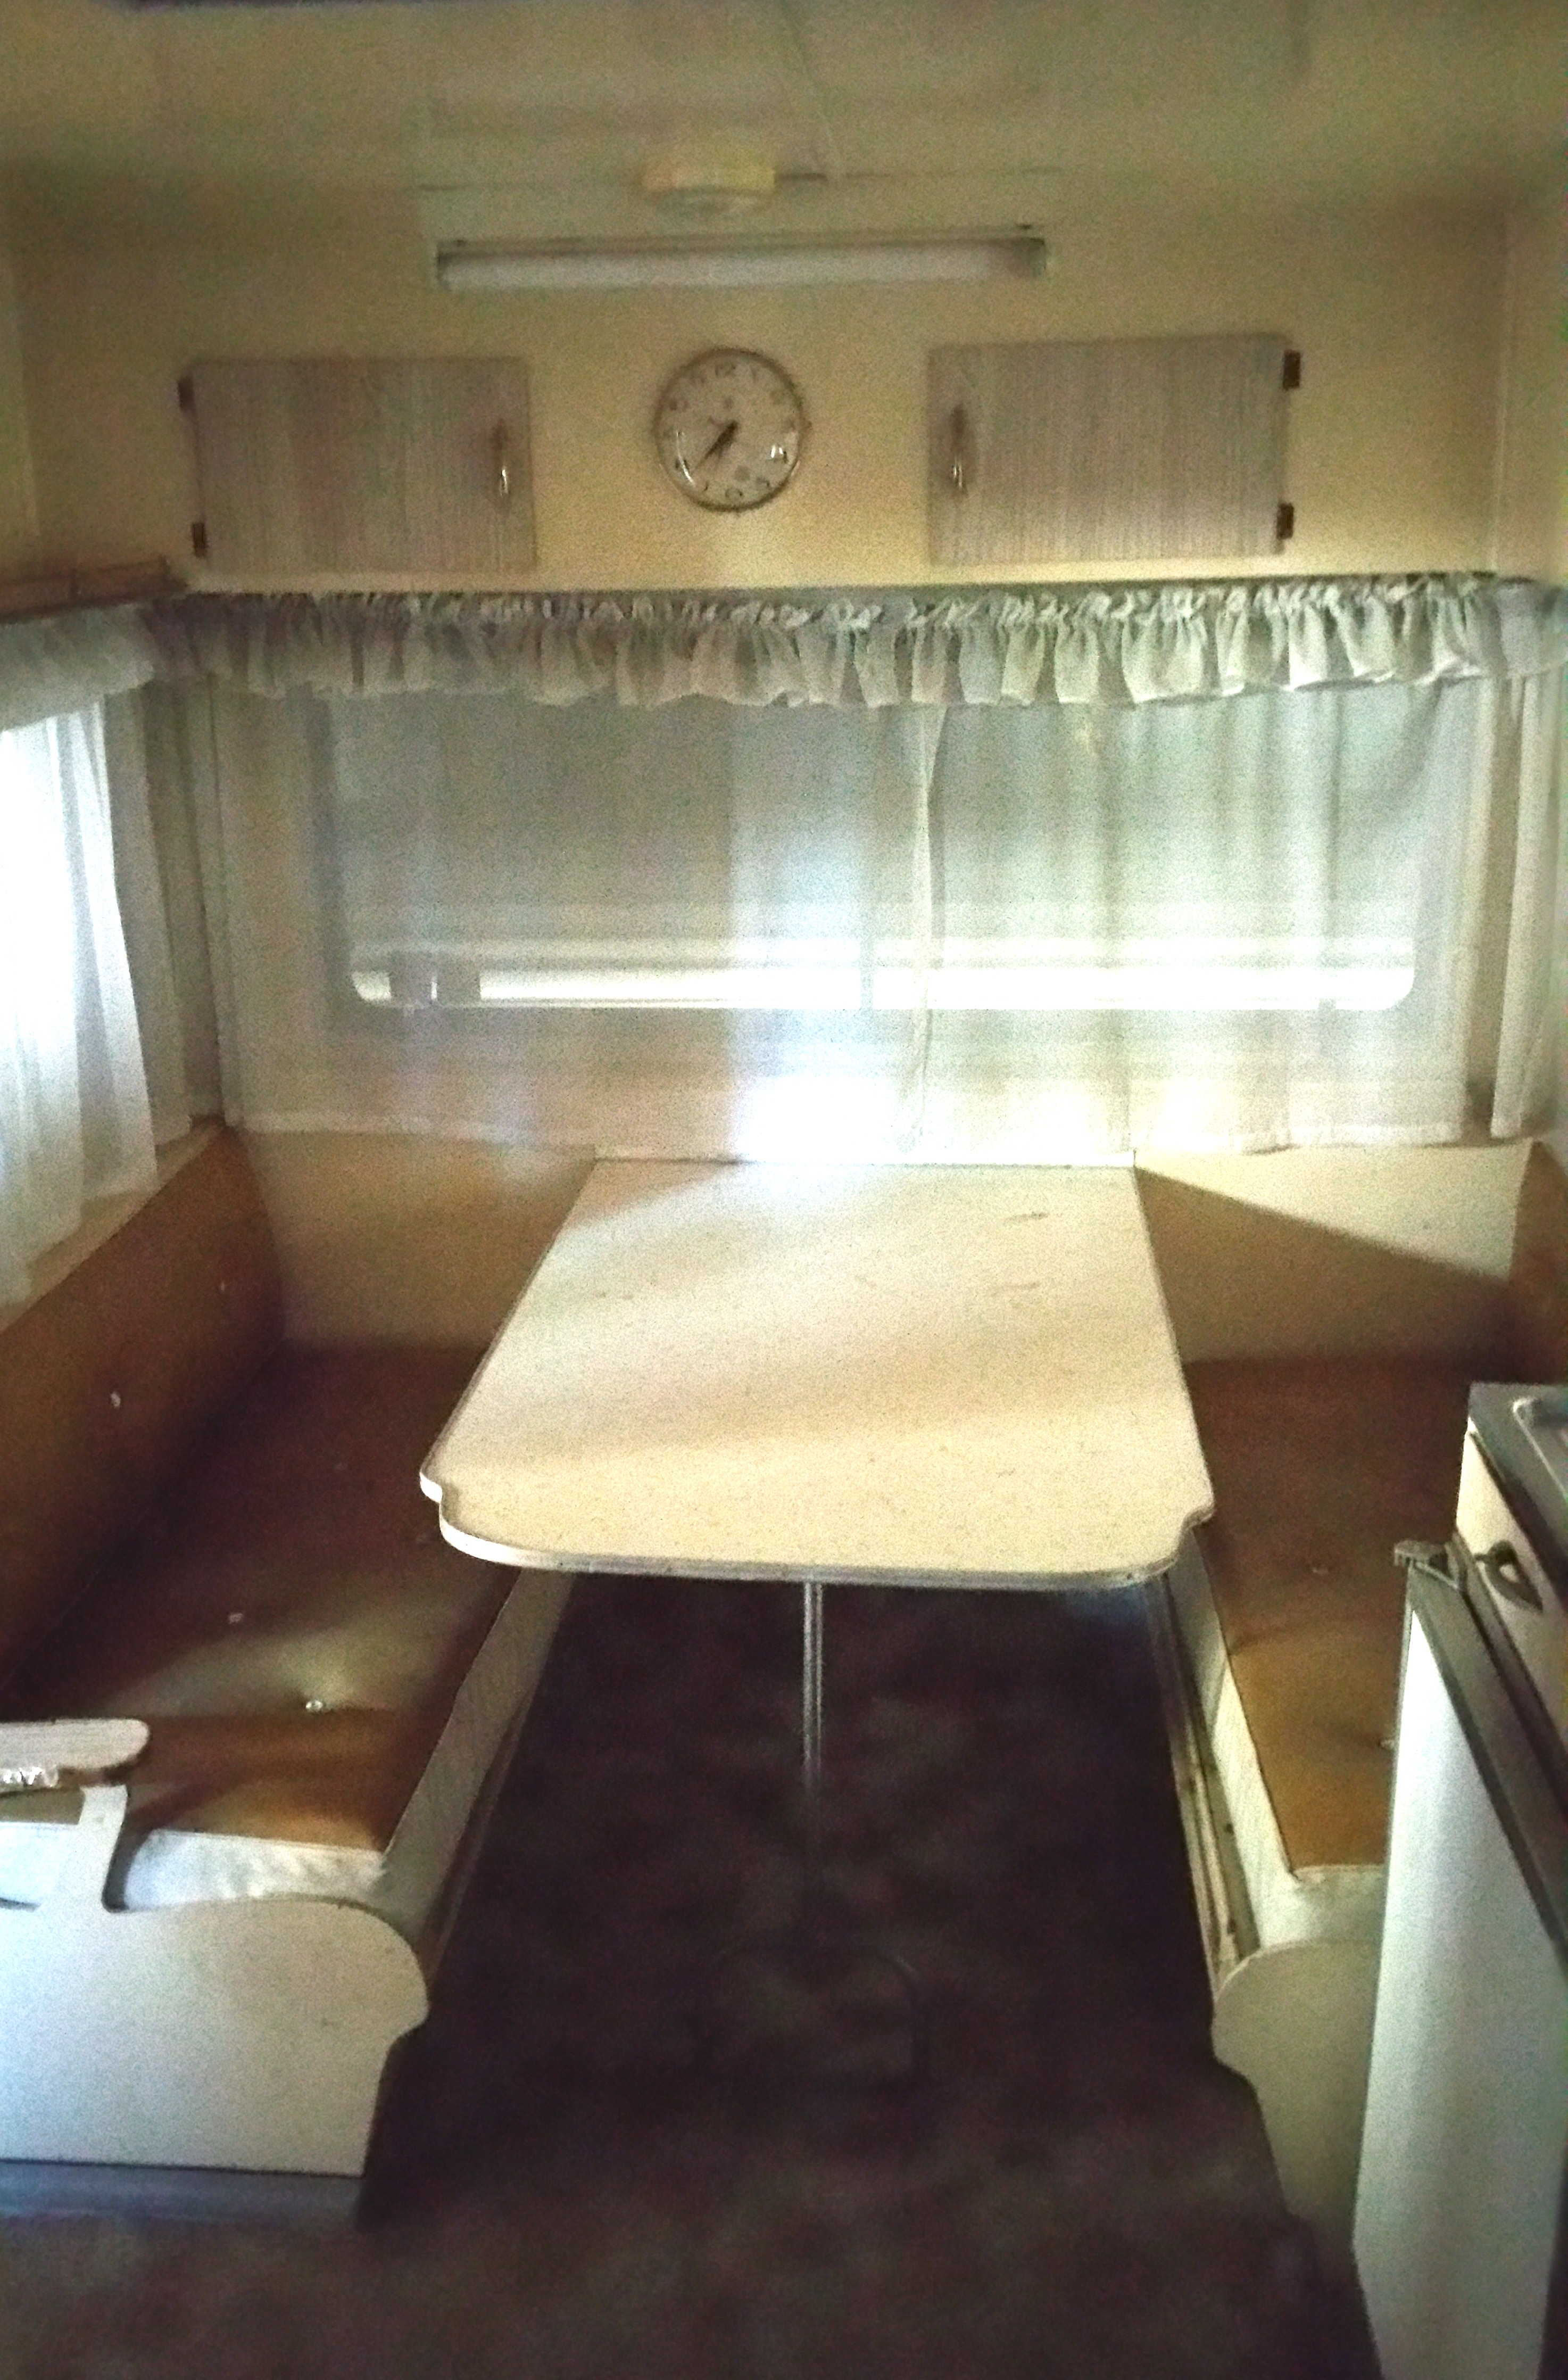
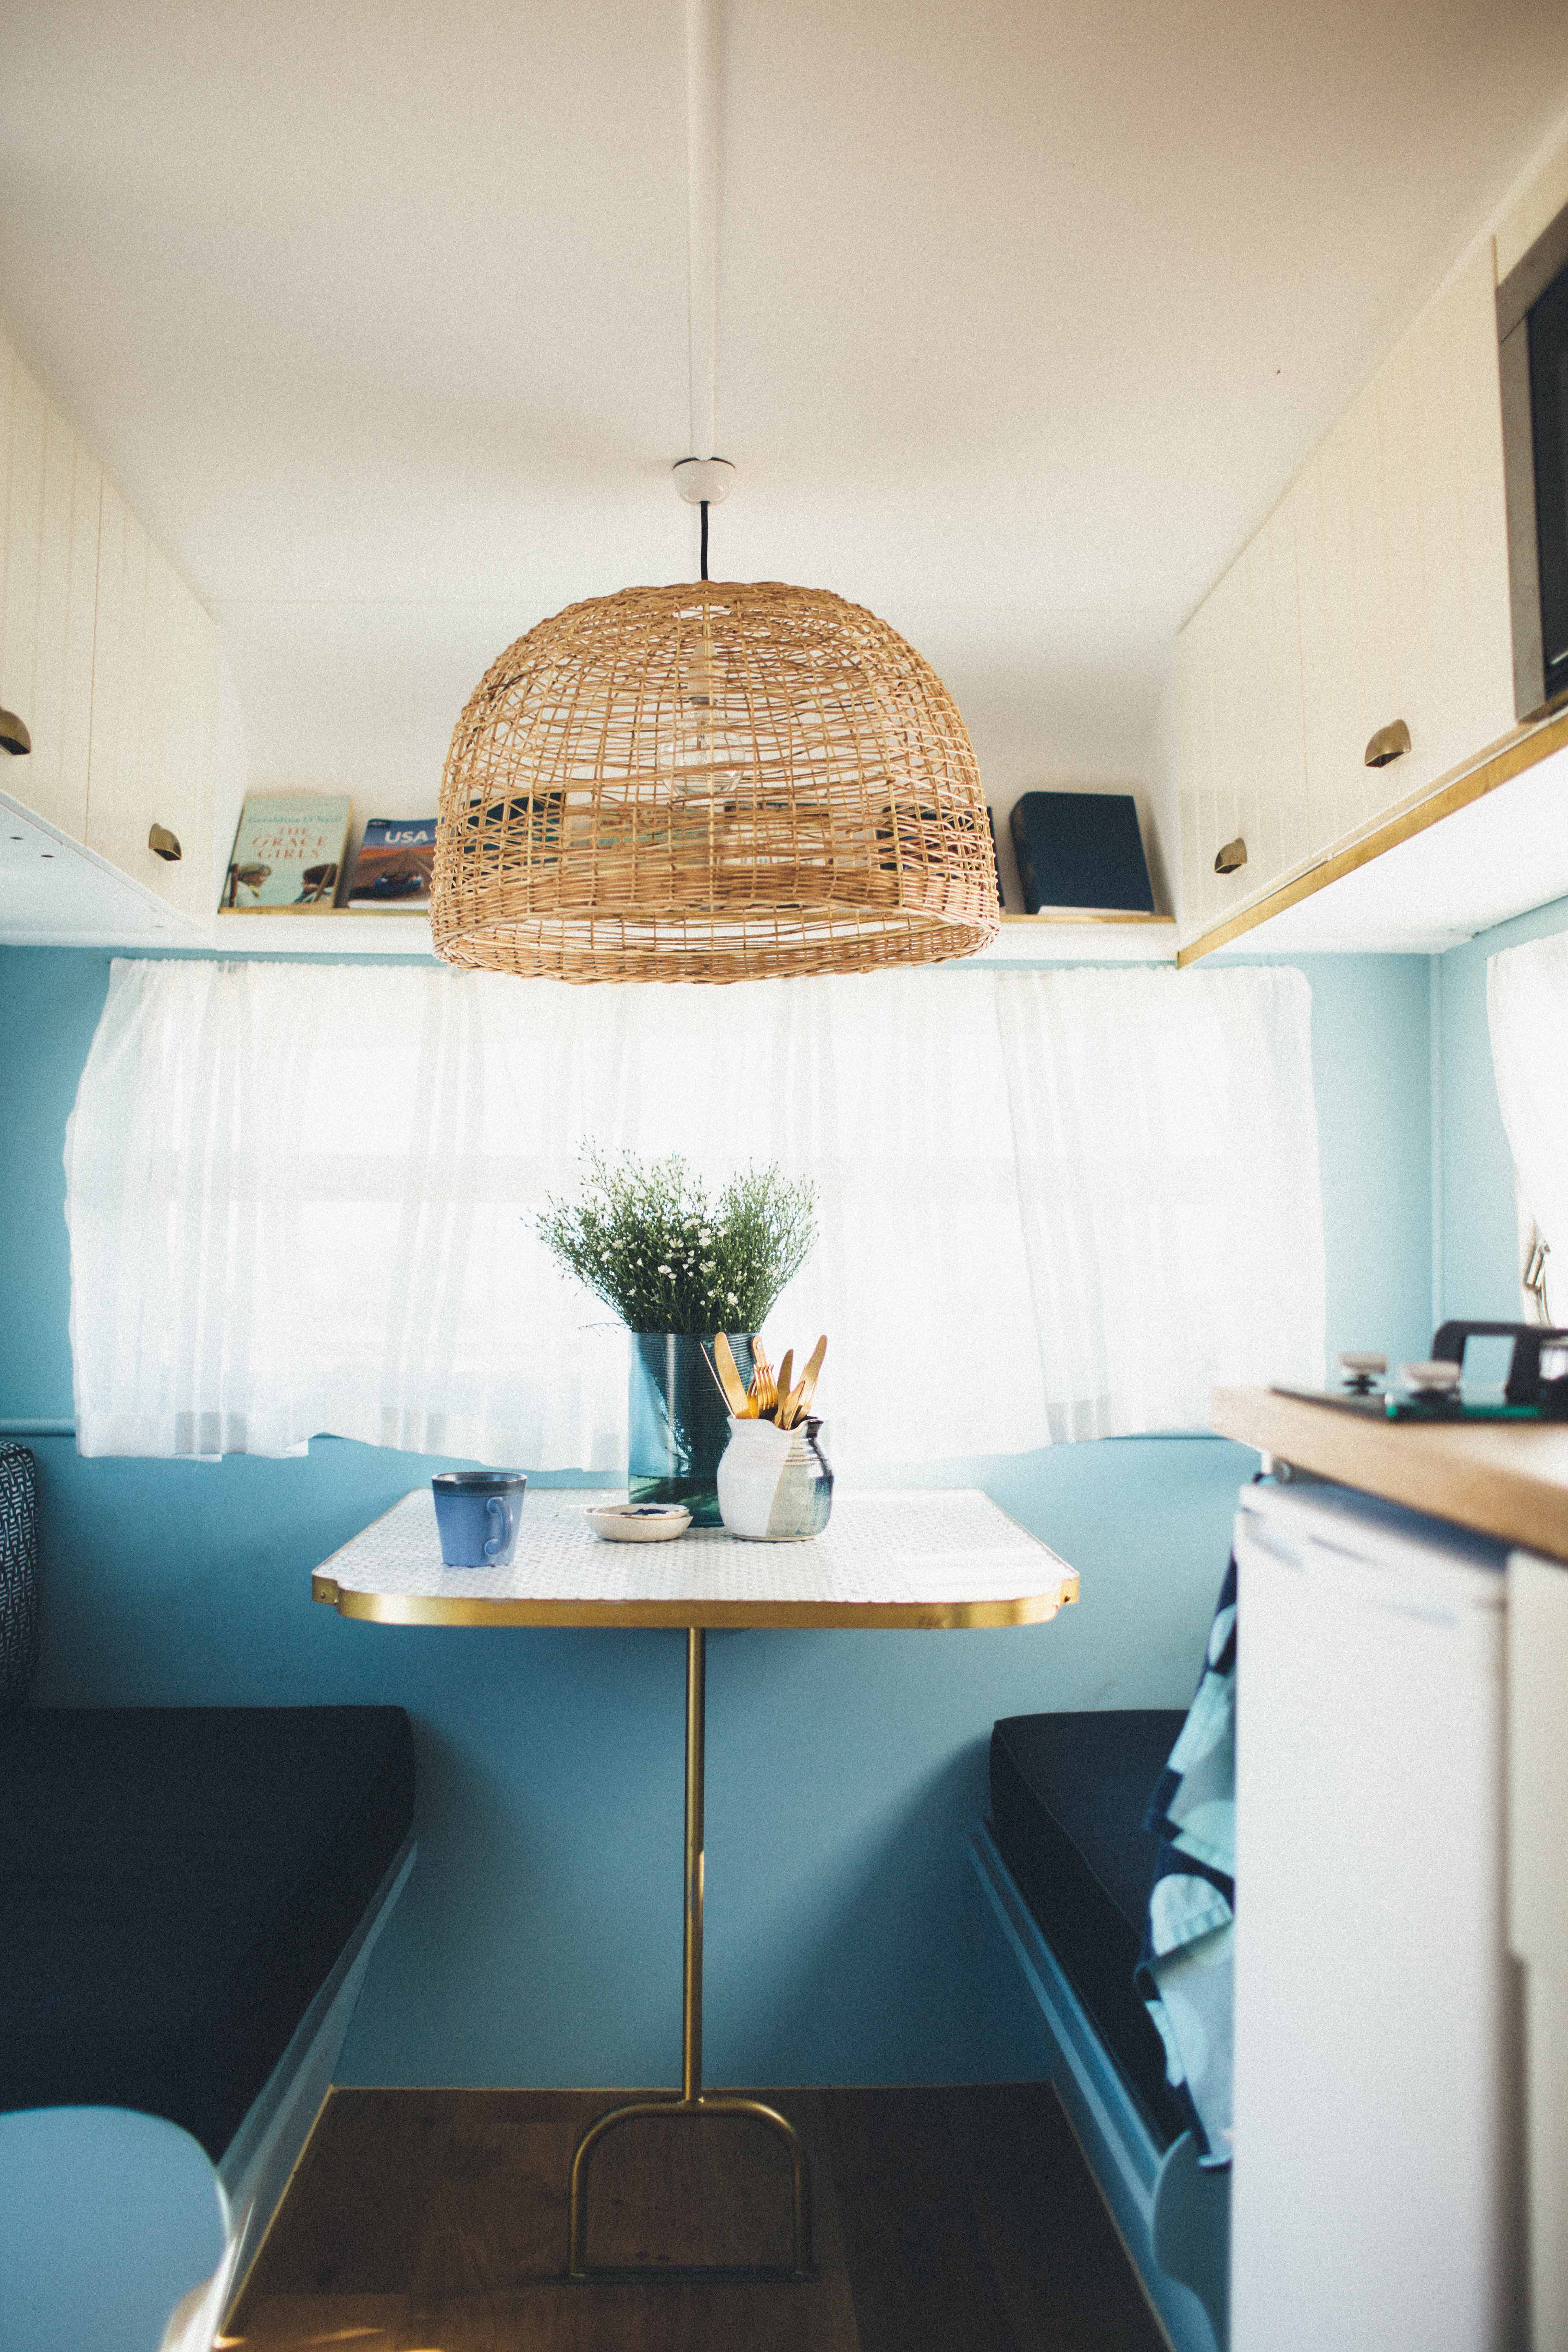
Ahh, my favourite part of the van, the dining zone. It’s this part of the caravan that remained most intact.
Dining area before
Dining area in progress

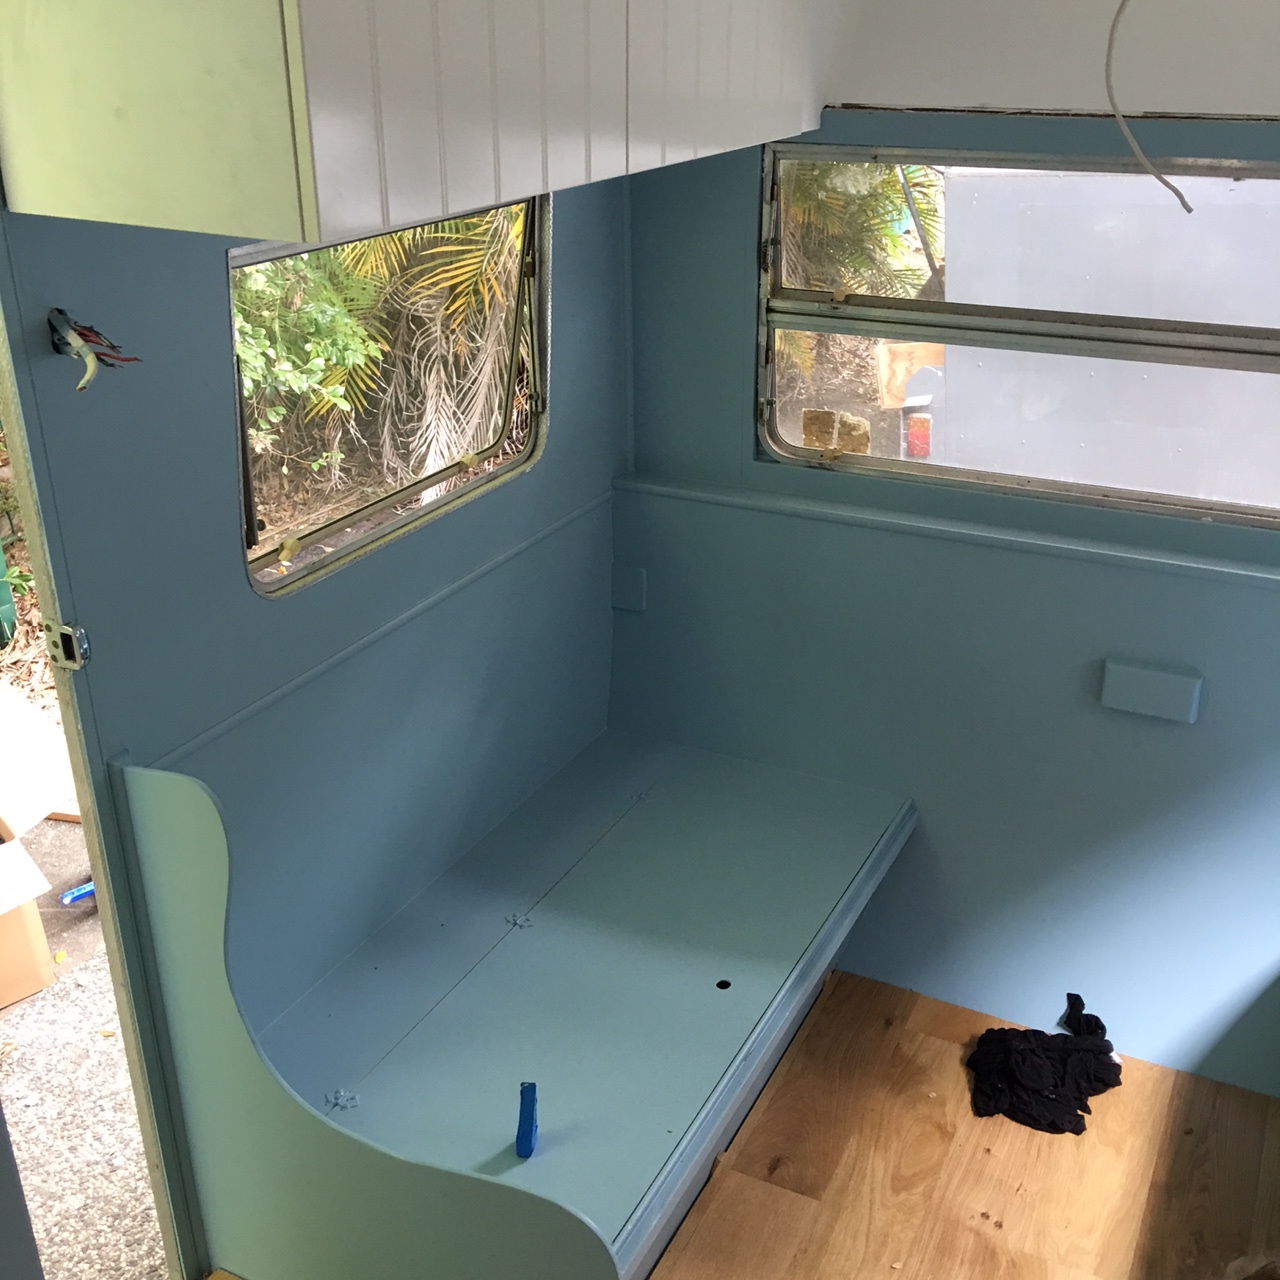
Michael laid Natural oak hardwood timber floating floors from DecoRug
The banquet seats in the dining area were in good shape, which was a bonus, as it saved us the cost and effort of having to rebuild them. It also would have been a real shame to not have been able to retain the sweet curves of the timber detail.
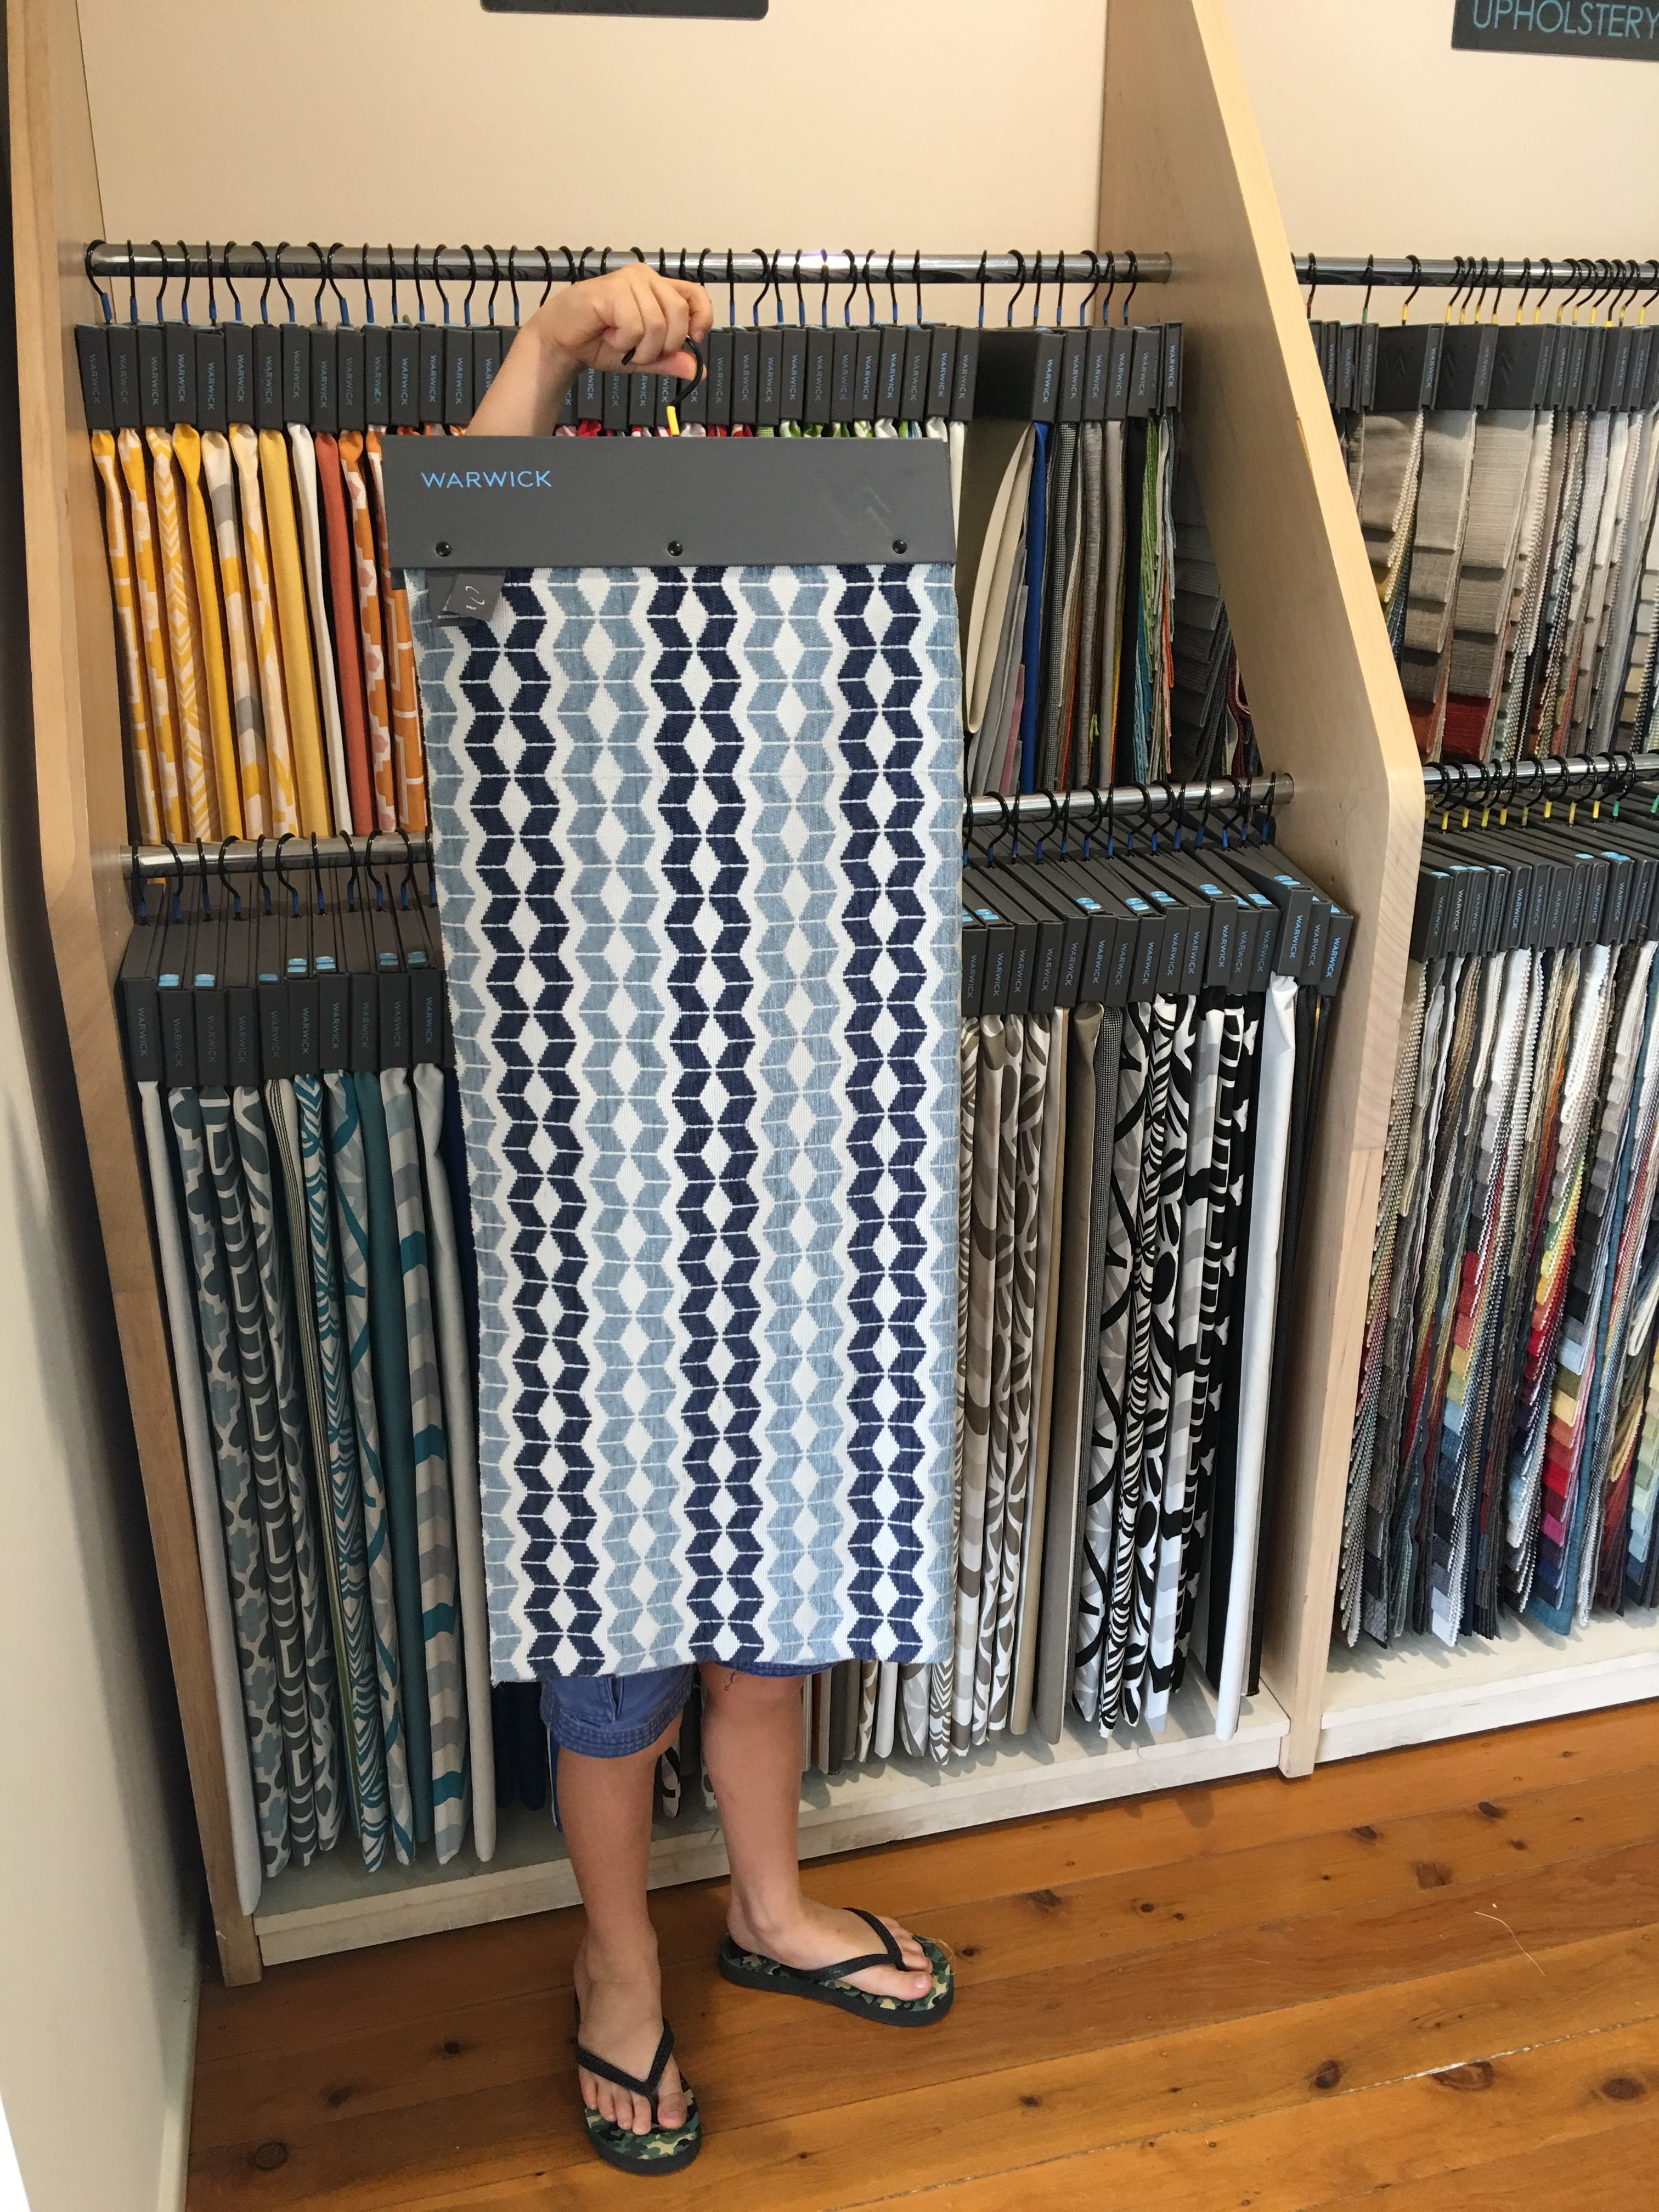
My pint sized shopping assistant, Paddy, helping me out. We didn’t go with this fabric but it was a contender.
Dining area after
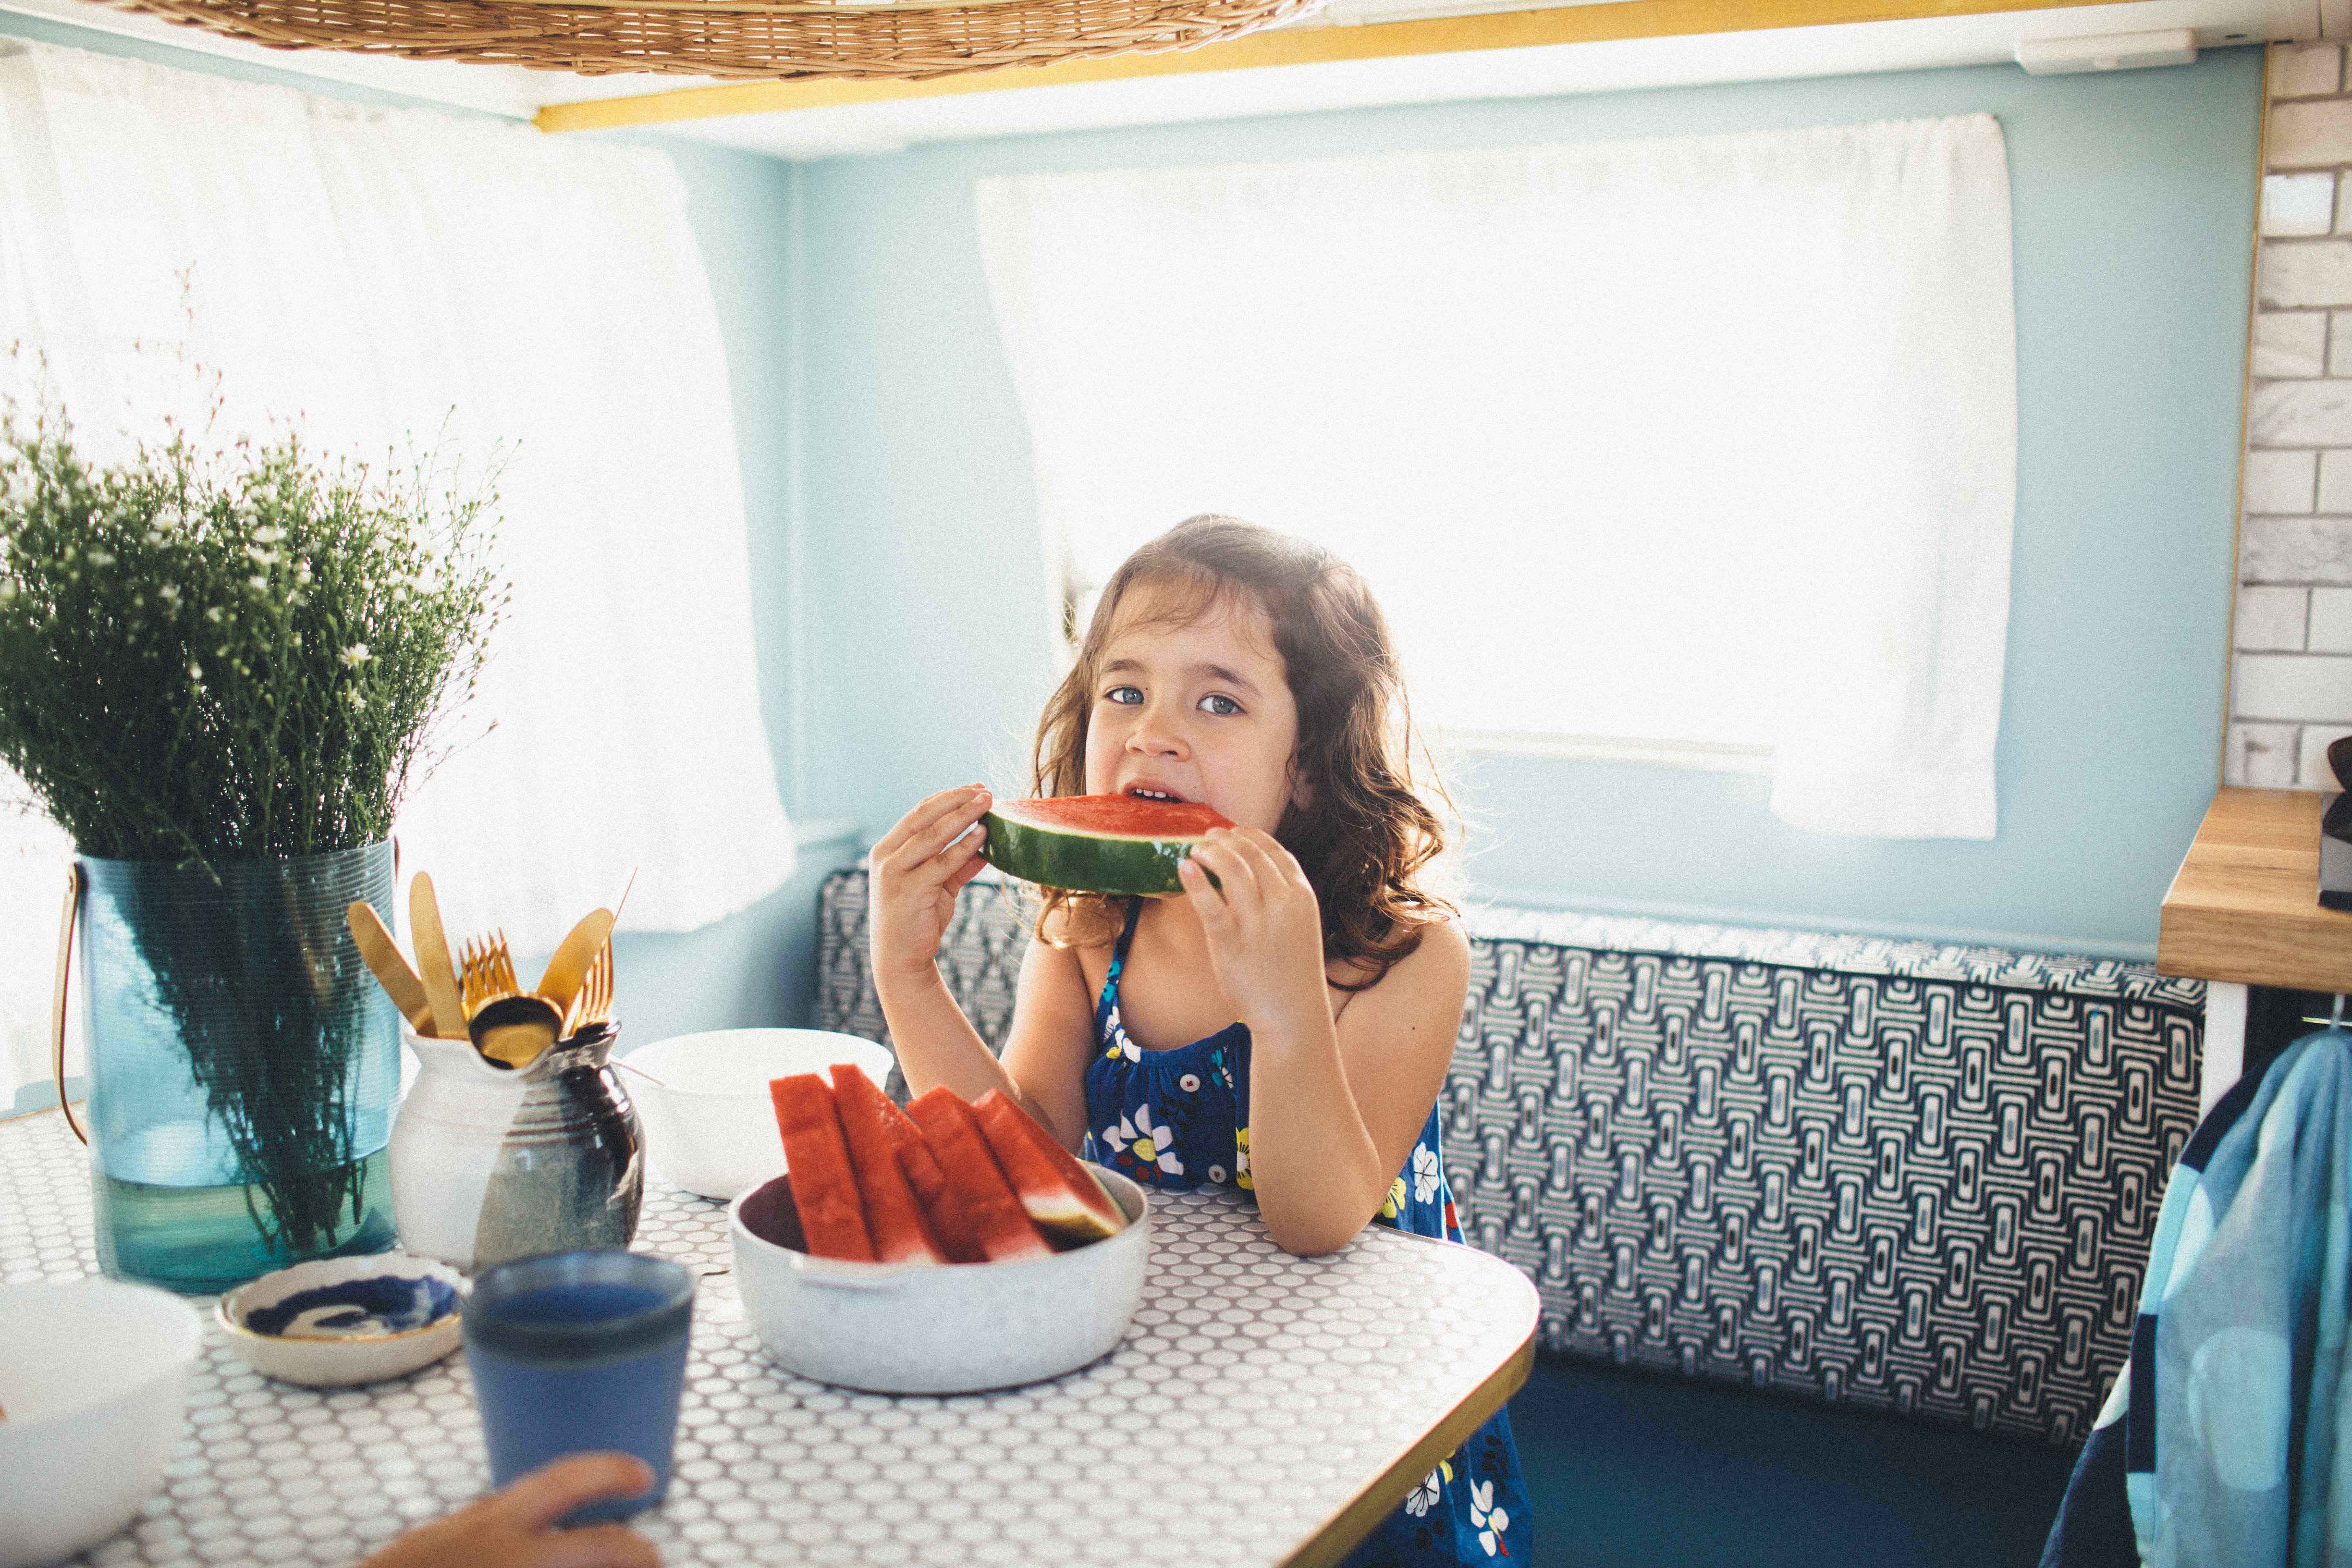
As for the bench cushions, we got rid of the inner spring inserts and purchased new foam. It was a good opportunity to reduce the weight of the van. For the back cushion fabric, initially I had set out in search of a stripe but when I saw this pattern (below) I knew it was the one. The design screamed 60’s to me, which paid respect to Millie’s origins. Michael was not so impressed with my selection but I was resolute. I’ve learnt to not let others weigh in on one aspect of a design choice when they aren’t across the bigger picture. So I just listened to his concerns, nodded my head in acknowledgement (not agreement) and carried on.
In hindsight, I wish I had opted for a patterned fabric for the base cushions because even though I used a durable outdoor fabric, being a block colour, it shows up dirt quite easily, which isn’t ideal when you’re beachside caravaning. Aesthetically though, I love it.
Gold Coasters might be interested to know that I get my reupholstery done by Foamworld, Burleigh Heads, for their competitive prices and good work. Anyone who has ever had anything reupholstered knows that you need to shop around for a good price because it can be cost prohibitive.
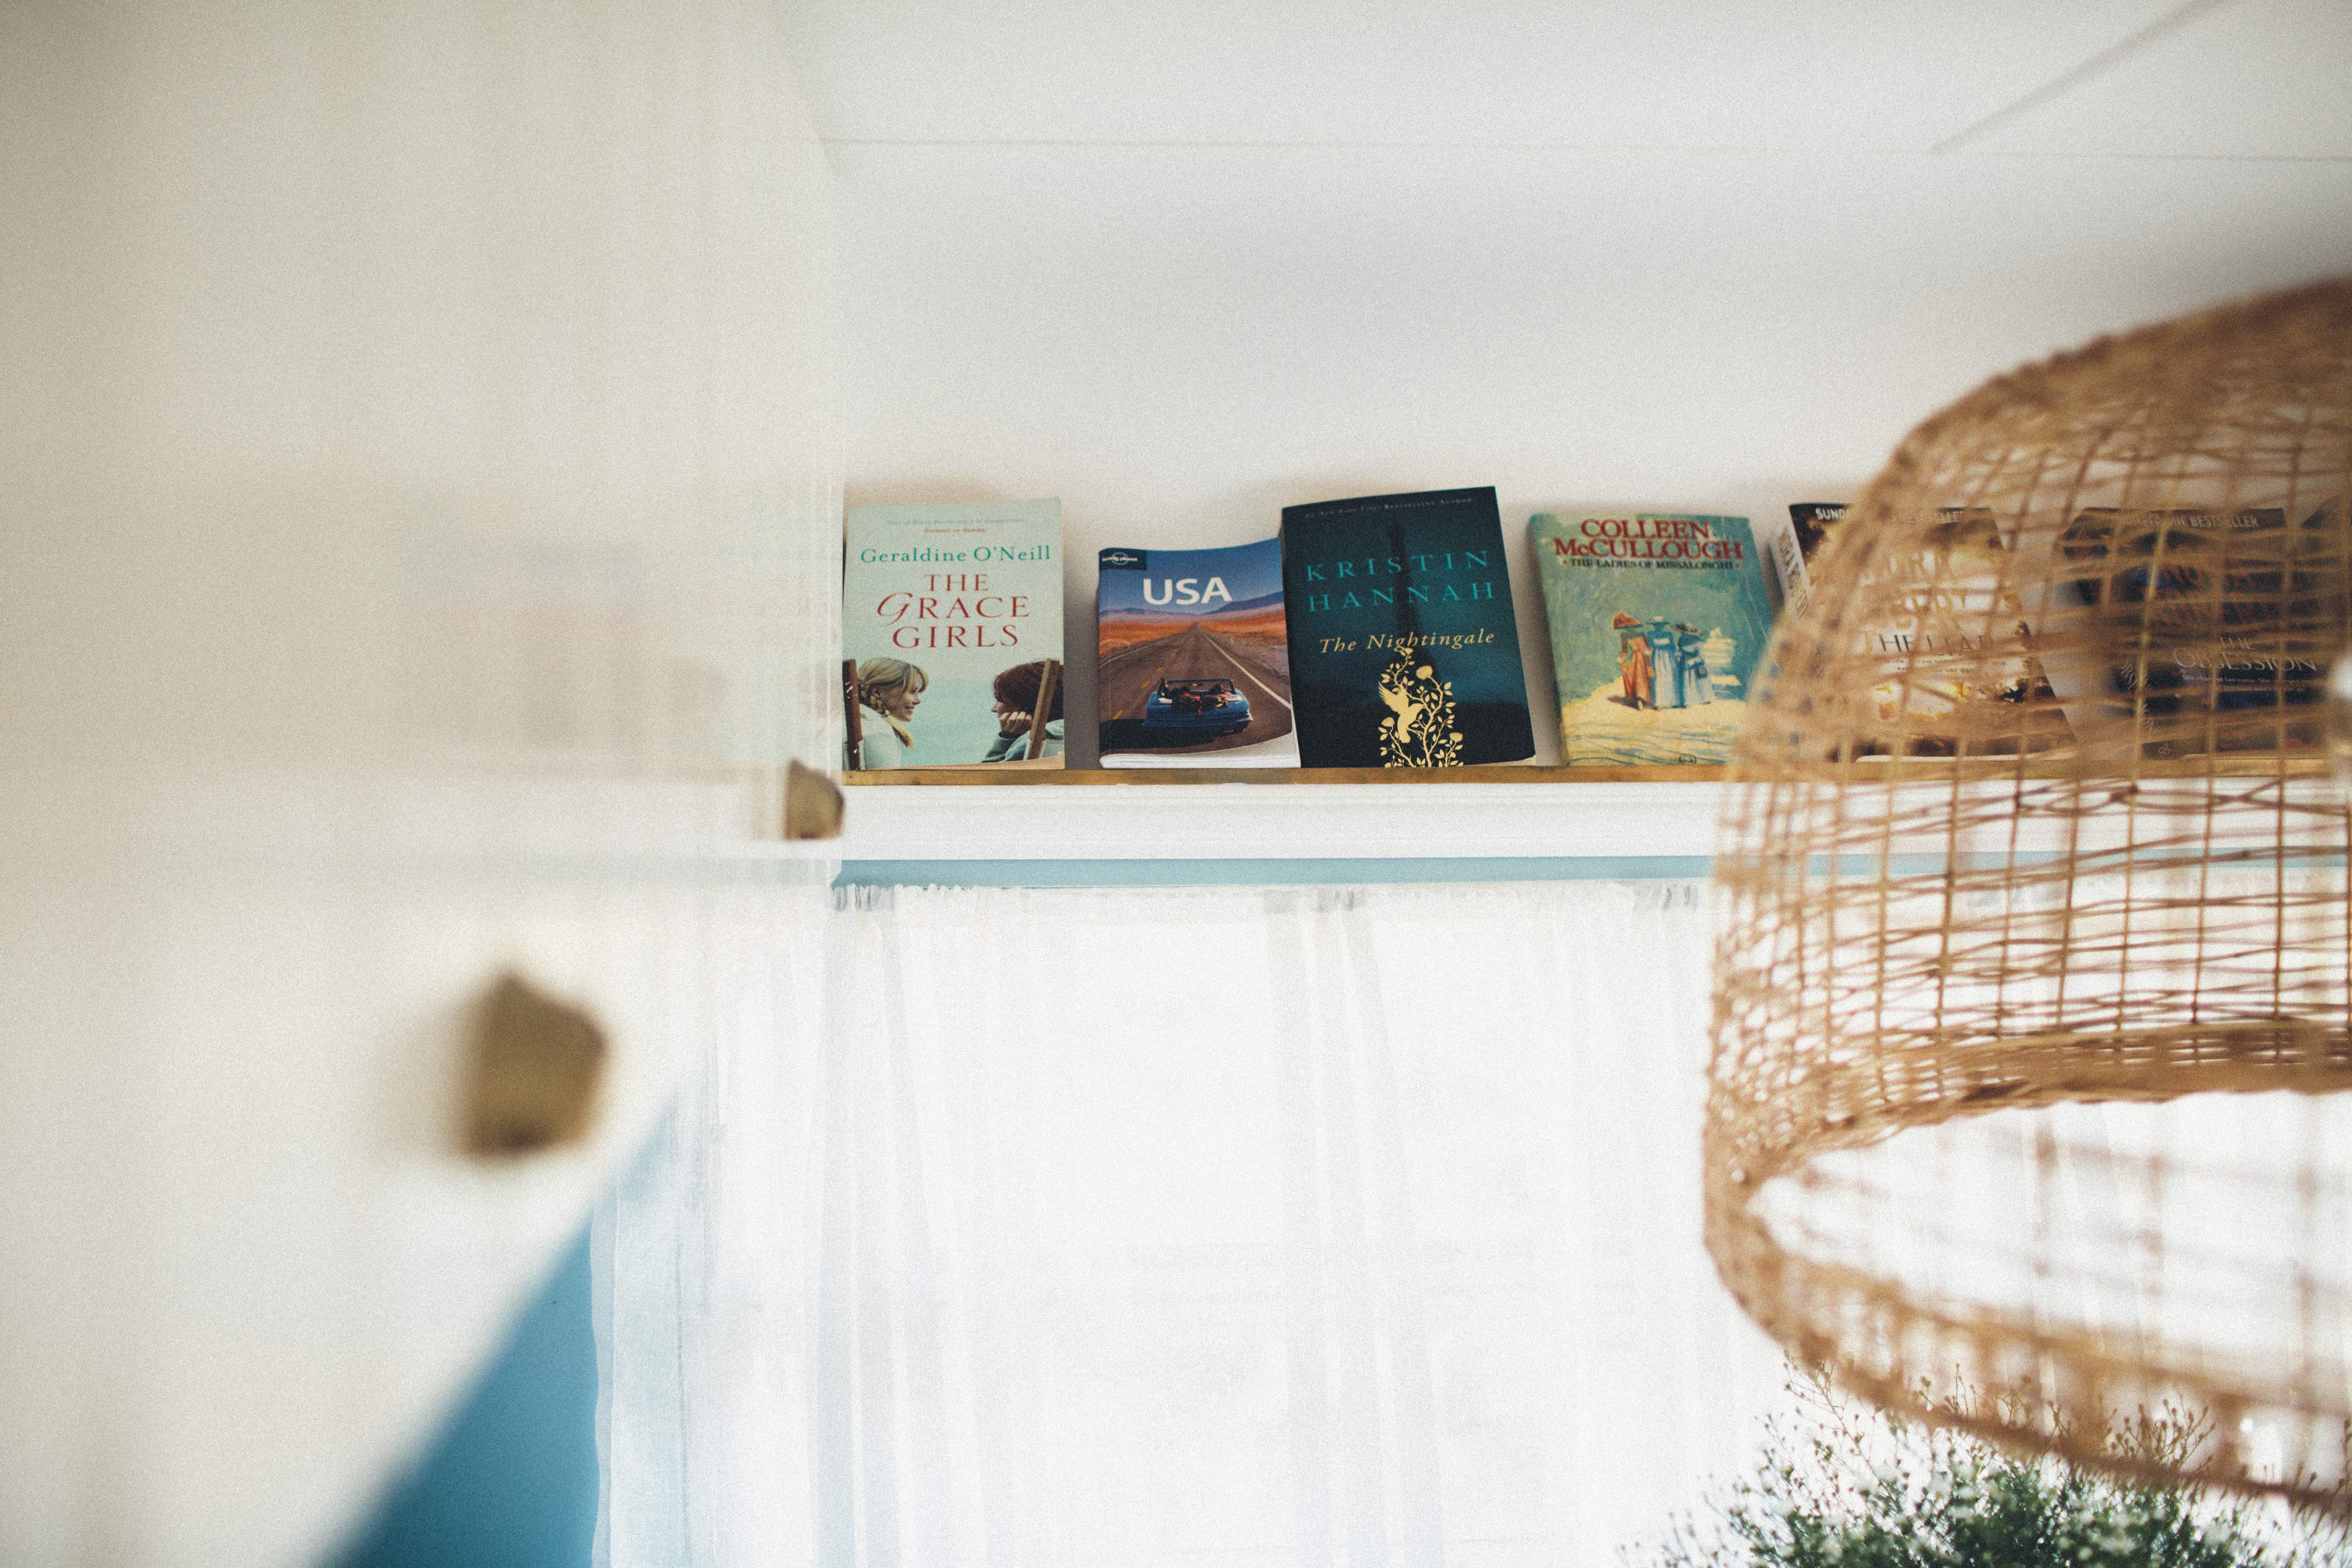
The shelf was accidental but is ideal for storing books
Michael nearly died when that rattan pendant arrived but I vowed that as long as the cabinet doors opened without hitting the light then it was staying. It was a victory for me. It’s hard not to love oversized lights. This one is from Wisteria Design, who are a wholesaler and don’t sell direct to public but you could always contact them re their stockists.
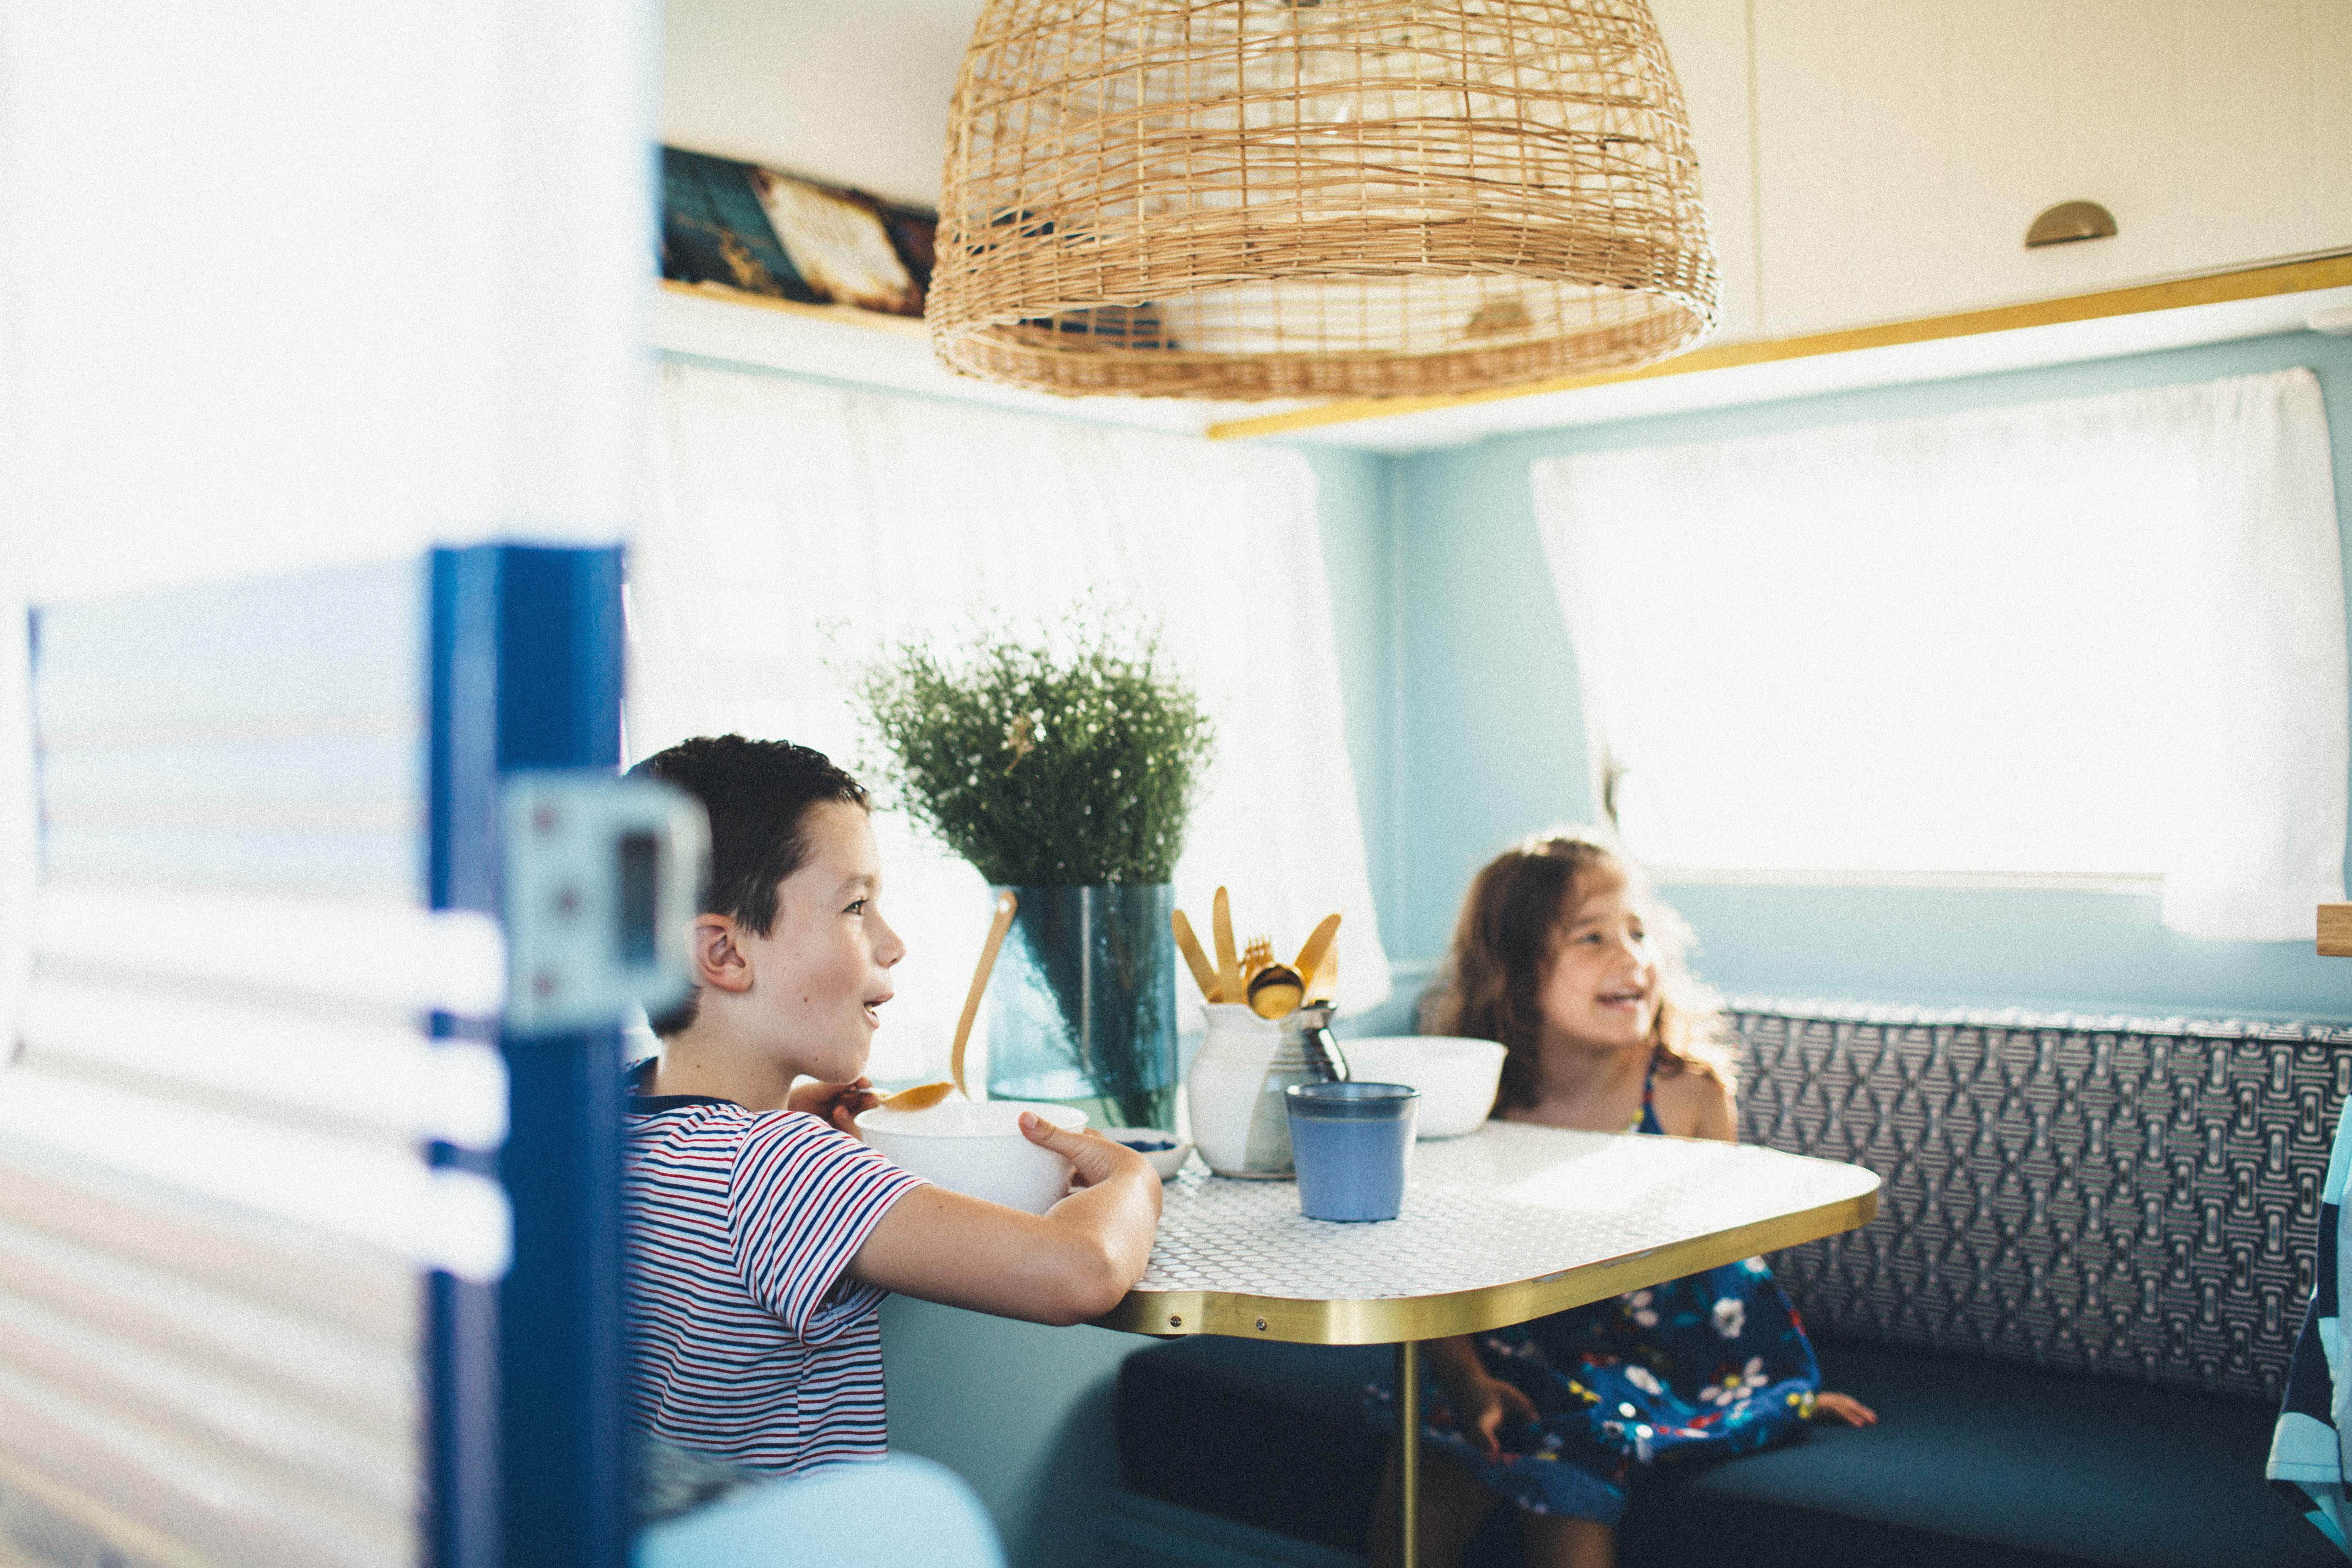
Credit where it’s due, it was Michael, who opted to use brass trims throughout and we all know that blues and golds are just the ultimate combination. He used it on the walls and under the overhead cabinetry to disguise LED strip lighting and around the dining table to finish off the table edge. He sprayed the original table legs gold to replicate brass.
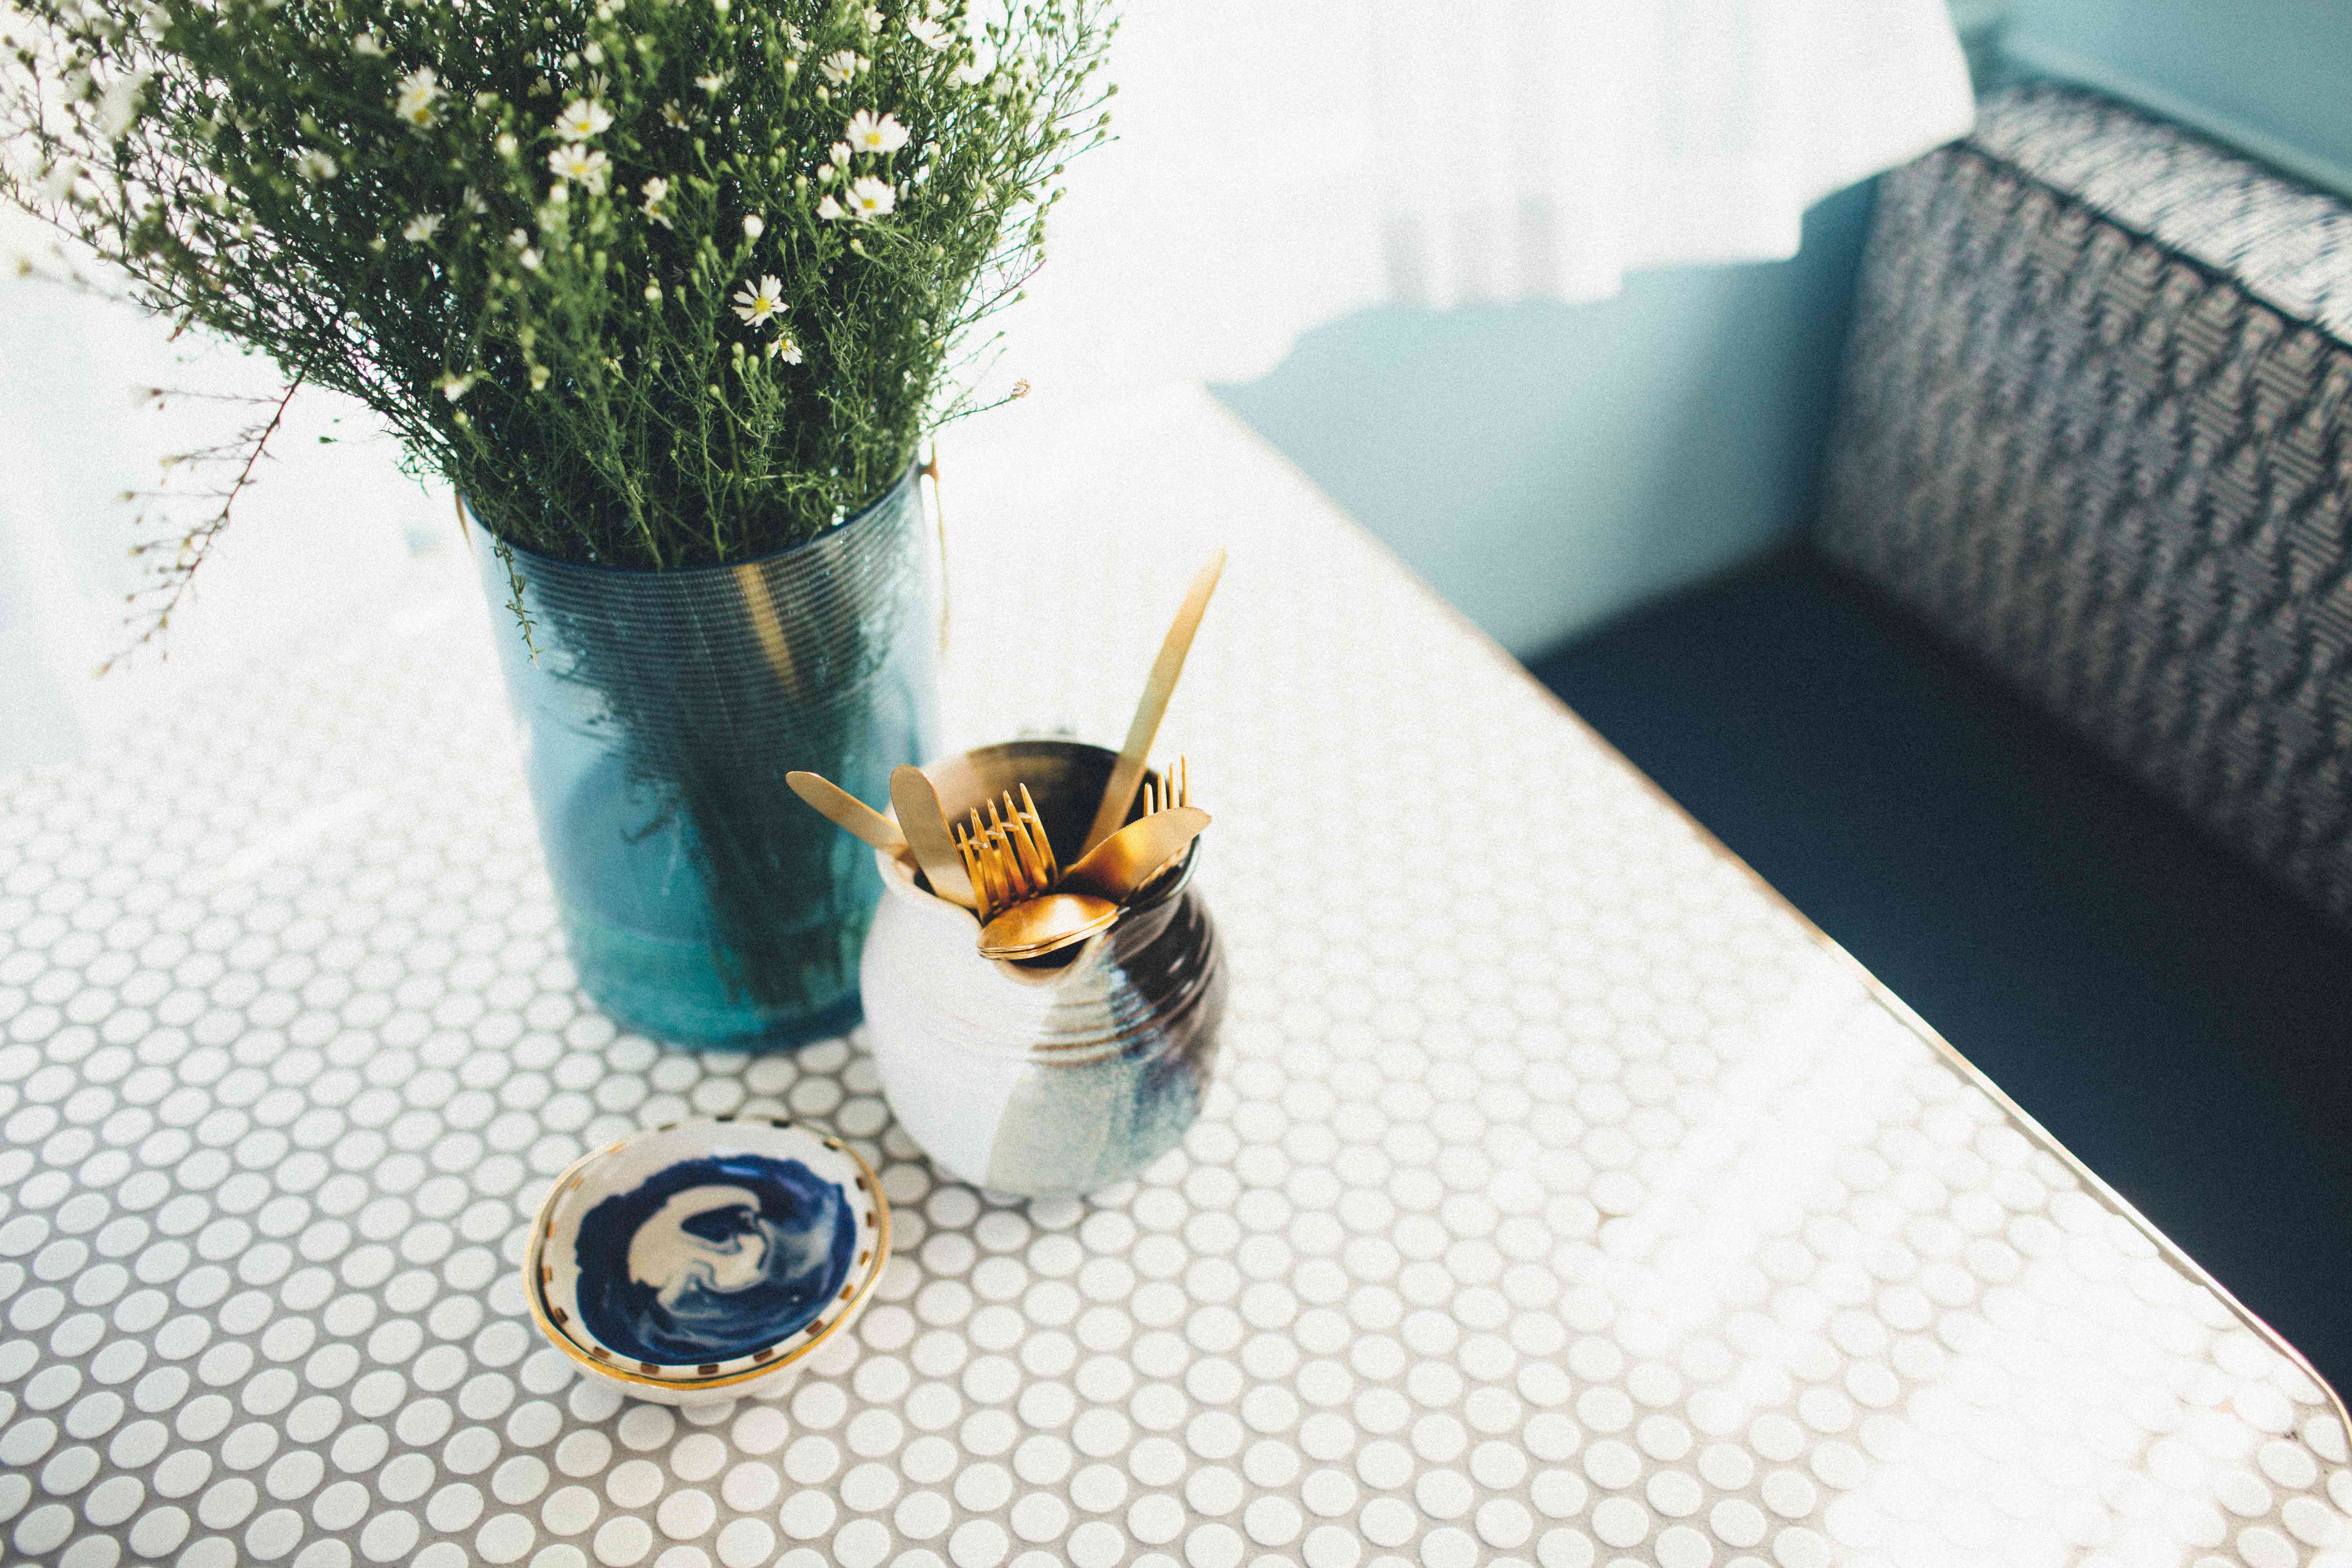
Tall blue vase from Kira & Kira; Blue/white jug is an op shop find; Gold cutlery from Zara Home; Small bowls from Liquorice Moon.
Now, let’s talk about this dining table, my favourite feature of the whole van. This is, in fact, the original table that we shortened in length slightly and recovered in white gloss penny round mosaics and medium grey grout from National Tiles. I’ve wanted to try this for a while and the caravan provided the ideal opportunity. The pattern is just so so good. I love that it contrasts with the pattern of the banquet back cushion and unlike hexagonals, penny rounds won’t date. The gloss finish on the tile also makes for easy cleaning. I don’t think a matte tile would withstand heavy use.
Michael looking pretty next to my pretty linen look striped curtains.
Ha you’d think that with all that pattern and texture that I’d stop at the curtains. Nope, I went with a polyester linen look with a subtle stripe, which I LOVE LOVE LOVE! I sourced the fabric from Warwick Fabric, who are also wholesalers and don’t sell retail so you would need to have your sewer order your fabric. I purchased the curtain cord and hooks from ebay, and had the curtains sewed by a local sewer. As a sheer, they don’t do much more than filter the light coming in but they do provide enough privacy and sure do look pretty.
Some approximate costs
- The caravan – $3.3k (a steal from Gumtree)
- Panel painting – $3.2k (this process isn’t cheap but it was worth it, as it’s not something we could do ourselves)
- Decals – under $500
- Bench seat reupholstery – $750-$1000 (for labour only – I sourced the material myself)
- Ikea cabinetry, benchtop, wall lights, tapware – $2k (very roughly)
- Curtains – $250 including material
Trades/Services required
- Carpenter (Michael)
- Electrician – Contemporary Electrical
- Plumber – Fusion All Plumbing
- Auto painter – Lowco Customs
- Signwriting/decal – Advanced Signworks
You can see more images of the final product here and watch the video below to see the renovation unfold.
That’s about it but if I haven’t addressed something that you may be curious about, feel free to comment below.
Carlene xx
Images by Carly Brown Photography.
March 1, 2017 at 7:03 pm
Love this font! Do you mind sharing what it’s called? Thanks!
March 1, 2017 at 8:26 pm
Thanks Jasmine. It’s called Bromello.
March 1, 2017 at 8:32 pm
Absolutely love it. Every single, beautifully considered detail. I am interested in the addition of the bunks…and the process of building them… enjoy your lively Millie ????
March 2, 2017 at 6:52 am
Thank you, Jen. The bunks are made from plywood and the posts are 42mm dowel, which are secured to the base of the King bed and to the battens in the wall. This is a job for a carpenter. x
March 4, 2017 at 11:08 pm
Hi! I’m obsessed with gorgeous Millie. We’ve just recently purchased an old Millie of our own to renovate also. Were you concerned at all about using tiles as your kitchen splashback? Movement, weight etc. Thanks!
March 5, 2017 at 8:25 am
Hi Yasmin, thank you! We love her! Weight should come into play for sure but in our case, we reduced it elsewhere. Michael was conscious of movement in the tiles but I was happy to risk it. They’re a mosaic and come on sheets so maybe that helps. I can tell you that we’ve done about 8 trips and there has been no sign of grout cracking at this point. If you don’t want to risk it though, go with the Stick and Go wall tiles instead.
March 14, 2017 at 11:23 am
We are almost ready to buy a 1980 viscount grand tourer that is going to require a lot of work! Hubby is also a builder so thankfully we have that covered. I just devoured this page for ideas! I love this!!
March 14, 2017 at 12:10 pm
Ah good! Best of luck!
April 22, 2017 at 8:54 am
Brilliant! Good luck with the renovation. C
March 31, 2017 at 4:22 pm
Hi can you please tell me the size of the caravan. I’m tossing up between a 13ft and a 16ft
Thanks
April 2, 2017 at 10:03 am
Our’s is a 16ft. For a young family I wouldn’t advise going any smaller. C
April 2, 2017 at 12:16 pm
Millie looks great!
I was wondering if you could provide more details on the Warwick fabrics used on the bench seats and curtains please?
April 2, 2017 at 4:52 pm
Hi Tara,
The bottom seat was a Navy outdoor fabric and re the back cushion fabric, I can’t find the the name but if you take the pic in they will be able to help you..
April 2, 2017 at 12:29 pm
Sorry, also some details on the flooring would be fantastic?
Thankyou 🙂
April 2, 2017 at 4:16 pm
We used an engineered timber floor from Decorug, called Natural oak.
April 11, 2017 at 3:02 pm
Hi did you use semi gloss for the walls or just the furniture? And have you got a coating on the table? It looks like it has coating over the grout
Thanks
Alex
April 11, 2017 at 5:44 pm
Hi Alex,
We used semi-gloss only on the bunks but I wish I had also used it on the dining seating because they are getting marked. There is no seal on the table. I used a gloss tile for easy maintenance and we used Mapei grout.
April 12, 2017 at 8:15 pm
Hi again, did you use the besta wall cabinets? how did you mount them to the wall? I have them in my house but that’s a more solid wall and we screwed it into wall studs
Thanks
April 22, 2017 at 8:45 am
ummmm the overhead cabinets might have been Besta. We can’t remember exactly, sorry but someone at Ikea will be able to tell you if you show them a pic. They are secured to the framework behind the wall sheets. C
April 18, 2017 at 7:30 pm
Can you please tell me what you used to wrap around the table edge? And where you got it please I can’t find anything at bunnings that bends well
Thanks
Allan
April 21, 2017 at 7:29 pm
Thank you. It’s from George White who I believe are national. C
April 18, 2017 at 11:04 pm
Hi Guys ????????
Just wondering where you got all of your brass trimming from that was used around the table etc?
Thankyou!
P.s. Totally in love with Millie btw ????
April 21, 2017 at 7:28 pm
Thank you. It’s from George White who I believe are national.
June 27, 2017 at 6:51 pm
Hi, we are about to buy a 1978 millard and do something similar to Millie. What kind of oven and cooktop did you use and where from? Thanks.
June 28, 2017 at 6:19 am
Did you install a water pump for the tap?
June 28, 2017 at 11:24 am
Hi Nigel,
No we didn’t on ours because we stay at caravan parks and utilise their water outlets.
June 28, 2017 at 11:25 am
Hi Nigel
We don’t have an oven – we keep it really simple when camping – and our cook top is a gas two-burner.
July 20, 2017 at 6:23 pm
Looove what you’ve done! Quick question – is the VJ Pannelling 9mm MDF? We’re about to get a 1975 Viscount to do the same thing. Thanks.
July 20, 2017 at 6:49 pm
Thank you. It is. They’re EasyCraft panels which you can purchase from Bunnings.
July 25, 2017 at 1:36 pm
Love her, she is perfect, about to start on my mabel. did you redo all of the walls and ceiling in the van and what product did you use to withstand the movement with no cracking.
Thanks hun xx
July 25, 2017 at 1:47 pm
Thanks Kristy. Our ceiling and walls were in tact but we did lay Easycraft VJ panels over some walls for some texture.
July 29, 2017 at 4:03 pm
Hey your ‘here’ link doesn’t work for the inspiration link!
July 29, 2017 at 8:57 pm
Thanks, Amanda for letting me know. I’ve fixed it. C
August 17, 2017 at 10:41 am
We’re doing a reno on a gorgeous Millard too, so this blog came at the right time. It’s beautiful! I wanted to ask about the Ikea cabinetry, did you replace all of the cabinetry with Ikea products? How did that work out for weight? Was that an issue? Bel x
August 17, 2017 at 10:46 am
Hi Belinda
Thank you. Yes, we did but we excluded other things so our weight was OK. There are probably lighter option materials out there which might be worth looking in to.
November 1, 2017 at 6:31 pm
Hey!
This is amazing! I’m looking at doing something very similar- it’s always been an underlying dream of mine.
I don’t have any building/ carpentry skills nor does my partner. Do you think this is doable without the experience? (I do have access to 2 family members one is an ex-builder and other electrician- but I don’t want to take up too much of their time on a project like this)
November 2, 2017 at 8:53 pm
mmmmmmm without experience you may need a chippie and definitely an electrician and plumber. It really depends on the extent of the Reno. It may be worth paying more for one that’s in good conditions that you can just paint and lay new floors and bench tops. C
November 2, 2017 at 6:12 am
Hi, I’m currently doing up a retro van and love love love what you have done. I would love to see a detailed blog post on how you did your table as I would love to recreate x
November 3, 2017 at 12:50 pm
Hi, I’ve just discovered this blog and your van. Love every bit of what you have done. Can I ask what you used in the kitchen drawers to stop them from coming out in transit?
Thanks!
November 5, 2017 at 8:06 am
Thank you – we’ve used magnetic latches but for the heavy ones we just duct tape it. We didn’t use traditional caravan locks because we wanted the ease of opening and closing when camping.
November 6, 2017 at 12:02 pm
Ok cool thanks for your reply!
December 9, 2017 at 8:36 am
Hi guys, very inspired! How do you find the sleeping situation? Trying to figure out the best layout to maximise space for a young family of 4.
December 12, 2017 at 9:15 pm
We’re currently renovating another and will do a Queen bed with bunks, one above the other. We think that’s best.
December 22, 2017 at 7:52 pm
Hi! In love with Millie! About to paint our 1979 Millard and keen to recreate a similar coastal look to your Millie – wondering what navy and white paint colour you used for the exterior?
December 23, 2017 at 7:05 am
Thanks Amanda. I actually don’t know the names because we selected from the auto paint’er chart. Sorry I can’t be more helpful. Good luck with your van.
January 14, 2018 at 12:42 pm
Hi Carlene & Michael,
Loved your caravan reno journey, Millie sure is beautiful. What is the meaning behind Cedar & Suede? Wondering how the privacy thing goes with the children so close?
January 15, 2018 at 10:31 am
Thank you.
Cedar being a timber and Suede being a soft furnishings material – it just made sense in terms of what we do and rolls off the tongue.
There’s no privacy in a 16 ft caravan with this sort of layout. You would need a larger caravan…..
January 22, 2018 at 9:52 pm
Hi Carlene and Michael
Just love what you’ve done with Millie … she’s adorable! Does the paint job on the exterior have to be done by a professional? Is it possible to paint it yourself?
Thanks Heather
January 23, 2018 at 9:53 am
Thanks Heather.
It’s really up to you. We used an automotive painter for Millie in which you will get a more professional look than doing it yourself but it will cost you around 3.5k.
May 14, 2018 at 8:00 pm
Hi!!
Loving this van and just wanting to know if yourtap s a caravan tap or just a regular one? If it’s just a regular one did you install a pump?
🙂
May 14, 2018 at 8:31 pm
It’s a normal tap. We did install a pump but it can also run off town water.
June 11, 2018 at 8:41 am
hayleyhofman@hotmail.com
Hey, I love what you’ve done here! So beautiful!
We are in the process of renovating our caravan but the thick black rubber around the windows are looking pretty grim in the big picture of things. Did you have this issue? X
July 23, 2018 at 5:34 am
Beautiful renovation, and great post!
How did you deal with interior walls of a caravan? Did you need to replace/repair any? Could you use normal paint straight on here?
Thanks!
July 23, 2018 at 9:13 am
Thank you!
July 23, 2018 at 9:15 am
It depends on what they are made from. If they are laminate which are a lot of old vans are you’ll need to use a laminate paint. If they’re timber you can use a standard paint.
November 26, 2018 at 9:47 pm
Hi, I’d love to know how you constructed the bed and bunks. We have a 75 franklin and are wanting to do the same configuration.
April 19, 2019 at 2:42 pm
Hey C, from memory, what brand paint did you use on the cupboards?
April 19, 2019 at 2:49 pm
In vans since, we’ve used White Knight Paints but for Millie we used Ikea cabinetry so we didn’t paint the cabinets.
September 21, 2019 at 1:58 pm
Hi, Love love love he look of Millie (+ your other vans). Same, we have old van, hubby gutted it as it had water damage, new frame & flooring done, walls to but ideally we want to replace walls. Where you able to keep your original walls and just paint? Suggests please on wall material that we can potentially paint a colour. Thanks
October 26, 2019 at 7:24 am
Hi Nicole,
The condition of our vans have varied but if we have to it’s typically 4mm ply.
October 30, 2019 at 12:18 pm
Hi there, just wanting to ask a question about your kitchenette splash back. I’m wanting to tile my van splashback, but many people have said not to as it may crack when traveling.
Would you agree or disagree with this now that you have used tiles yourself?
Kind regards
From Lauren
November 1, 2019 at 1:27 pm
Hi Lauren,
If you want a tile try a mosaic which will have more flexibilty. Otherwise, try the TicTac tiles which are in fact a stick on that provide a tile look.
December 17, 2019 at 6:41 am
Hi there! I was wondering how you put the brass around the table top? Did you cut a strip and nail it? How did you attach that part and did you have to sand the edge so it wasn’t sharp? Thank you!!
January 15, 2020 at 4:15 pm
Hello, Love your work. Millie is gorgeous. If you can remember could you please tell me where you purchased your gas cooktop from? Thanks
January 18, 2020 at 3:39 pm
Hi there
Thank you – it would have been either Camec or Dometic. C
January 26, 2020 at 7:26 pm
LOVE LOVE LOVE everything about this! We are looking at doing this in the next few years and this is major inspo. Got all the way to the end and then realised who it was. “Come on Carlene” <3
Is there anything you would change?
March 13, 2020 at 9:34 am
I am really inspired by this renovation. Out of interest, how much could you sell this van complete to a guy like me?
April 26, 2020 at 2:24 pm
hi carlene
just a question on what how you allow for covering personal wages & profit?
i can see above youve listed all expenses up to approx 10k.
we have renovated caravans in the past but that is now 10 years ago when we first got married. the market for caravans has exploded in that time!
thanks
June 19, 2020 at 4:46 pm
We’ve never really tracked costs as we don’t do it as a business. I suspect there isn’t much profit in van renos unless you’re able to really streamline it because there isn’t the ready availability of lightweight products like in house renovations but worth a shot if you love the process!
October 19, 2020 at 1:38 am
Hi Carlene,
I was just wondering how long it took you in total to complete the project?
October 20, 2020 at 5:52 pm
I actually don’t know. We did Vonnie in 3 weeks under pressure for a campaign but it wasn’t easy.
November 27, 2021 at 7:39 pm
Hi guys , we have just obtained an old van to Reno and were wondering what windows you have put into your van or are they the standard windows
And cost aswell if you did change them out
November 28, 2021 at 7:48 am
Hi there,
We’ve replaced them with perspex which came to under $30 per window.